Okay,
After 2 weekend of tournaments, I have to conclude that these quick disconnect fittings work GREAT!!!
It keeps the flow to a minimum on water entering the deck with livewell weight or lard-arse angler weight.
During slow trolls, it draws and deck water(or this weekends rain water)out nicely
So here is the deal,
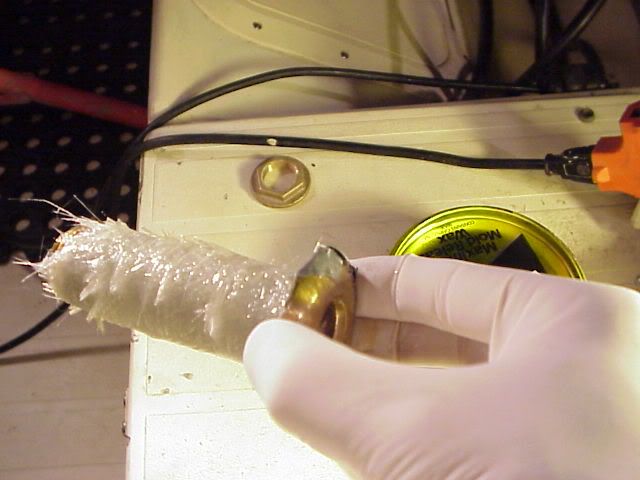
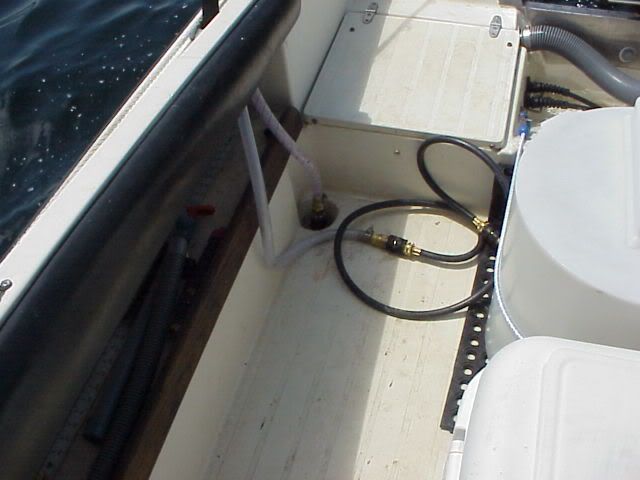
- Pick up two 3/4" Bronze thru hulls, mark to length leaving 3 full threads above the nut for screwing on the quick disconnects. I used a double nut to lock on the length and cut slowly with sawzall following the nut. Used a dremel with a stone bit to taper in the end thread to look like the original threaded end.
- Duck taped the threads and waxed the duck tape. Applied epoxy covered matt around the bronze thru hulls to make up the diff and cleaned, acetone, wetted out the original holes with epoxy.
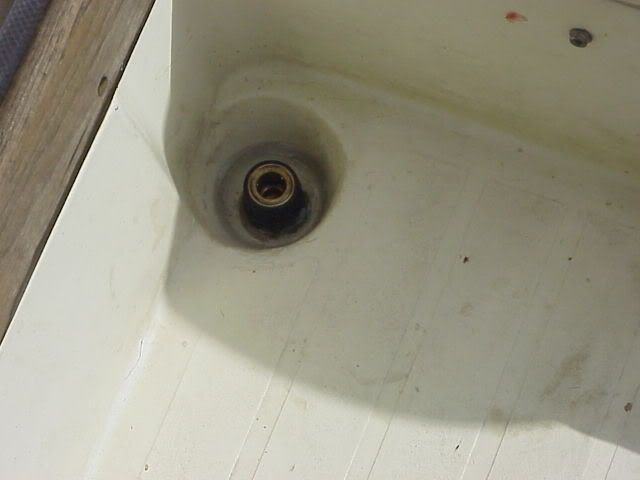
- Placed the new thru hulls up through the bottom and waxed the nut and cranked into place. Let cure for a a few days since I was not in a hurry and then take off the nut and unscrew the thruhull out the bottom. Clean/sand area around thru hull and thru hull fittings.
- Decided to use quick cure 5200 (or 4200, too late now) the hole and thru hull and snug together. Let dry overnight, and then surprised that I could crank the top nut and into place the mushroom almost flush with hull making sure that the thru hull does not spin to break a seal. I trimmed off the excess 5200 that squeezed out around the thru hull mushroom head. I could put a nice bead around after, but I decided I made enough mess with 5200 so I left it alone.

- Screw on some Home Depot brass quick disconnect fitting with check valve(I noticed Lowe's has a similar one without the check valve) and you are ready to go. If you want them closed, put a brass hose cap on the other male end of the quick disconnect and snap in. Or use the brass cap and take off the quick disconnect and screw on directly.

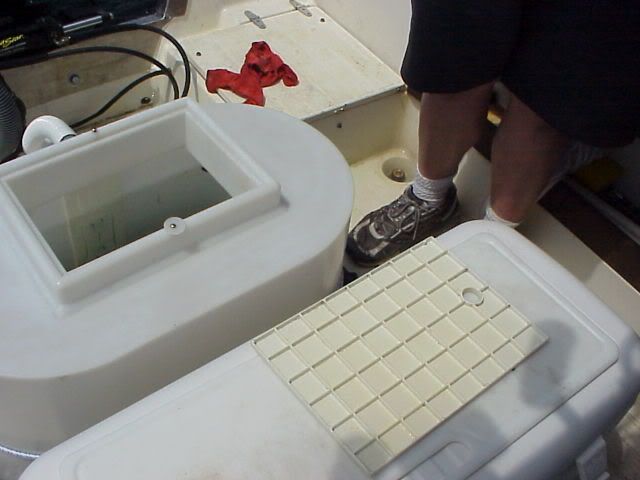
Now the livewell,
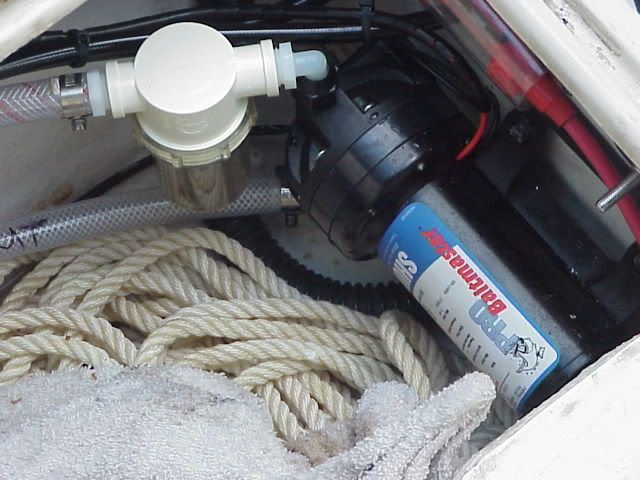
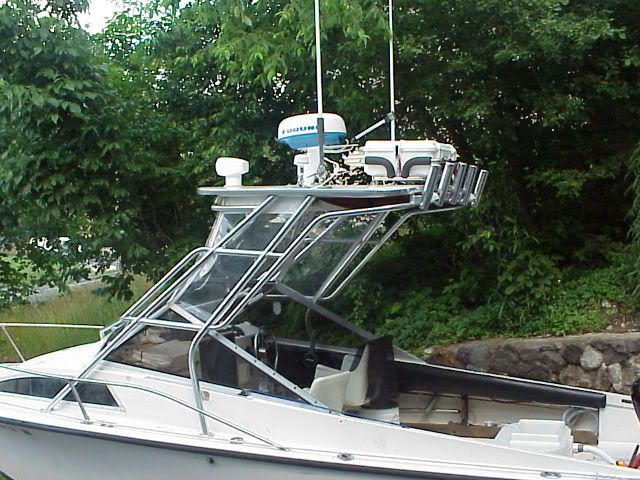
- 1st live well pumps are designed to push water and to be below the water line. So I went with the washdown/livewell pump from shurflow designed to be mounted above the waterline and mounted under the star stern seat with strainer.
- I then decided on just leaving the hoses curled up under the gunnels rather than flush mounting female quick disconnect fittings. Not as clean, but my reason was that I did not want them to leak on the fittings where I could not see and I needed to test and may reroute in the future. Besides sometimes simple is better!

- Layed the livewell on a Home Depot rubber anti fatigue mat(I had to double up the back end with tie wraps to prevent the lower fittings from hitting the splashwell) and when full under weight it is not moving. I mounted a couple of eye bolts in the splashwell area to get some straps, but having the problem to find the correct length. I might go with some rope with spliced eyes with stainless snaps to strap around more to prevent it moving, mainly when empty. If it moves when full, it should be emptied asap!!
Now the washdown;
- Picked up a 4' washing machine hose that has the 2 female hose ends. Add 2 male brass quick disconnect to each end and then adaptor to add the female to the nozzle end. Snap in to the outlet hose and start spraying.

- Remove the quick disconnect on the port side scupper to prevent clogging and max outflow and trim over or a lard arse buddy to tilt that side and it works like a charm.
And if all of this sounds scary to anyone,
I bought a Winslow 4-man offshore raft(only weights 40#!) with Pelican case and mounted in cradle on the hardtop!!

( Many thanks again to Jim/Beth at BOE for the raft!!!
.. They are the best!! )
See you in the canyons!! I will be the guy floating in the new raft!!

- Nick