
|
|
#1
 06-01-2007, 03:29 PM
|
|||
|
|||
|
otherwise known as, Back to the Grind -
Having fished my boat pretty hard over the last couple years, learning and enjoying it's capabilities, I've slowly been scheming improvements, finding things needing fixing, and wanting to make upgrades to improve fishability, and wanting to clean her up and give it a cosmetic makeover, so, starting with what she was - 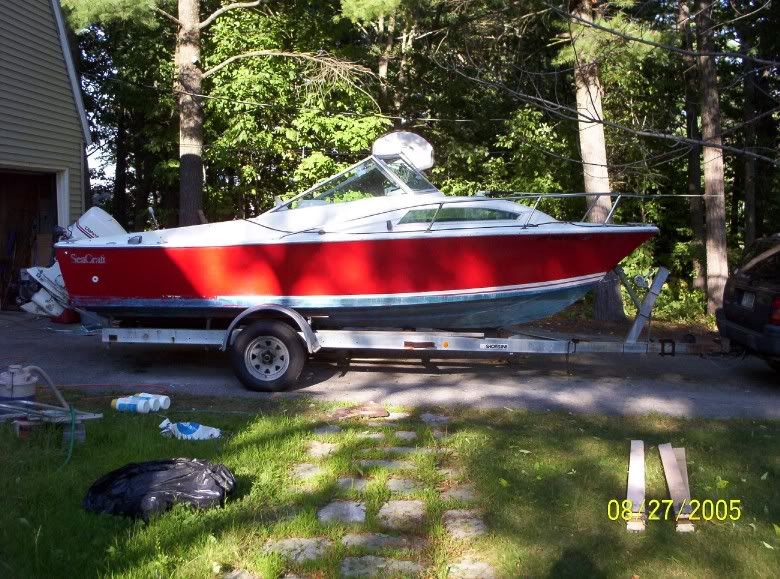 the laundry list includes: - fixing the forward bulhead, connecting the inner liner back to the hull (a discussion CSN, Fr. Frank, and I have shared) these pix show how it's seperated, creating a loose feeling in the boat - note pix are at partial repair stage- 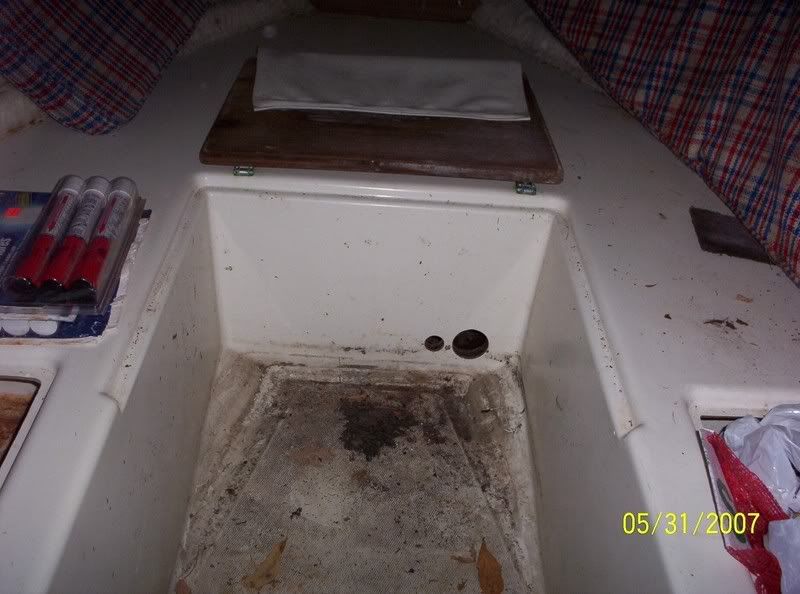 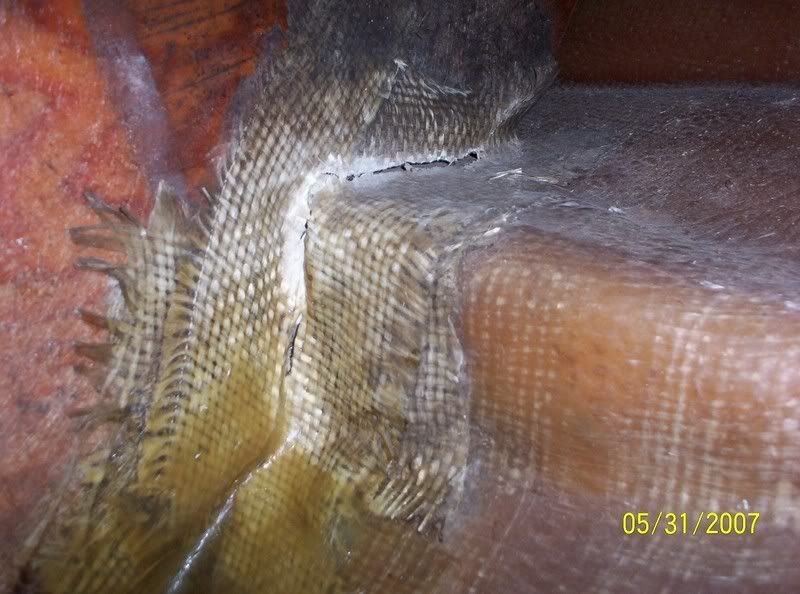 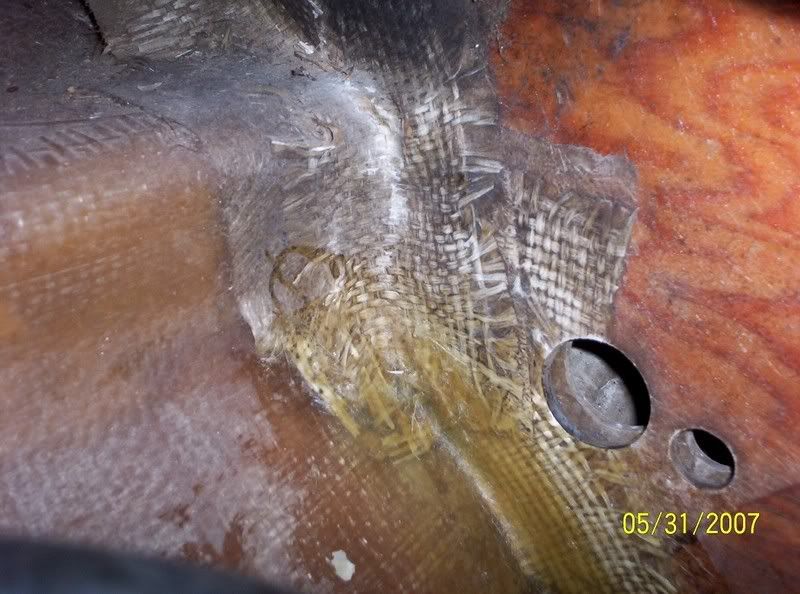 I also have been wanting to clean off the old bottom paint, and Carla's bowrider project pretty well convinced me - so here's to the grinding - 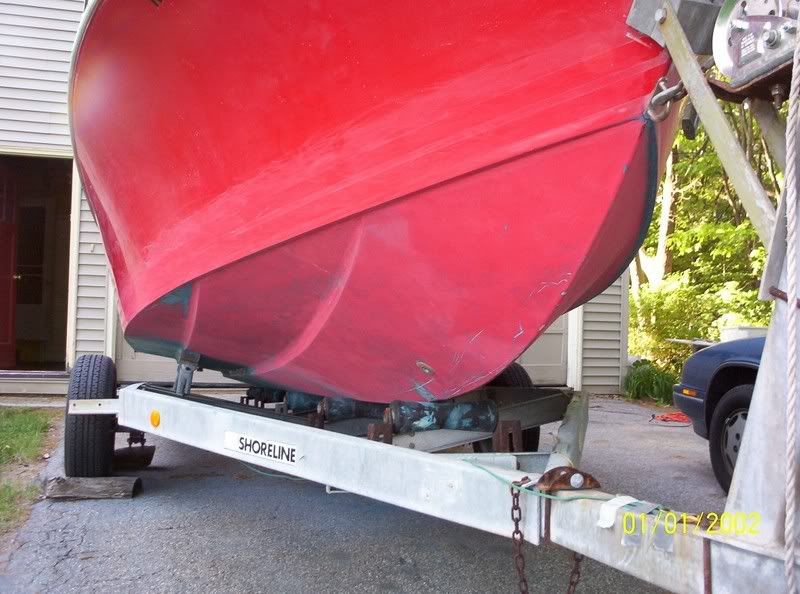 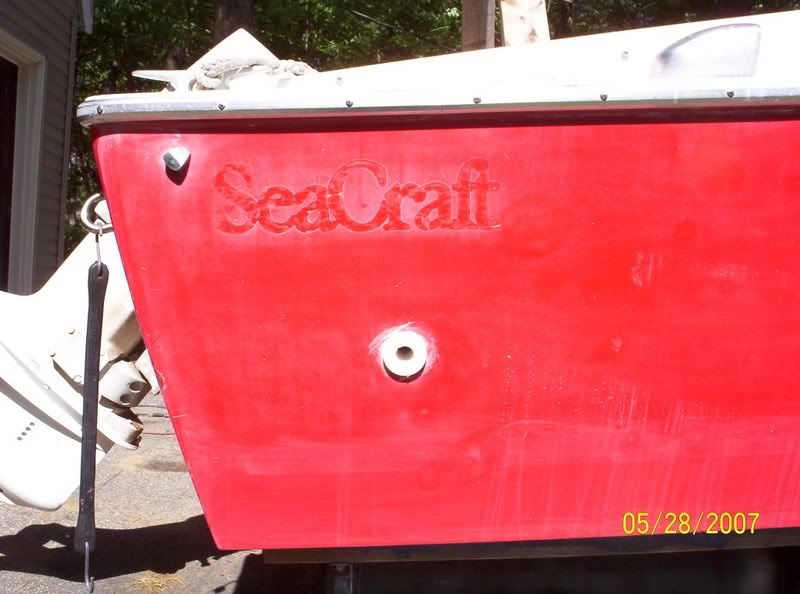 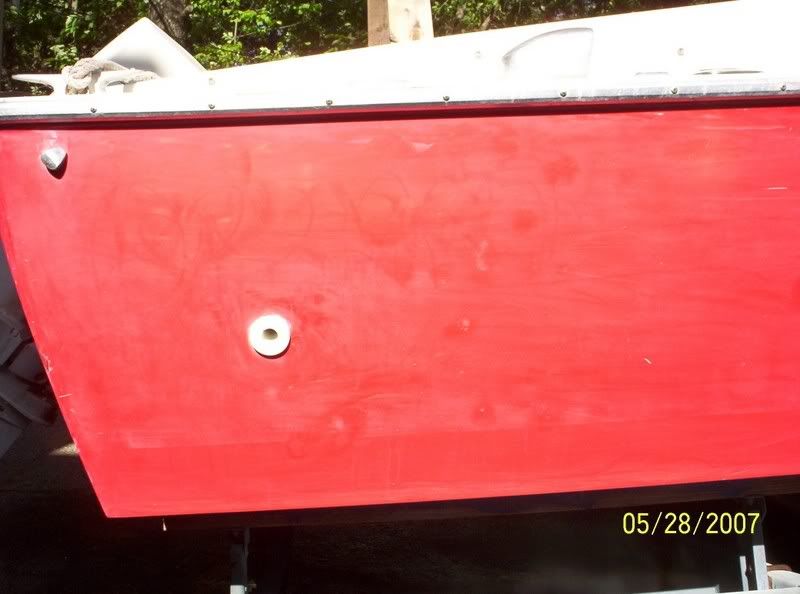 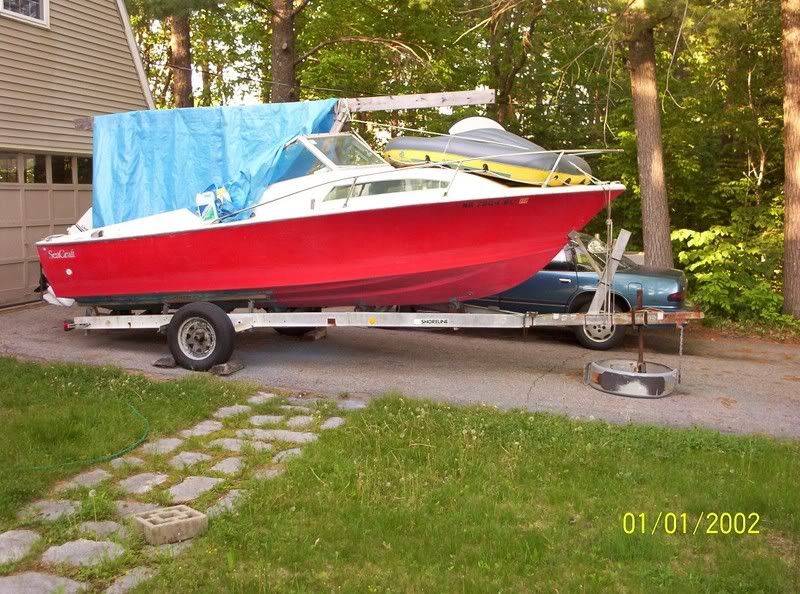 Fishability - this boat, to pull a proper tuna spread, needed more rod holders, especially to go along with the 15' outriggers I picked up. I found the original rod holders lightly thru bolted (size 10 hardware) directly into uncored fiberglass in the gunnels, so first I did up some 3/8" core pieces, which were glassed under the gunnels, and then new rod holders installed. 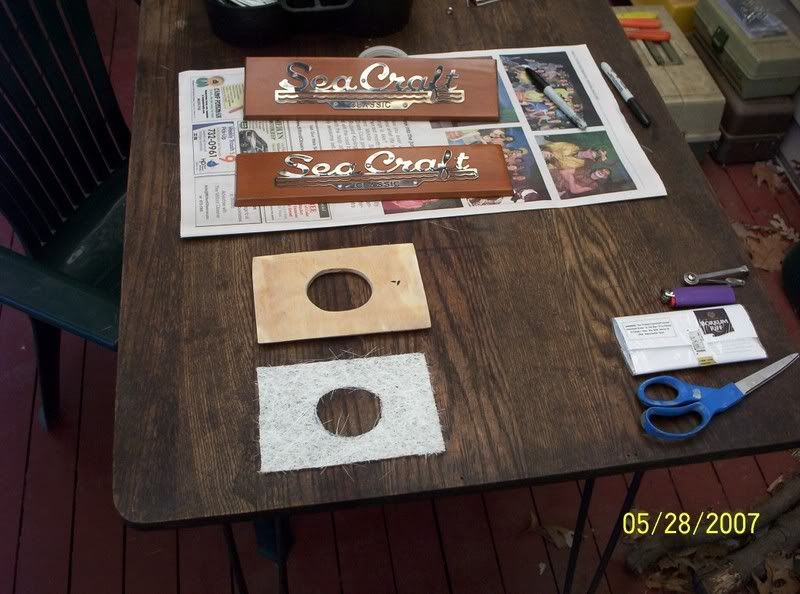 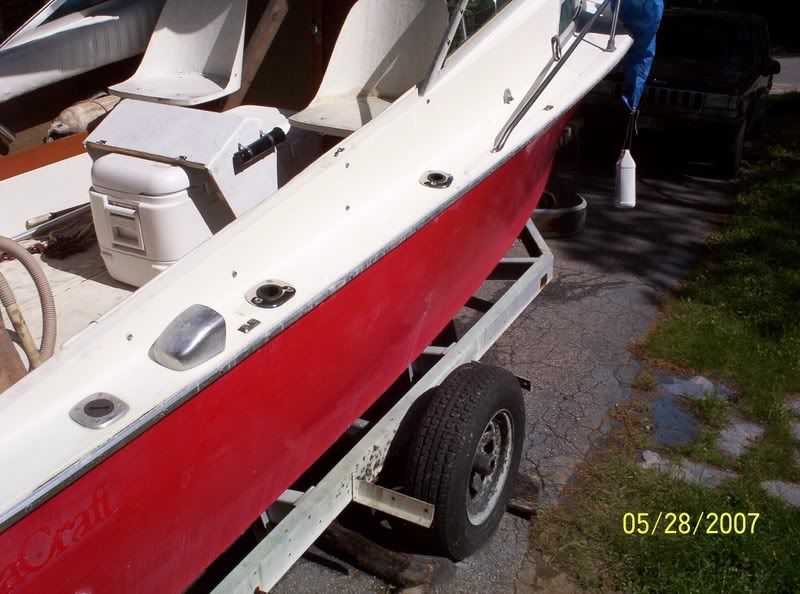 so, more bottom grinding to do, outrigger holders to install, looks like I might be picking up a stand-up bimini top, I'd bet on a fresh coat of white on the bottom, and new old style Sea Craft decals for the rear sides, and the new stainless logo's mounted on 3/8" mahogany, for somewhere on the cabin sides, just aft of the cabin windows - will update as progress dictates - Bill 
|
|
#2
06-01-2007, 05:02 PM
|
|||
|
|||
|
Bill - nice job of removing the bottom paint w/o much damage to paint underneath! That's something I need to do when I get around to working cosmetic stuff. The emblems look nice on the wood plates; I was just going to mount mine below side windshield aft of the bimini support; further forward they're blocked by bow rail. If you go with a bimini top, I've come up with a way to support the bimini top off the windshield that really stiffens it up side-to-side, such that you can hang on to it when walking around side deck to get to bow anchor. Might also work on a Tsunami/Scepter depending on where support bow is anchored. Also have a similar scheme that works real well for support of VHF antenna. (Mine is mounted on port side; wanted to keep stbd side clear for easy access to front deck.) Will post photos when I get a chance. Also, if you'll send me your e-mail, I'll send spreadsheet with performance data on old 115 vs. 150 E-tec + bracket.
I checked the fg tabbing on my forward bulkhead yesterday and it's solid, no cracks!  I also have no big cracks at top of cabin door, just a small craze crack on one side. Also fixed my leaking scuppers and tested yesterday - was out for about 6 hrs and bilge was dry! (Need to post pictures of epoxy fill with pvc core for redrilling on a leaking scupper thread; wanted to verify it worked first!) Also tried the "Vortex" pvc check valves in the scuppers that Fellowship posted a couple of years ago. Version with the glove tip works great; the one with plastic flap not so great; I think the flap sits open too much, so need to find a better source for the plastic. These things work well enough that, as long as the boat is self bailing at rest with no one aboard, which mine is with the Potter bracket, I don't see the need for raising the deck. I think the Seafari deck was raised about 1-2" around '75 or 76, as a friend of mine bought a new one then and the scupper wells were deeper on his. Also his stepdown was smaller, just big enough to open the cabin door, which allowed room for a longer gas tank, ~50 gal vs 34 on mine. I also have no big cracks at top of cabin door, just a small craze crack on one side. Also fixed my leaking scuppers and tested yesterday - was out for about 6 hrs and bilge was dry! (Need to post pictures of epoxy fill with pvc core for redrilling on a leaking scupper thread; wanted to verify it worked first!) Also tried the "Vortex" pvc check valves in the scuppers that Fellowship posted a couple of years ago. Version with the glove tip works great; the one with plastic flap not so great; I think the flap sits open too much, so need to find a better source for the plastic. These things work well enough that, as long as the boat is self bailing at rest with no one aboard, which mine is with the Potter bracket, I don't see the need for raising the deck. I think the Seafari deck was raised about 1-2" around '75 or 76, as a friend of mine bought a new one then and the scupper wells were deeper on his. Also his stepdown was smaller, just big enough to open the cabin door, which allowed room for a longer gas tank, ~50 gal vs 34 on mine.Good look on the updates! Denny
__________________
'72 SeaFari/150E-Tec/Hermco Bracket, owned since 1975. http://i188.photobucket.com/albums/z...Part2019-1.jpg
|
|
#3
06-04-2007, 01:10 PM
|
|||
|
|||
|
Denny - Thanks for the thoughts - be glad to check that data - send to - oldbluesplayer@yahoo.com
Also, I know I need to replace my scupper tubes - I shot you a question on the tubes source, in the scupper thread - I looked in BOW website and couldn't find those ? Next up is some side mount Outrigger mounts, a'la Nestor's old Seafari - I love that setup, and those mounts will drive where the seacraft plaques go. I have replacement decals for the stern, same web source as somebody else recently pointed out. In removing the old ones, totally weathered out, I was amazed at how much the gelcoat had weathered away - once the old decals were removed, the surface protected by the decal must have stood proud above the surrounding gelcoat by .015 - .020 in - very noticeable, as can be seen in the photo's - pretty much the same held true for the old boot stripe tape, and that was a cast iron bee-itch to try to level out - I couldn't get it anywhere near as good as at the stern decal locations. Spent the weekend redoing the hull sides - 200 grit dry, 320 grit dry, 600 grit wet, 1500 grit wet, followed by powered rubbing compound, then 3-M Finesse-It on the orbital buffer.... and I can still see where those darn boot stripes were   Bill
|
|
#4
06-04-2007, 01:41 PM
|
|||
|
|||
|
Hi Bill, great start! She's gonna look great when you're finished. About my outrigger setup, I wasn't very happy with its actual function although I agree they looked nice. The problem was that the cockpit sides tumble in a bit and if you install the side mounts flush to the fiberglass the outriggers are at too high an angle when you open them up. I suggest you do either of the following:
1. Install the TACO Sports Slam outrigger mounts on the side decks. These mounts have many different settings where you can lay them back at an angle like mine but still open correctly when deployed. You can find them for about $350 in the internet. This was going to be my next choice if I had kept the boat and they fit perfectly (I measured the base already) on the side deck about 6-12 inches behind the helm chair where they are readily accessible to the helmsman for deploying. They use the TACO 15 foot poles but will accept any other poles if you drill a small hole on the pole base for the retention pin to fit. I did it with my Tigress telescoping poles and they fit perfectly.  2. Install the side mounts like I did but place a wedge (metal, wood or any other material) between the top mounting pad and the vertical cockpit side to ensure the mounts are perpendicular to the deck and not leaning inwards like mine were, this way you'll get an optimum angle on the poles when deployed to fish. Contact me if you have any questions. Good luck and keep posting pictures!
__________________
Boatless again!
|
|
#5
06-04-2007, 11:24 PM
|
|||
|
|||
|
Bill - I have the Lee's outriggers with flush mount base similar to rodholders. They work well and appear to be a much cleaner installation than the Taco unit nestor showed, although you do have to drill about a 1.5" angled hole in gunnel and install backing plate underneath. They have notches in the base that lock them at 0, 45, and 90 degrees. My poles are KGS aluminum telescoping type and when stowed measure 6'10" including the chrome/brass holder. I mounted the base about where the bow rail comes down to the deck, which puts the ends of the poles about flush with transom. I angled the base so the poles lie between the vent scoops and cockpit coming when they're laid down.
__________________
'72 SeaFari/150E-Tec/Hermco Bracket, owned since 1975. http://i188.photobucket.com/albums/z...Part2019-1.jpg
|
|
#6
06-05-2007, 01:23 AM
|
|||
|
|||
|
I tried those but you can't lean them back at an angle, they either lay flat on the gunnel, out (deployed) at 45 degrees to fish and straight up at 90 degrees when not used. I like the my poles leaned back a la "Big Sportfisherman" when not deployed and I think that's what made my setup so cool. Unfortunately, the only way to have that with a normal "skiff" type outrigger is to have rod-holder type bases made that are at 90 degrees from the deck instead of the standard 45 degrees so the 45 degree angle base on the pole will lean back at a 45 degree angle and still deploy correctly when fishing. I guess you could take a pair of standard outrigger bases (Lee, TACO, Tigress, etc, they're all designed the same way, 45 degree angle) to a SS welder and have them change it from a 45 to a 90 degree angle, that would give the rake you want and still be very fishable.
__________________
Boatless again!
|
|
#7
06-05-2007, 11:53 AM
|
|||
|
|||
|
The outrigger kit I got came with the gunnel / skiff style mounts - I remember Nestor talking about the functionality issue before- but the more I think about it, the more I'm going for the side mount, and Nestor's #2 solution, putting a shim pad under the upper mount to position the holder correctly - Nestor - did you install any backing / reinforcement to the inside of the sidewall area where you mounted yours - I'm thinking it would be a good idea.
thanks !! Bill
|
|
#8
06-05-2007, 04:49 PM
|
|||
|
|||
|
Yes I did, the cockpit sides are too thin and flexible to take the load. I made an aluminum backplate twice as big as the mounts to help disperse the torsional forces. If I were to do it again and had better access, I would have first fiberglassed in a 1 foot square piece of 1/4" or 1/2" marine plywood on the backside of the side panel and then installed the aluminum plate behind that so the nuts and washer won't dig into the fiberglass/wood; with the aluminum plate alone I still had quite a bit of flexing, especially when trolling large mullet or ballyhoo. Anything to stiffen the area and disperse the torsional forces will help. The problem is that there's very little space to work in between the two fiberglass vertical surfaces. Here's a rough sketch of what I would do:
 Hope this helps!
__________________
Boatless again!
|
|
#9
06-05-2007, 04:58 PM
|
|||
|
|||
|
By the way, here were my plans for the "ultimate" Seafari 20:
 I estimated about 50k including the engine and I/O combo but who has that kind of moolah?? Now, on a Seafari 25 this would be a sweet setup except with twin 190's or a single 350-400 diesel with duoprop outdrive. ")
__________________
Boatless again!
|
|
#10
06-05-2007, 06:34 PM
|
|||
|
|||
|
Nestor, you're right, can only run with the conventional type in 2 positions. I always wanted them laying flat for running; just prefer to have stuff well supported in case it gets rough.
__________________
'72 SeaFari/150E-Tec/Hermco Bracket, owned since 1975. http://i188.photobucket.com/albums/z...Part2019-1.jpg
|
 |
|
|


 Linear Mode

