
 |
|
#1
|
|||
|
|||
|
I work in the boating bussiness but I am always interested in what people think. I recntly purchased a 1974 SC Seafari with an inline 115 six merc. The motor is being replaced by a newer Merc 150 v6.
The transom appears to be in good shape but I would like a little more room,larger seating in the aft and a live well. My question is has anyone closed in the transom of a outboard 20 footer? Did you cut the outside skin off and close it in? Make a mold and do a pour in transom? or even try it from the inside? I managed to come across thru connections a porta-bracket brand new in the box for next to nothing, so I figure close in the transom, add a live well where the motor well is with a lid on it that can be a seat when the live well isnt being used and Im good to go. I just havent decided which way to do the transom is best. I realize that putting the weight farther aft is going to affect my deck drains which really in the factor of things of what I will be doing to the transom is minor. Any suggestions or advise will be thankful JB |
|
#2
|
|||
|
|||
|
If you do a search you will have enough reading material to make you real dangerous.
Check out bushwackers posts and you will have all the engineering data that you need. Click on "Here we go again"(top of this page) and you will have a tutorial on boat rebuilding. Good Luck.
__________________
[SIGPIC][/SIGPIC] "If You Done It...It Ain't Braggin" my rebuild thread: http://www.classicseacraft.com/commu...ad.php?t=18594 |
|
#3
|
|||
|
|||
|
My transom was in good shape but I too wanted a solid transom, so had Don Herman fill in the cutout and install one of his brackets. I did the rigging on it per his advice, which is to run all the motor rigging thru the transom into the flotation tank (and fill thru-transom pipe with RTV!) and then up thru the swim platform, which leaves a clean platform for diving without all the hoses running across it. I kept the existing baitwell under port and added some plumbing to keep it functional after flotation tank covered up inlet/outlet port.
You have to be careful with a bracket as it tends to screw up balance and self bailing by moving the motor weight aft. You'll also need a stern-lifting prop, probably a 4 blade. I'd recommend a bracket with the biggest flotation tank you can get, which is probably the Hermco, although it's 30" setback is more than I need. The porta bracket probably has less setback but also no flotation. I believe Strick used 24" on the one he made, which would be enough for my motor. Don might be able to make you a bracket with less setback. Also have to be careful with motor weight. I increased motor weight from 300 to 429 lbs + bracket, and my waterline went down about 1" to where it's just barely self bailing. They raised the cockpit sole in the later Seafari, so yours should be a little better. The Merc 150 should be ok; the only 4-stroke I would consider is the 140 Zuke, as it's about the same weight as my E-Tec. All the rest are at least 50 lbs heavier based on dry weight numbers, and I'm not sure they even include weight of the cowling. Here's some pictures of my setup: 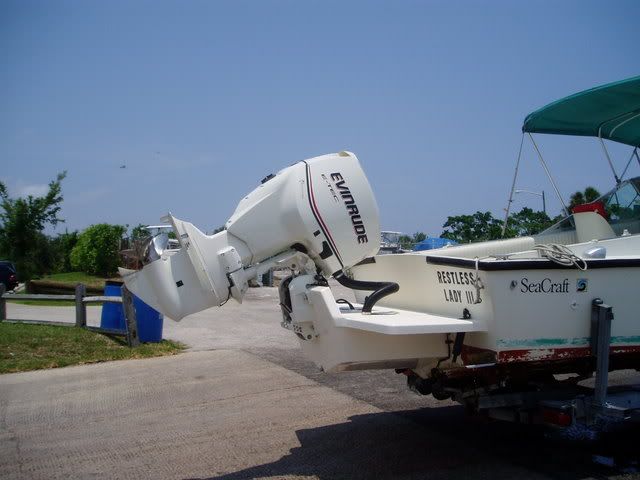 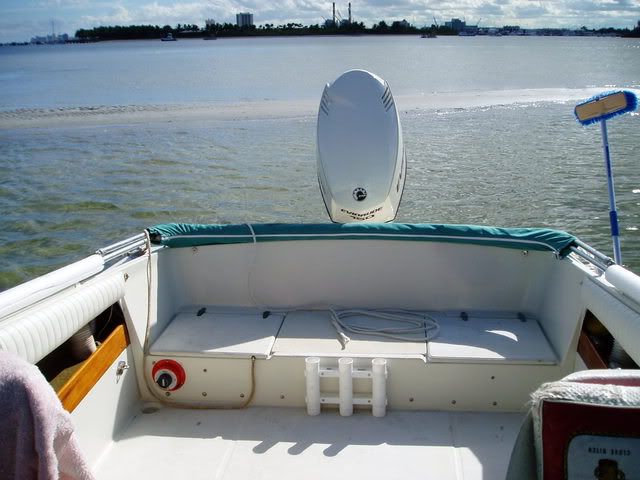 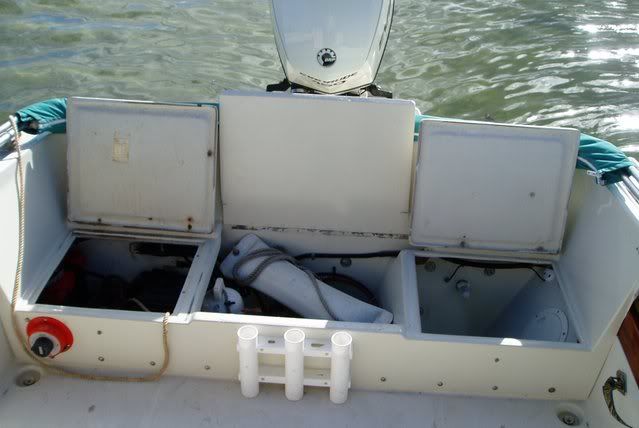 Here are some before/after pics of waterline (both are with full fuel tank): 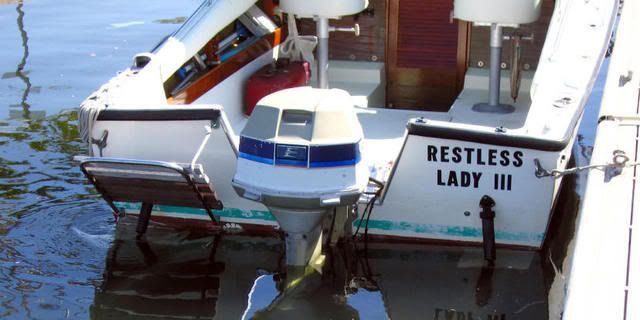 
__________________
'72 SeaFari/150E-Tec/Hermco Bracket, owned since 1975. http://i188.photobucket.com/albums/z...Part2019-1.jpg |
|
#4
|
|||
|
|||
|
Thats the exact look I want!!!! do you have any other pics of the transom being built? That aft bench area is awsome!! nice seating for cruising and even bettter for casting platform.
|
|
#5
|
|||
|
|||
|
Replied to your PM - will post transom fill photos later tonight.
__________________
'72 SeaFari/150E-Tec/Hermco Bracket, owned since 1975. http://i188.photobucket.com/albums/z...Part2019-1.jpg |
|
#6
|
|||
|
|||
|
New problem as of tonight, drilled a couple of test holes to check for dampness and its wet. Now I need to figure out weather to rebuild the transom from the inside or the outside. what do you guys think of that pour in transom stuff?
|
|
#7
|
|||
|
|||
|
Here's the pics I promised. Looks like Don has removed them from the gallery on his web site.
I kept the live well under port seat - it works ok for the limited live bait fishing I do, plus it's a great to store dive gear! Plumbing is based on original Moesly setup which circulates water while underway - no pump required!  The center seat/hatch provides great access to bilge pump, tank hoses, fuel filter, wiring, etc. Used some 1/2" starboard I had lying around for that hatch. It's a little flimsy for standing on and doesn't match height of the seat hatches, so I may redo it with some 3/4" Azek board left over from galley seat project. The center seat/hatch provides great access to bilge pump, tank hoses, fuel filter, wiring, etc. Used some 1/2" starboard I had lying around for that hatch. It's a little flimsy for standing on and doesn't match height of the seat hatches, so I may redo it with some 3/4" Azek board left over from galley seat project.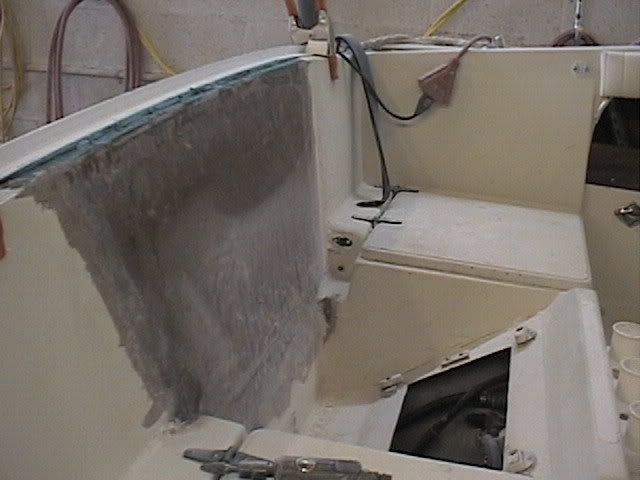 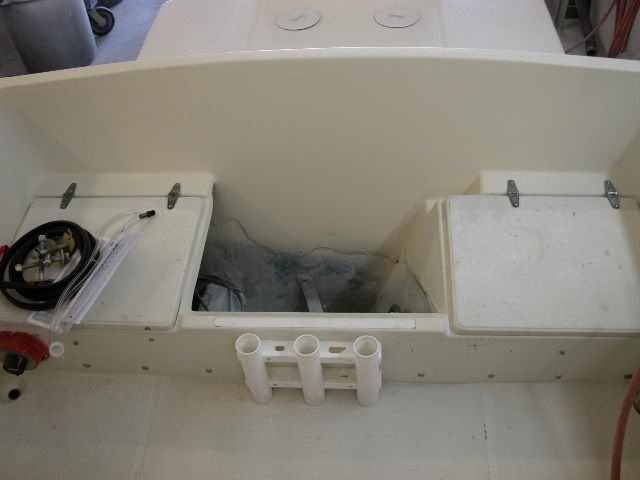 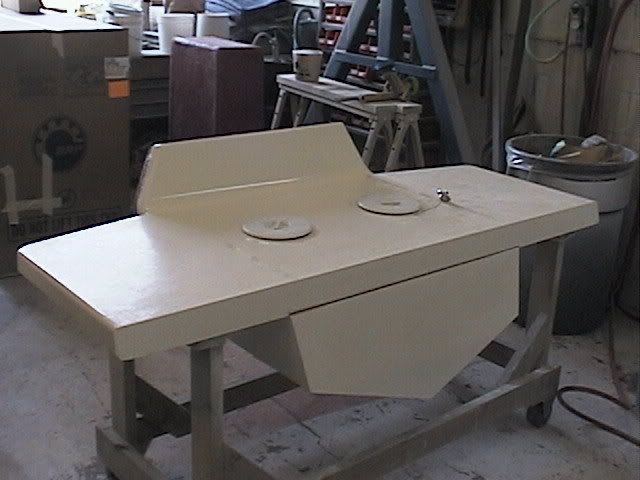 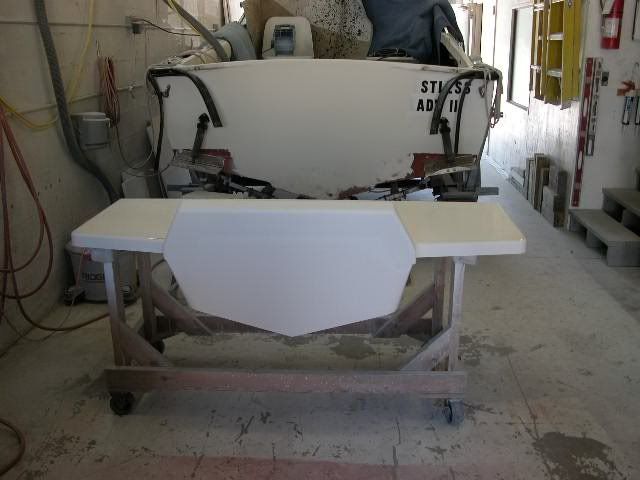 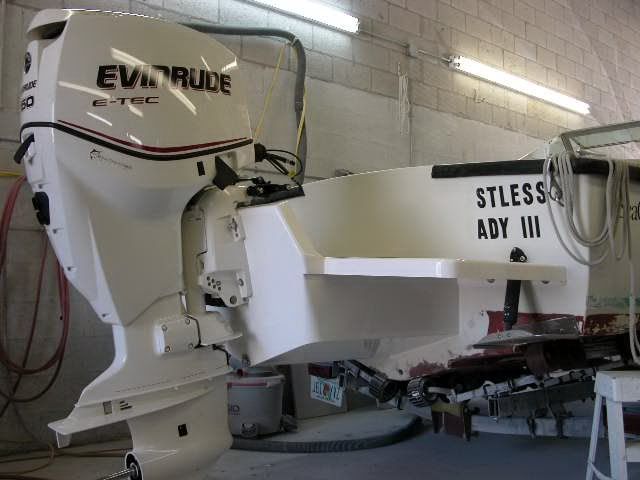 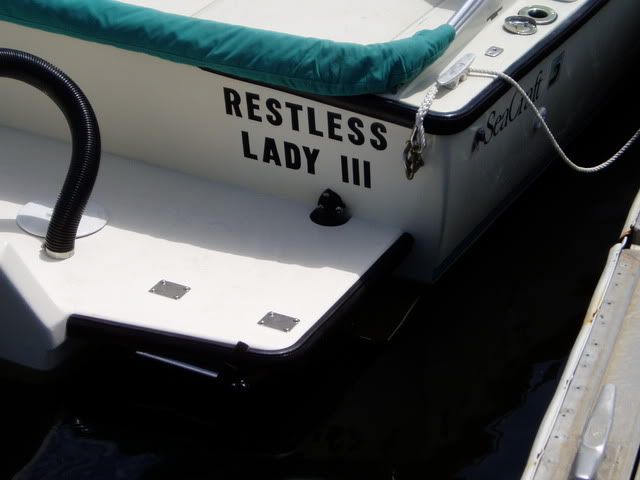 The clean swim platform is also great for fighting a fish - if you need to keep it away from prop, just step over transom on to platform, and put rod out over/behind motor. 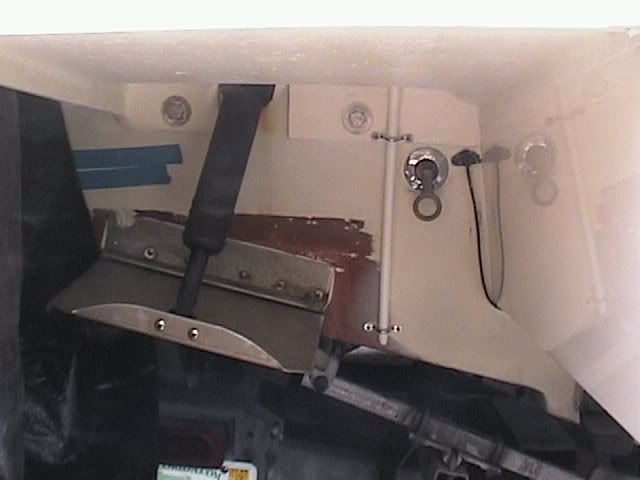 Water pickup is a 3/8" PVC tube with 45 deg slice at bottom. Just push tube down about an inch to turn on the water. Can also slide a longer hose over pickup and use for deck washdown @ 30 mph! 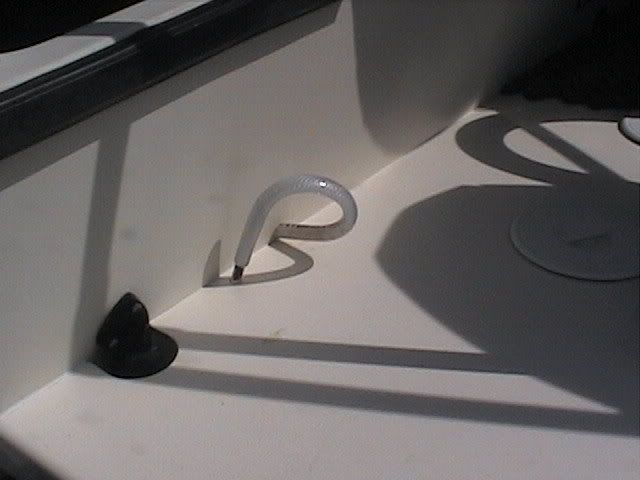 Inside of baitwell, water inlet is at upper left. 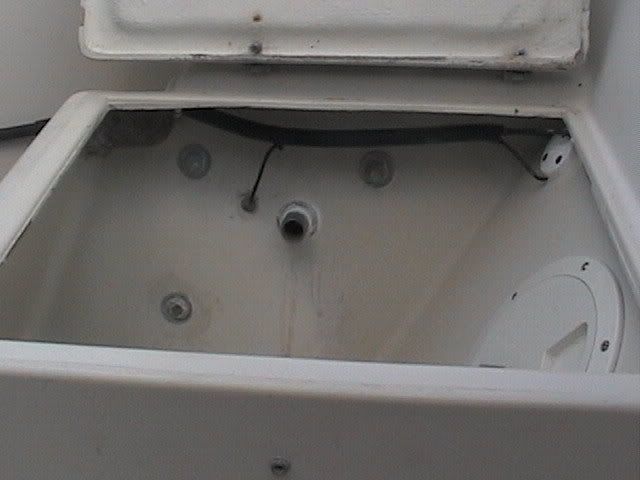
__________________
'72 SeaFari/150E-Tec/Hermco Bracket, owned since 1975. http://i188.photobucket.com/albums/z...Part2019-1.jpg |
|
#8
|
|||
|
|||
|
Sorry to hear about your wet transom! Does it flex if you stand on lower unit? One advantage of a bracket is that they spread the engine load across entire transom vs. conventional mount putting all the load in small area of about 1 sq. ft.
Don Herman does transoms from outside - just leave ~3" of original skin all the way around edge so you'll have something to fair the new skin to. I've heard about the pour-in stuff but don't know much about it, or how you'd get the old wet wood out - maybe from the top with a chainsaw! I'd send Don a PM about it.
__________________
'72 SeaFari/150E-Tec/Hermco Bracket, owned since 1975. http://i188.photobucket.com/albums/z...Part2019-1.jpg |
|
#9
|
|||
|
|||
|
Well my transom is comming ot fantastic, When I figure out how to post Pics I'll put some up. Hey bushwacker, in one of the pics it looks like the engine well is still in place then in another it looks like they glassed the entire inside of the transom. Which did they do?
|
|
#10
|
|||
|
|||
|
Quote:
__________________
'72 SeaFari/150E-Tec/Hermco Bracket, owned since 1975. http://i188.photobucket.com/albums/z...Part2019-1.jpg |
 |
|
|