
|
|
|
|
#1
 07-08-2008, 03:06 PM
|
|||
|
|||
|
Quote:
That being said here is what I did. One of the stringers had a section that the wood was rotted out because the bulkhead was cut out and the stringer was not sealed up. The fiberglass cloth was solid and not pulling away from the hull. Rather than cut it out, all I did was rough up the area and apply 1708 mat over it and epoxy it. The old stringer is the mold, and the new glass the stringer. You can kick it, pound it and it is strong. Beats the heck out of cutting out and replacing. Coosa comes from a local supplier. Here in Florida they build so many boats that there are retail/wholesalers all around. Walking into there store is like going down to the local Ace, except its all Fiberglass boat related supplies. Hope this helps.
__________________
[SIGPIC][/SIGPIC] "If You Done It...It Ain't Braggin" my rebuild thread: http://www.classicseacraft.com/commu...ad.php?t=18594 
|
|
#2
09-13-2008, 06:39 PM
|
|||
|
|||
|
In between tropical storms, hurricane watches and the frickin' feels like 105 temp. I got the floor project under control.
After serious consideration of all types of materials, I decided on the following. The tank coffin floor would be "plascore"(divincell) with a layer of 1708 on top and bottom. Weight factor is 15# versus 31# for the old floor. Plus this is the part of the floor you will never see again so no rot is good. On the cock pit floor I am using 1/2 inch marine ply...1708 top and bottom. I stayed with wood on this part since the old floor lasted 40 years and was in decent shape. The floor grid and bulk heads where spruce. Again the old wood was in great shape. I would not of replaced it, except there where spots where water intrusion rotted the wood because of excess drilling of holes...that were not sealed. The old gas tank was 33 years old and in excellent shape. However it was a bastard size. To low and to long. The previous owner cut the mid bulk head out to use this tank. I had Tony from Sunrise Tanks, in Venice Fl. (this guy is good and reasonable) cut down my old tank, and then make me a new tank to fit in the original coffin. The old tank is now in a forward area as a extended cruise tank. I should have approx. 80 gals of fuel. The bulk of the fuel will be in the CG point of the boat. Most of the construction process so far has stayed pretty close to what was done originally. I thought if it lasted this long why change a good thing. Enclosed are a bunch of pictures. I have used many of the ideas that where posted on this site, and I thank all of you for your sharing. Getting the floors all tied together will be the next step. The tank floor and keel...Plascore 1/2 inch 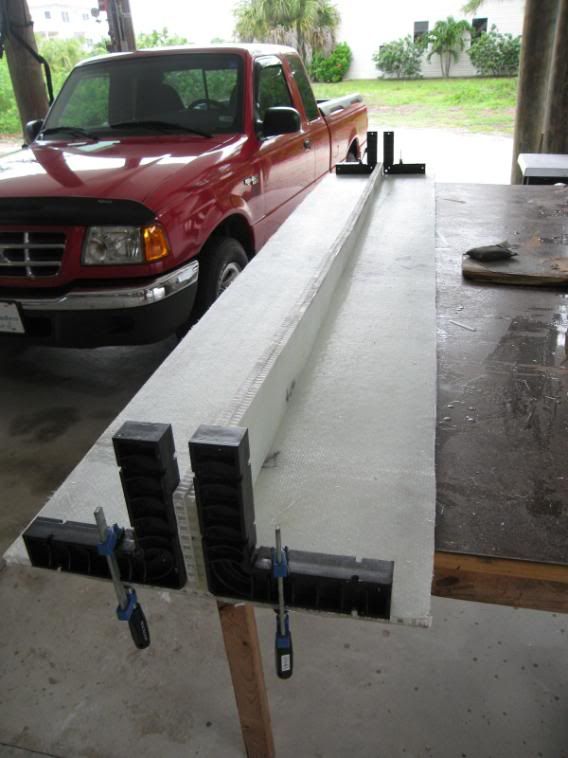 Before Painting  After Painting and Engine Bulkhead  Floor and bulk head glassed  Floor Grid and bulk heads  Glue and stick 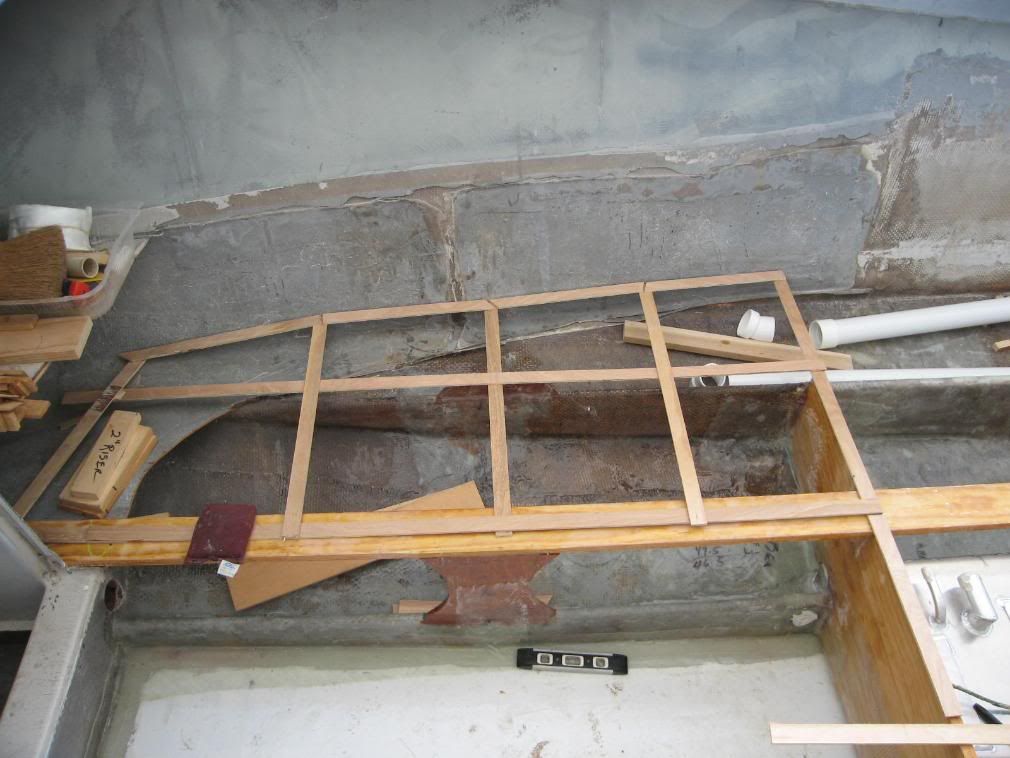 The end result of Glue and stick 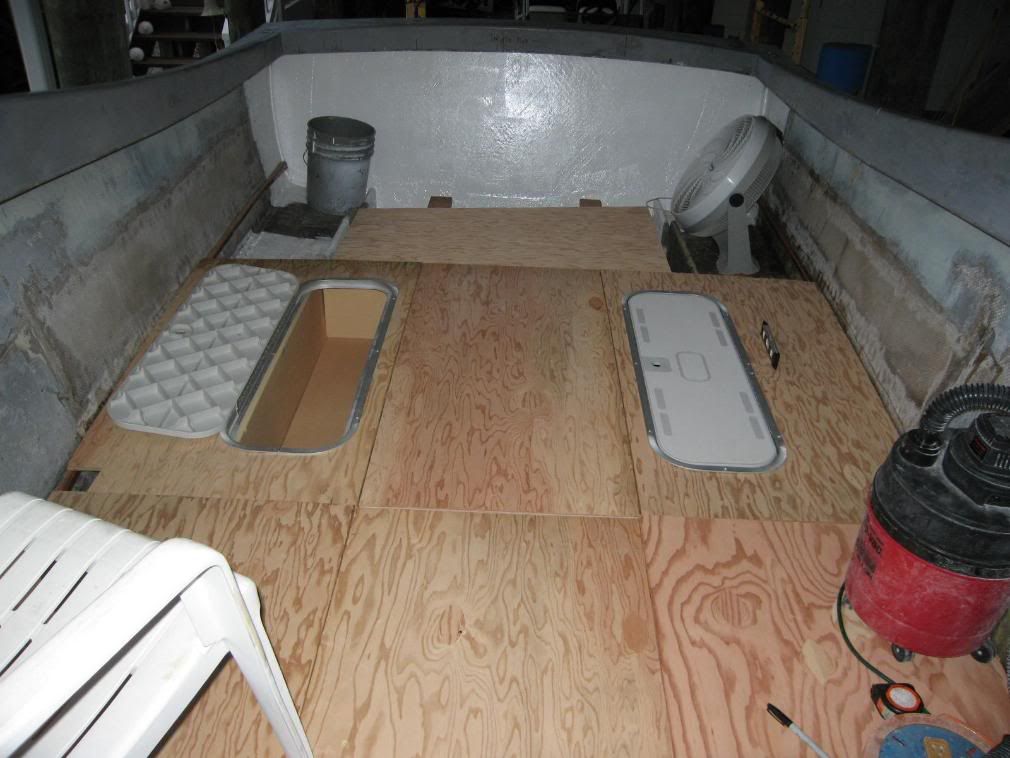 I found some retro hatches...one side will be a live well and the other a cooler fish box. More glue and stick for engine area 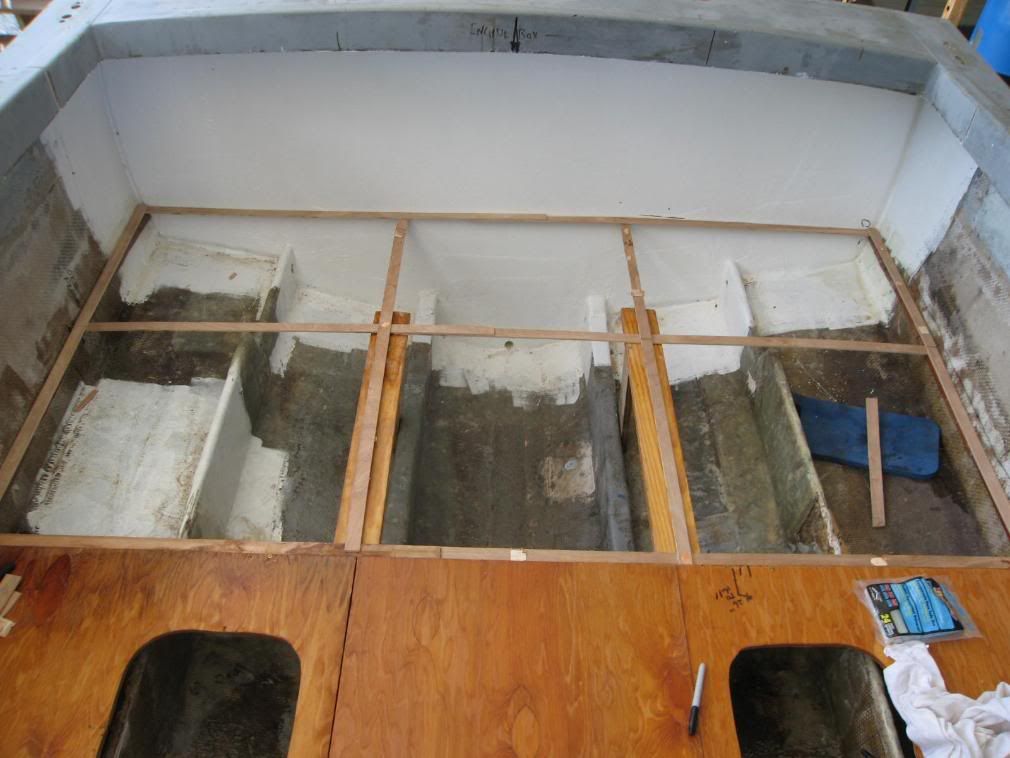 It really works well..Trial fit  Old floor for measurements  End result 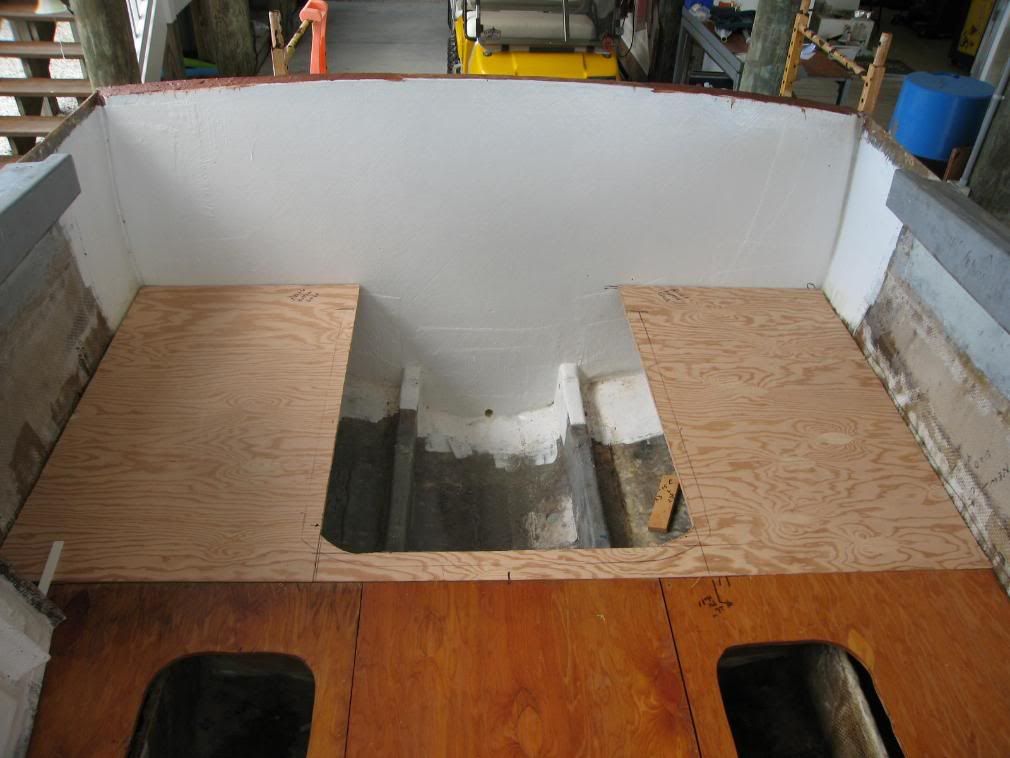 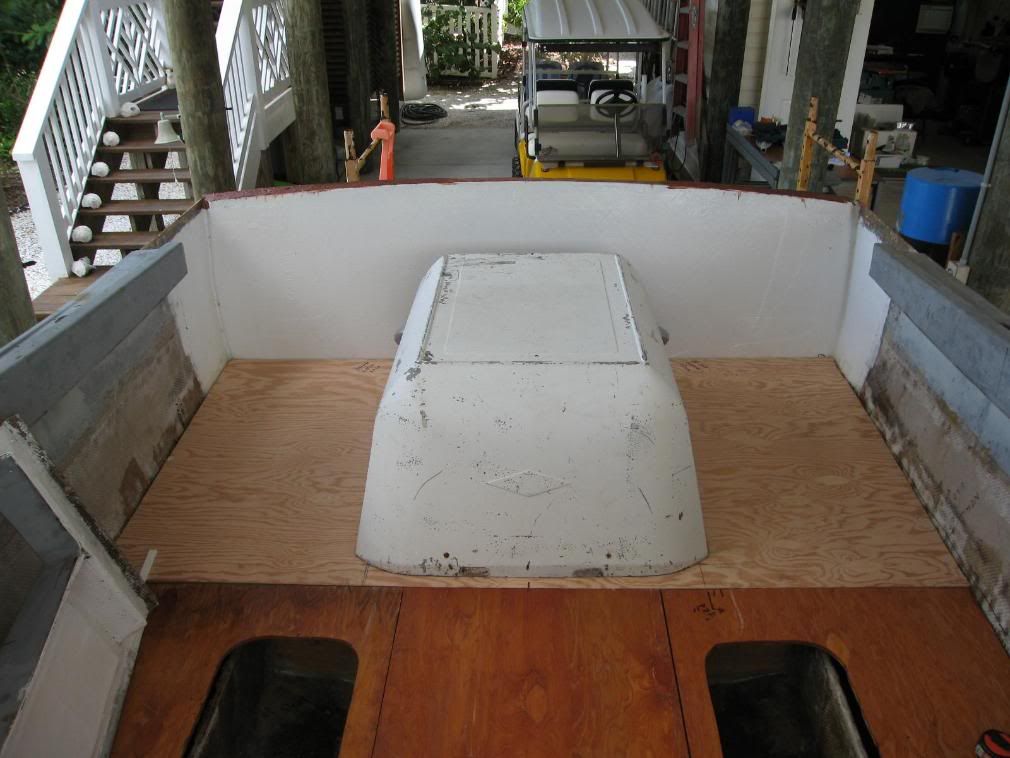 Engine coffin front and storage areas painted with tile clad 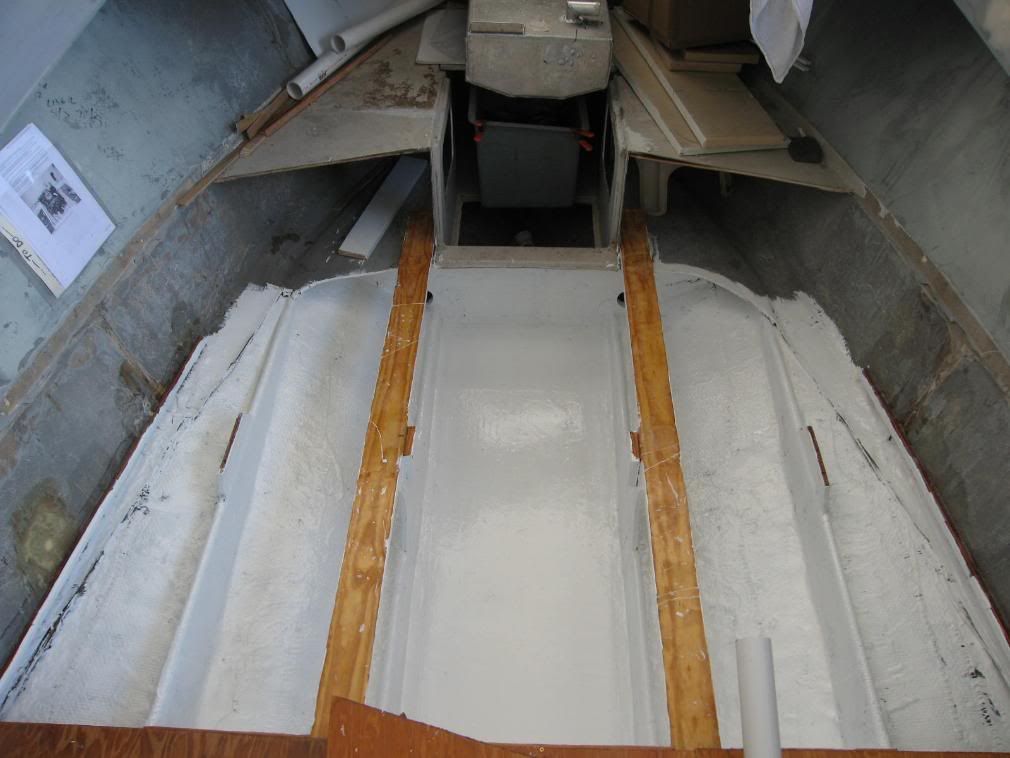 Old tank 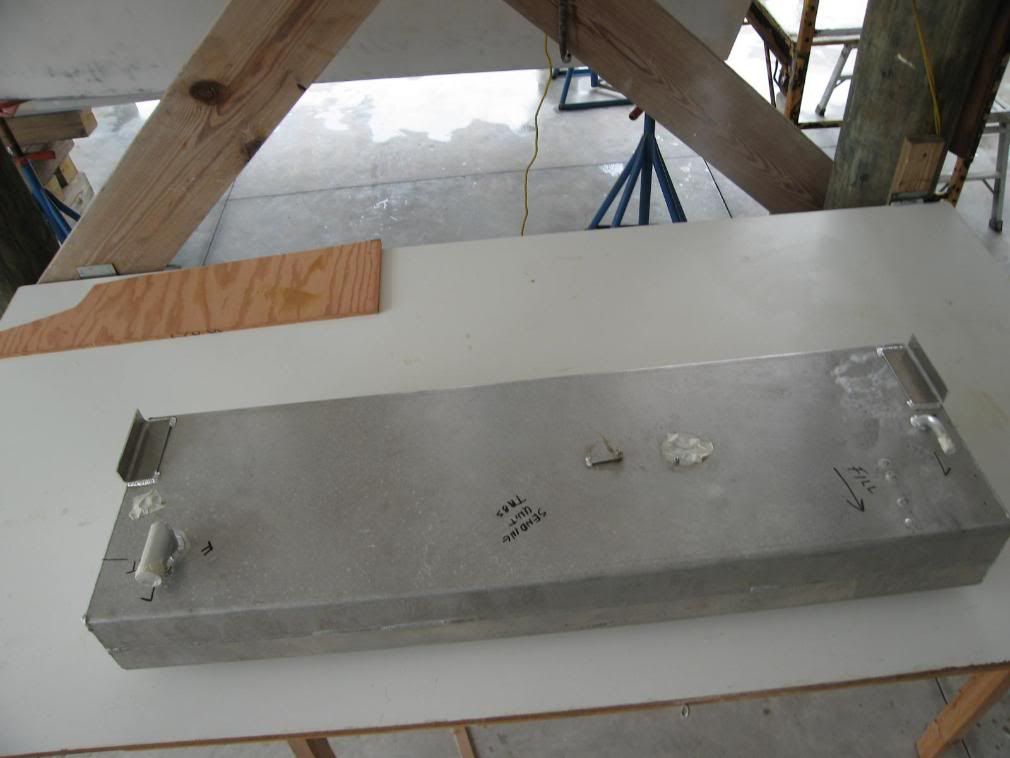 Both Tanks Trial Fit 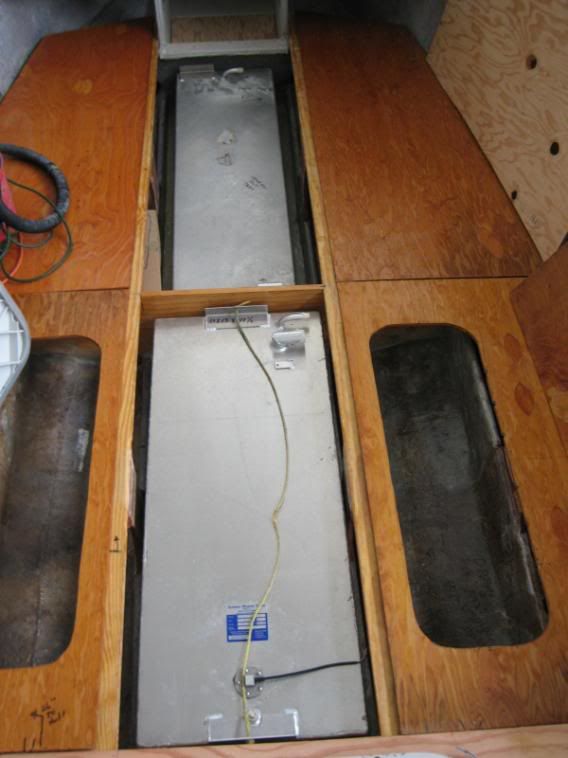 Wire Run  That is it from the Island... 
__________________
[SIGPIC][/SIGPIC] "If You Done It...It Ain't Braggin" my rebuild thread: http://www.classicseacraft.com/commu...ad.php?t=18594
|
|
#3
09-13-2008, 06:59 PM
|
|||
|
|||
|
Lookin' good Terry!!
We love seeing the progress! Lloyd
__________________
1973 Seacraft 20' SF "Sea Dog" 1988 Tracker/Seacraft 23' WA "Salty Dog"
|
|
#4
09-14-2008, 08:49 AM
|
||||
|
||||
|
Well Planned & Clean Work Terry! You mention and show the extended fuel tank install. Did you consider or do you still have room for a fresh water hold? If you plan on doing some Island/Dive or Camping trips, it sure is a nice feature. I utilized unused space between the tank and the forward deck hold and filled it with a "bladder" type tank. I (and the ladies) sure love getting the salt spray off!
Just a thought 
__________________
   1978 23' Superfish/Potter Bracket 250HP -------- as "Americans" you have the right to ...... "LIFE, LIBERTY and the PURSUIT of a Classic SeaCraft" -capt_chuck
|
|
#5
09-14-2008, 09:50 AM
|
|||
|
|||
|
Quote:
Mock up of Water Tank.  Quote:
Great Lakes Skipper
__________________
[SIGPIC][/SIGPIC] "If You Done It...It Ain't Braggin" my rebuild thread: http://www.classicseacraft.com/commu...ad.php?t=18594
|
|
#6
09-14-2008, 10:57 AM
|
|||
|
|||
|
Looking great Terry. Can't wait to see her drifting the pass with all those old Morgans next summer
__________________
" I'm the one thats got to die when its time for me to die; so let me live my life, the way I want to". J. M. Hendrix
|
|
#7
09-14-2008, 11:46 AM
|
|||
|
|||
|
Watching these 21`s makes me feel like Mel Brooks behind the clacker board on the set of "Young Frankenstein". It`s ALIVE!I can`t wait to ride on one.
Are you going to round the corners of the livewell? What kinda power have you planned? Nice work Terry! At least you have some shade.... GFS
|
|
#8
09-14-2008, 06:26 PM
|
|||
|
|||
|
Quote:
Power would be as of today MC 350 efi with a bravo 3.We will see when the time comes
__________________
[SIGPIC][/SIGPIC] "If You Done It...It Ain't Braggin" my rebuild thread: http://www.classicseacraft.com/commu...ad.php?t=18594
|
|
#9
12-19-2008, 12:13 PM
|
|||
|
|||
|
Well since the last post I have not accomplished as much as I would of liked. It seems like a little burn out set in so I backed off a some. After the holidays I will hit it hard.
Question to all you who have been there and done it. The main cockpit sole is all ready to be glassed in. Besides some fuel line hoses and ?? is there any reason not to glass it in.Here is my thought process. The bottom of the sole has one layer of 1708 on it. The top sole has a primer coat of epoxy. I was thinking of tabbing the floor in and taping the seams, make it fair and then lay on or over some pre-made up 1708 panels. Sorta ala Strick on his 20 footer. Let me know what you think? Cock pit sole and all hatches. 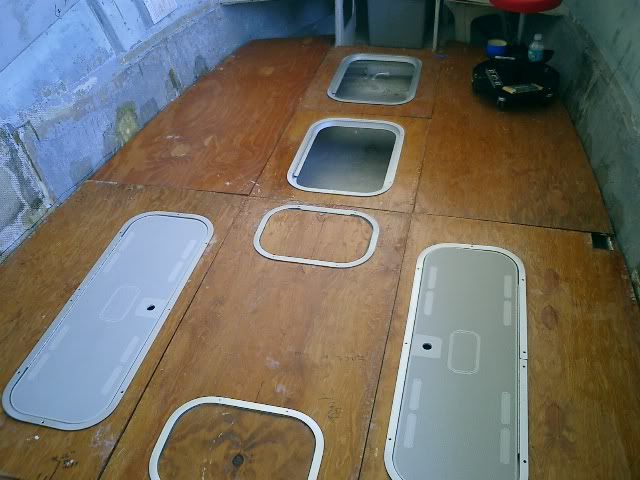 Transom enclosure template 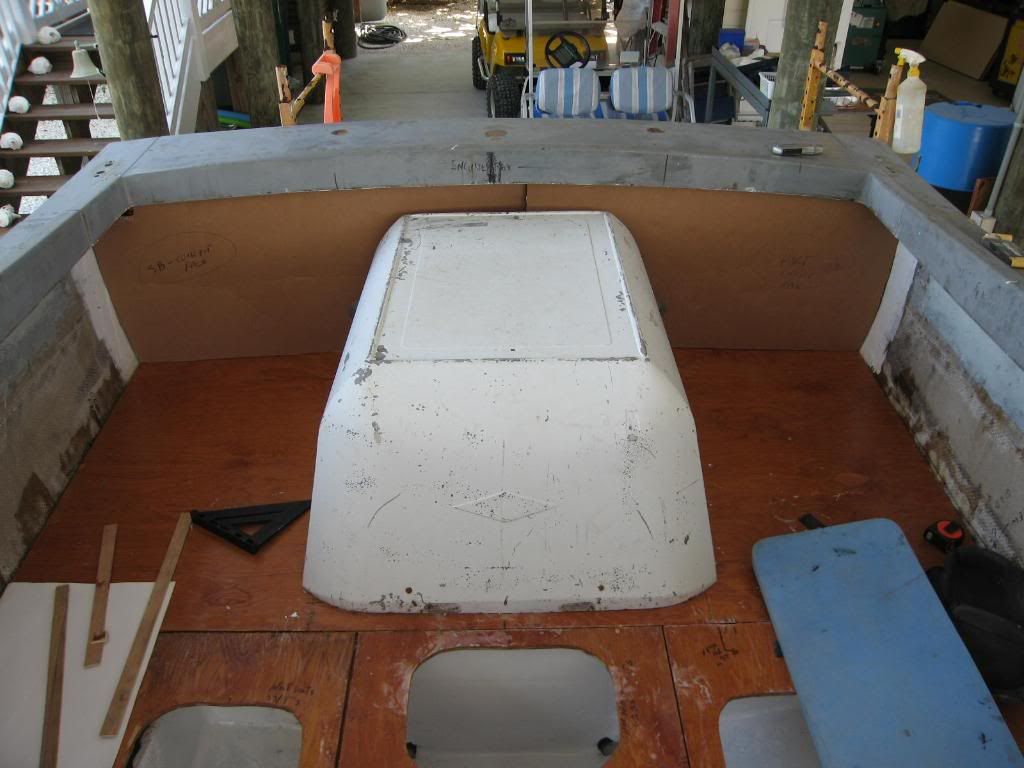 Transom cover finished product 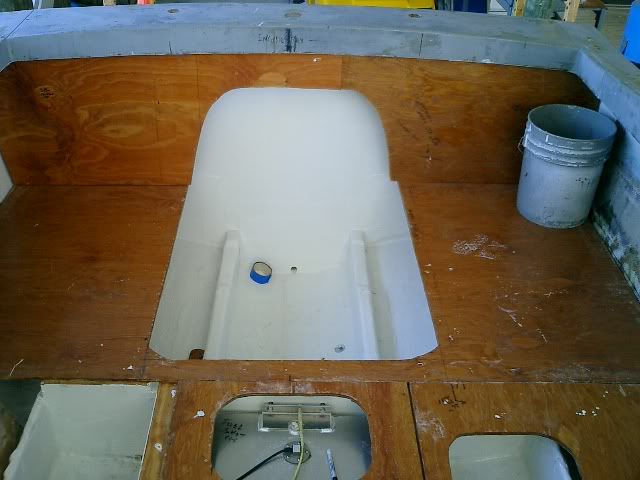 SS/T-nuts for tank and Glassed in 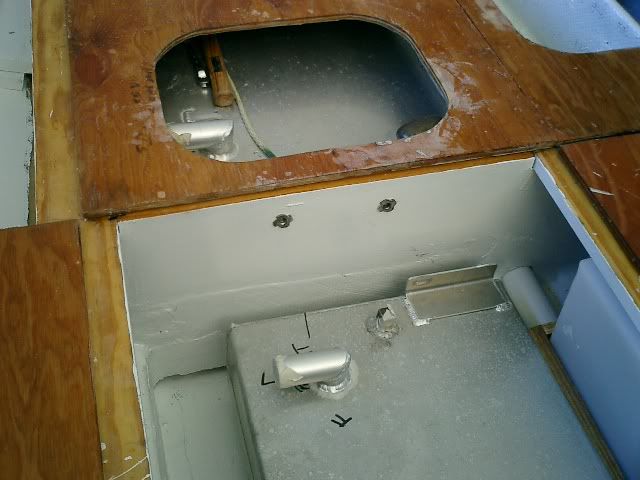 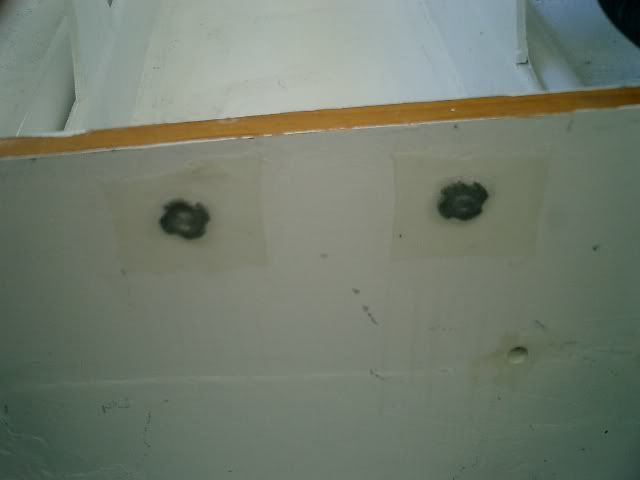 Tank hold down 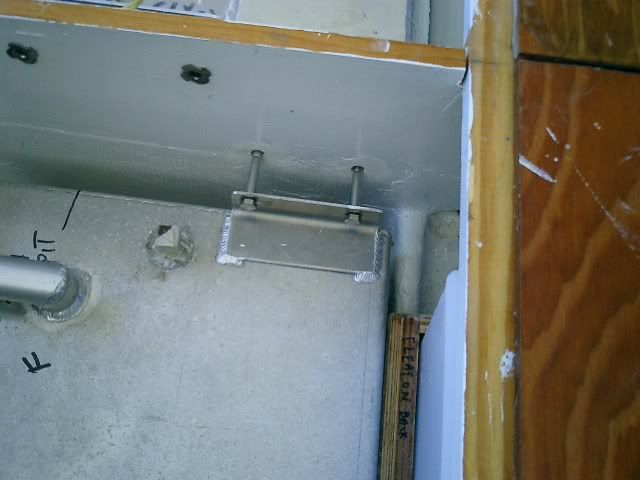 Water tank tray 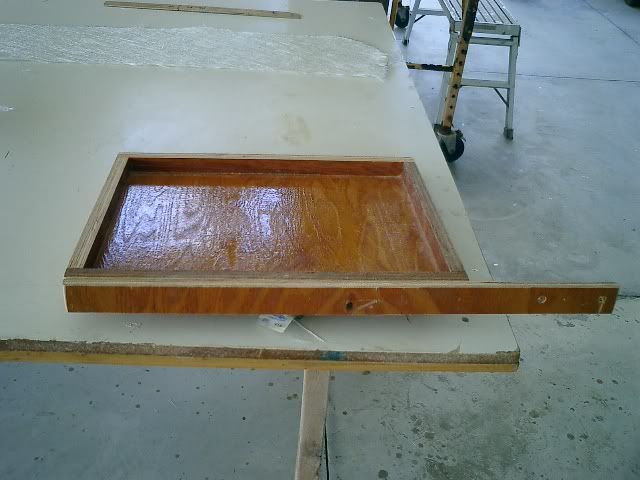 Water tank tray installed 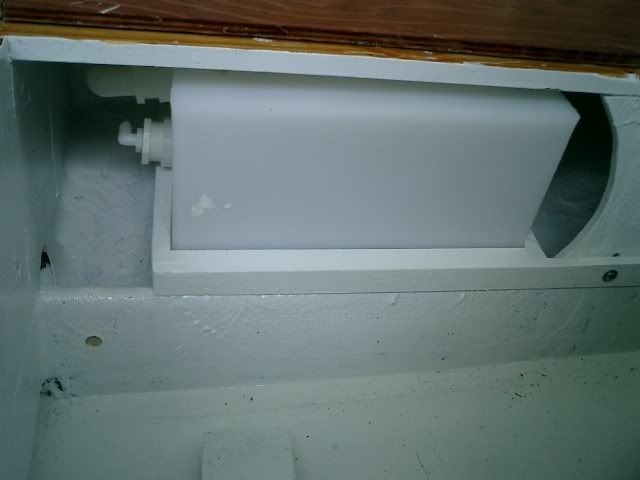 Happy Holidays...its been 1 year 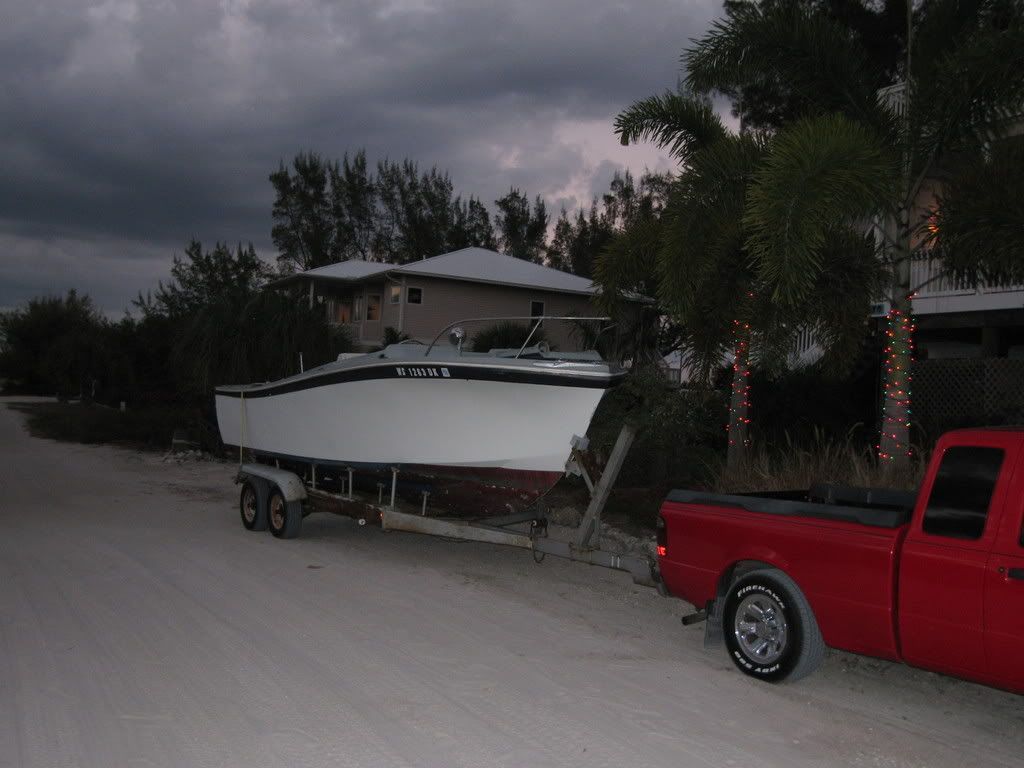
__________________
[SIGPIC][/SIGPIC] "If You Done It...It Ain't Braggin" my rebuild thread: http://www.classicseacraft.com/commu...ad.php?t=18594
|
|
#10
01-26-2010, 07:40 PM
|
|||
|
|||
|
It has been awhile since I have done anything on the boat besides fair or epoxy and lay glass. So I thought I would do some fun work.
This series of pictures is how the high speed bait well pick up turned out... My first challenge was to make a template so I could transfer this to the bottom. 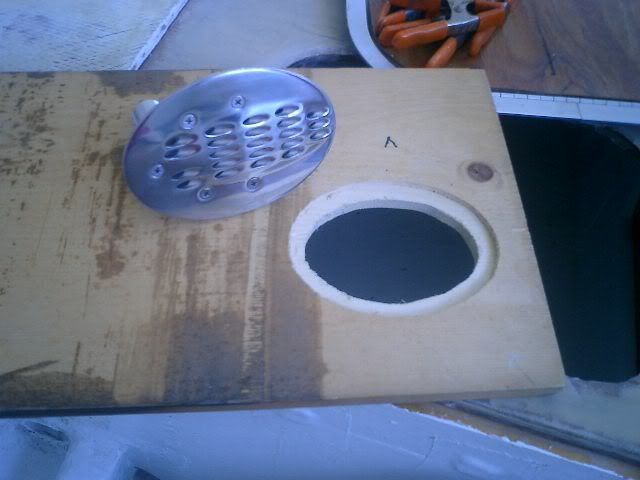 Once it was routed out and tested a flush fit was the reward. 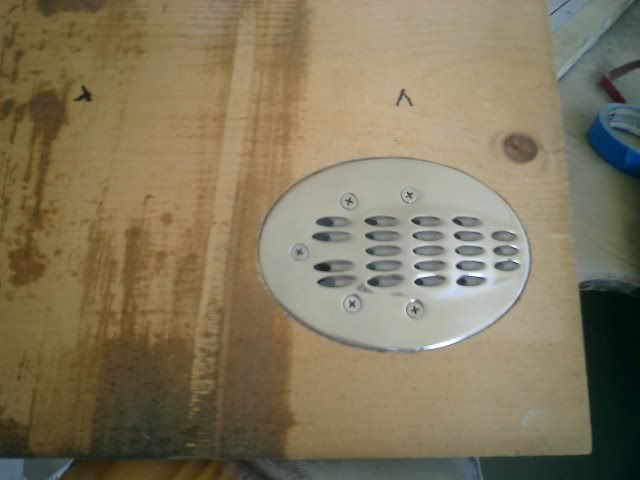 The next step was to make a backing plate so that it would be able to take the stress of a pump and shut off. 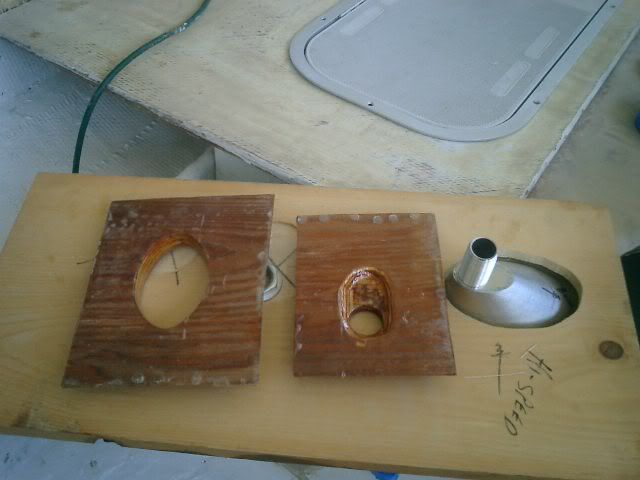 Once you grind away enough material you get a flush fit. 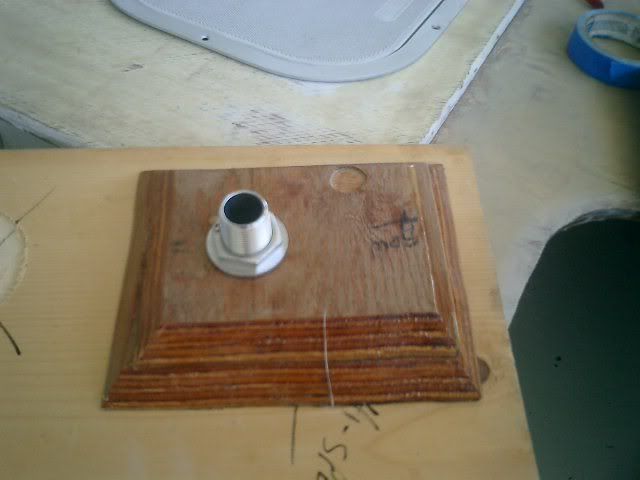 Now the fun begins...I took my template and screwed it to the bottom on the hull after I laid out where I wanted the hole.  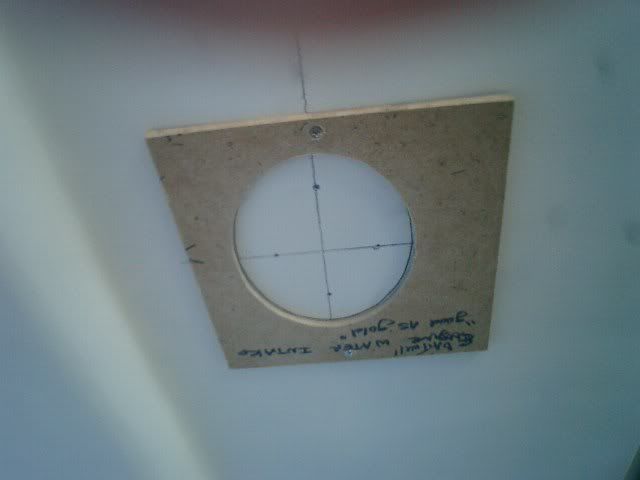 I used a flat router bit with a collar on it to get the right size lip. This is the first pass. 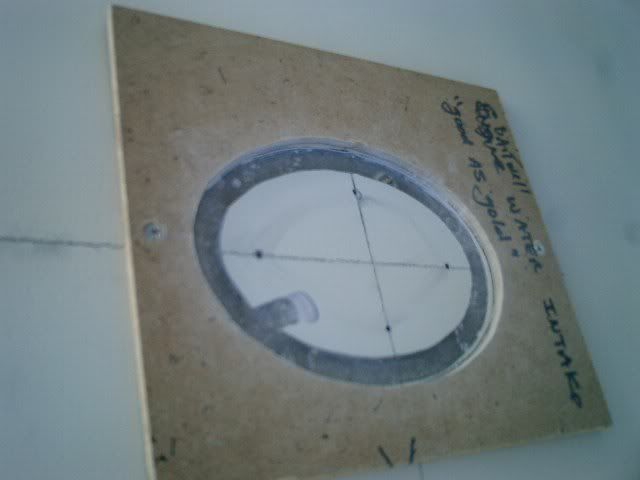 The next part was to clean it up at depth. 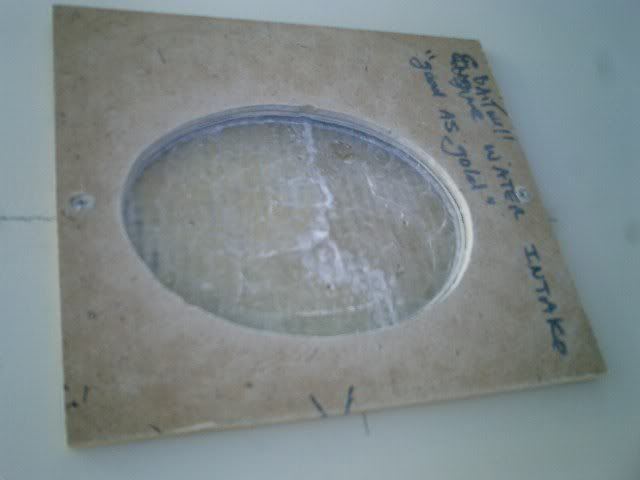 Now I have a new hole in the boat  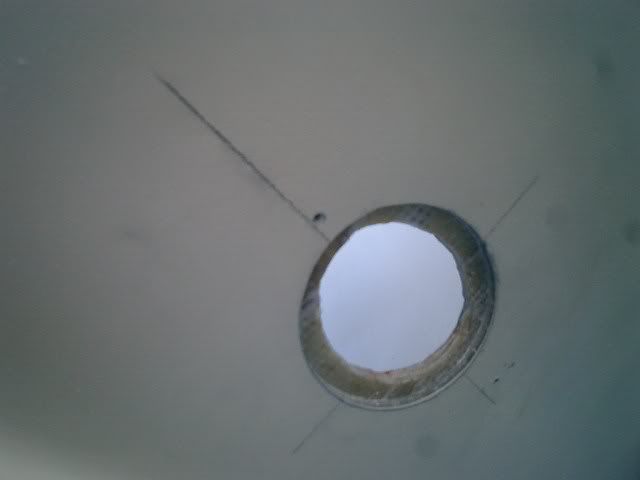 After some minor die grinding...we now have a high speed water pick up that is flush with the bottom 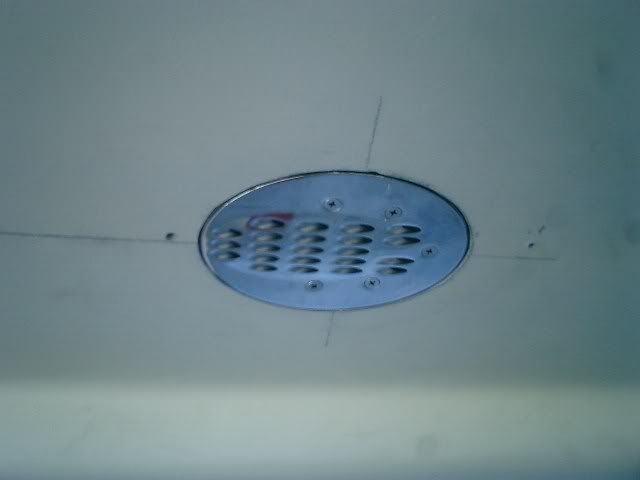 Now the last thing to do is fair out the inside and mix up some epoxy and glass the pad in. 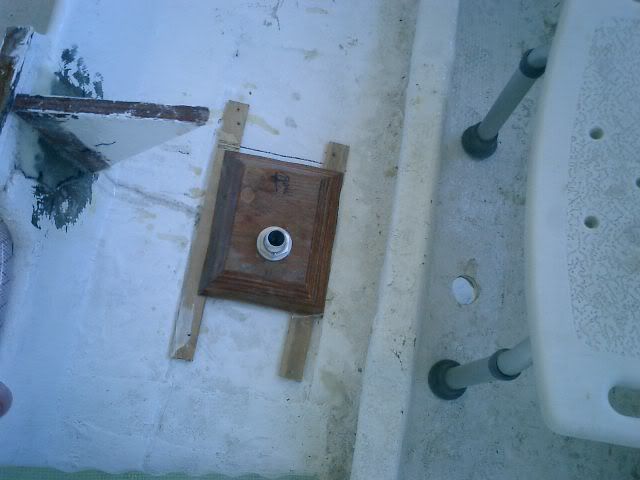
__________________
[SIGPIC][/SIGPIC] "If You Done It...It Ain't Braggin" my rebuild thread: http://www.classicseacraft.com/commu...ad.php?t=18594
|
 |
| Thread Tools | Search this Thread |
| Display Modes | |
|
|


 Hybrid Mode
