
|
|
|
|
#1
 04-12-2010, 02:24 PM
|
|||
|
|||
|
bj - Yup that was him, got out of the business a few years ago though.
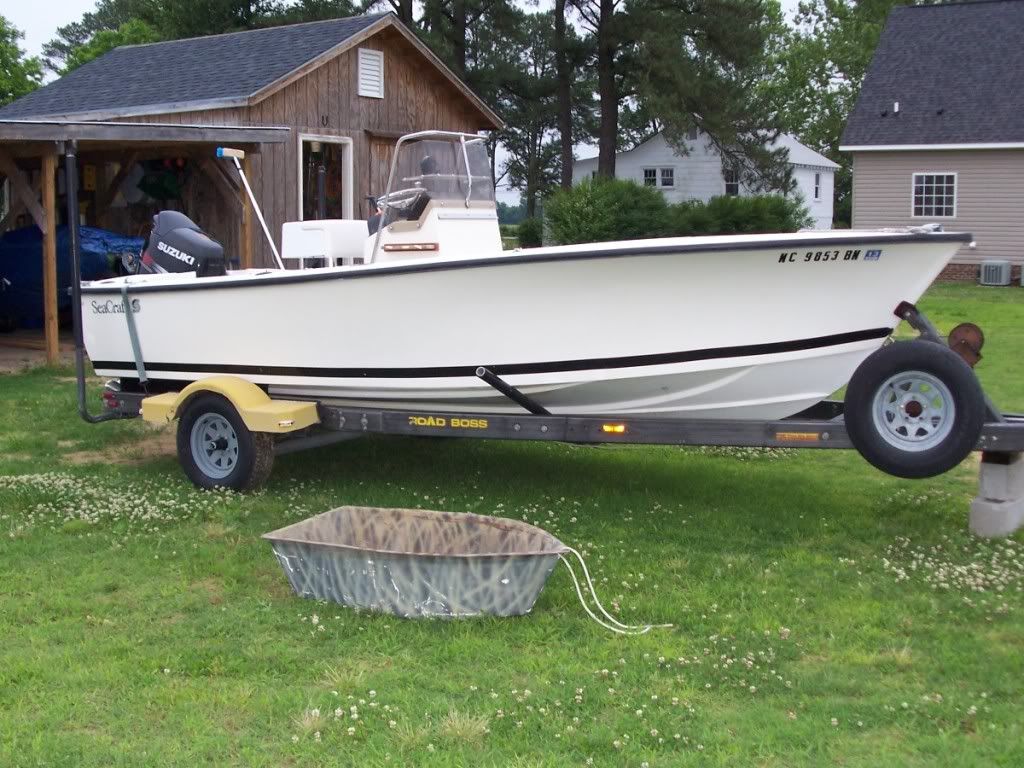
Sorry for the lack of updates. It seems that whenever I have any paid contractor (save my Zuke mechanics, they are a godsend) directly involved with my boat nothing goes to plan, I mean nothing. Took the boat over to Cobbs Marina on 4/02. My dad's 28' master marine was painted there and is a great facility/crew, owner is there all the time ready to bend over backwards to help you. Their travel lift really knows how to make a 20' SeaCraft look small.  Got the boat there and up on blocks and started to work on the bottom paint. The jelly-fish consistency fiberglass paint stripper worked like a charm in the upper 80 degree heat. By the end of the day had it ready to sand the next morning.  Also got a coat of epoxy + fairing filler on the sanded fiberglass tape on the deck and the stern repair.   Spend day 2 up underneath sanding off the little remaining bottom paint and sanding the faired deck.  Once the deck was sanded back down we cut and measured the mounts for the leaning post and console. As I said before to prevent water intrusion into my new deck I'm mounting the leaning post and console to wood that is glued to the deck. The console and leaning post were put in place, and feet measured out. Then the deck was sanded down and the pads were glued in place.  The console mount is 2 strips of 1/2" marine ply with a piece of 1708 in between them and painted with resin. The top edges were rounded out and stick out about 1/4" when the console is sitting on it. The leaning post pads are 1-1/4" tall African Mahogany with 1708 between it and the deck to help fill any micro voids. They were also painted with resin. To prevent them from moving around while curing, a 1" area of 5 min epoxy was used on each end of the leaning post pads, and the ends + middle of the console strips. They pads were held in place weighted till the 5 min set up. Thickened epoxy that oozed out from under the pads was then cleaned up and they were allowed to set up overnight. The next day a thick bead of West System Six10 ($13 a tube at Paxtons) was applied and then radius-ed around the edges of the pads to a) give it even more holding strength/fill the edge b) clean up the edge a bit and make it look more factory. These pads will be Awl Gripped white with the rest of the deck. Its almost a shame cause the Mahogany is actually quite pretty but would look off as it would be the only exposed wood on the boat. Now for what went wrong. My plan all along was to have it painted at Cobbs by one of the many painter that work out of the Marina (Cobbs doesn't actually have any on staff). I was assured before I went over there that they had plenty people capable of doing and not to worry. Second day I was there we had the most recommended painter there come take a look and give us a quote. He seemed fine except he had no idea how to overcome the blocks on the bottom since we are AwlGripping the bottom too (trailered boat, will never sit more than 1 day in the water), said he had never sprayed a bottom or heard of anyone doing that.  His quote was a little high in my opinion for just gun time (I'm supplying all materials, cleaners, doing all prep, etc), but he came with high recommendations so I figured you just pay for quality. His quote was a little high in my opinion for just gun time (I'm supplying all materials, cleaners, doing all prep, etc), but he came with high recommendations so I figured you just pay for quality.We talked to the owner and got it cleared to use the travel lift to hang it from the lifting eyes over the weekend so he could paint without blocks. He agreed that he could work with that. The next day he comes back over and says he doesn't want to do it. Doesn't think he can do a good enough job (there are 3 boats around us that he painted that look great), doesn't want to paint in this yard due too dust (he told us yesterday he works exclusively out of this yard), and is worried about putting AwlGrip on a bottom and if it doesn't turn out it would affect his reputation. So not even 24 hours and I don't have a painter, no worries there has to be another good painter who needs work. Call up 5 different painters who work out of that yard, all say no because they didn't get to do the prep and don't get to buy the paint so there isn't enough money in it for them. So I was almost done with the prep and ready for primer and sitting there racking up a bill at Cobbs and couldn't pay someone to paint my boat. Finally I found a painter who wants to do it. He has his own shop on the other side of town, indoors, experienced, comes with like 5 recommendations from people over at tidalfish.com. Had him go over my boat with me which he offered tons of advice that I can do a little more prep here and there and get an even better finished product. Offered to use his shop to finish off the prep if I want, just lock up when I'm done.  In the end it definitely worked out, and I am more confident that I'm gonna get a great paint job than I was at Cobbs. Pulled the boat outta there on Friday and its in my driveway until I'm ready to take it to his shop. All in all it wasn't a complete waste of money, storage for a week there was $300 ($100 each time they move it with the lift and $15/day), so basically paid $300 to removed all the bottom paint I couldn't reach with the trailer and get the bottom 95% faired out. More updates soon. 
|
|
#2
04-13-2010, 08:36 PM
|
|||
|
|||
|
I hate that you had so much trouble, but, looks like you almost have it whipped. The water sure was pretty up your way this morning.
__________________
1975 SF18/ 2002 DF140 1972 15' MonArk/ 1972 Merc 50 http://i833.photobucket.com/albums/z...photos/SC3.jpg
|
|
#3
04-13-2010, 09:52 PM
|
|||
|
|||
|
Yeah getting there, got some minor details to finish but hopefully she turns out as good as she looks when I close my eyes.
The weather up here has just been ridiculous, its driving me crazy since I can't use the boat. Got to me tonight and I had to catch a fish. Went out back to our pond and after a few casts:  Now that I know what catching a fish feels like again, back to work.
|
|
#4
05-17-2010, 04:30 PM
|
|||
|
|||
|
WARNING this is a long overdue update and contains more images than should be allowed in a single post, I apologize in advanced for this (but really though, is there every enough boat porn?
).Boat was brought back to my driveway after taking it over to the painter. He noticed some things that we hadn't seen that needed to be addressed before moving on so to work we went. Some things might have been overkill but better safe than sorry. For one all the old hardware holes on the cap we had just taped the bottoms and filled with thickened epoxy then faired. He mentioned that he'd seen people do that before and after a while the epoxy shrinks and its visible in the paint job, recommended to grind out a little around them and put a layer of glass on top.   This was loads of fun on the 200 holes in the console.   A drill with a 60 grit wheel on the end was a good tool for grinding out a little square on each hole.  These were then faired and sanded.     Also noticed some spider cracks on the hull sides that we hadn't seen before. These were ground out and then covered with a layer of 1708 and 6oz cloth.   And then faired.   I also decided to switch from the square butt style hinge up front to the strap style hinge. So the recessed hinge cut outs were filled.    Recessed areas also filled on hatches.  I have purchased a new stainless gas fill that has a 3 hole pattern vs the 4 hole of the original. The underside was backed with a glassed piece of 3/8" marine ply and then was filled with epoxy. This sealed the hole well and will provide some meat for the new fill to mount in vs just glass.  Then more of the usual fairing and pin hole filling.     The boat was then taken over to the warehouse to start the paint process. First coat was some Awlgrip Epoxy Sprayable Fairing Compound (which was picked up off the sale rack at West Marine for $13!). This is a very thick (20 mils dry) coat that fills A LOT of imperfections. We spot sprayed the trouble areas on the outside of the hull but my interior has been beat to hell over the past 36 years and it got a complete coat. Below are some pictures after we'd been sanding on it some.      We sanded that down smooth and then put a coat of Awl-Quik Sanding Surfacer. This is a very pale yellow, but smooth coat that can be used as a surfacer for 545 primer or top coat can be directly applied. Awl-Grip recommends for best distinction of image to use Awl-Quik with 545 on top, so that's what we're doing. The Awl-Quik is currently being lightly sanded with 180 to prepare for 545.             This is where we stand now, almost done sanding the Awl-Quik. Getting 545 on it this week and hopefully topcoat early next week. Then she starts to get put back together. Which reminds me, I've been picking up boat jewelry since she's close to being finished. The amount has almost tripled since I took this pic but I'll get a more up to date pick once I start putting everything on her. She's getting new stainless EVERYTHING. 
|
|
#5
05-17-2010, 05:46 PM
|
|||
|
|||
|
hey man if u dont mind, pass along your painters number to me in a PM or something.... my hull is getting soda blasted this winter and i need a person that can paint. im doing the same by useing awlgrip on the bottom (stored on trailer) thanks
|
|
#6
05-17-2010, 06:31 PM
|
|||
|
|||
|
Looking great!!! Instead of checking your work out, I guess I'll have to see it on the water. I'll be keeping a check on your progress. Maybe you can show me around your VA playground sometime. Keep up the good work!
__________________
1975 SF18/ 2002 DF140 1972 15' MonArk/ 1972 Merc 50 http://i833.photobucket.com/albums/z...photos/SC3.jpg
|
|
#8
05-18-2010, 12:05 PM
|
|||
|
|||
|
I've been waiting patiently for someone to ask.
I'll post a picture tomorrow.
__________________
1975 SF18/ 2002 DF140 1972 15' MonArk/ 1972 Merc 50 http://i833.photobucket.com/albums/z...photos/SC3.jpg
|
|
#9
05-20-2010, 04:29 PM
|
|||
|
|||
|
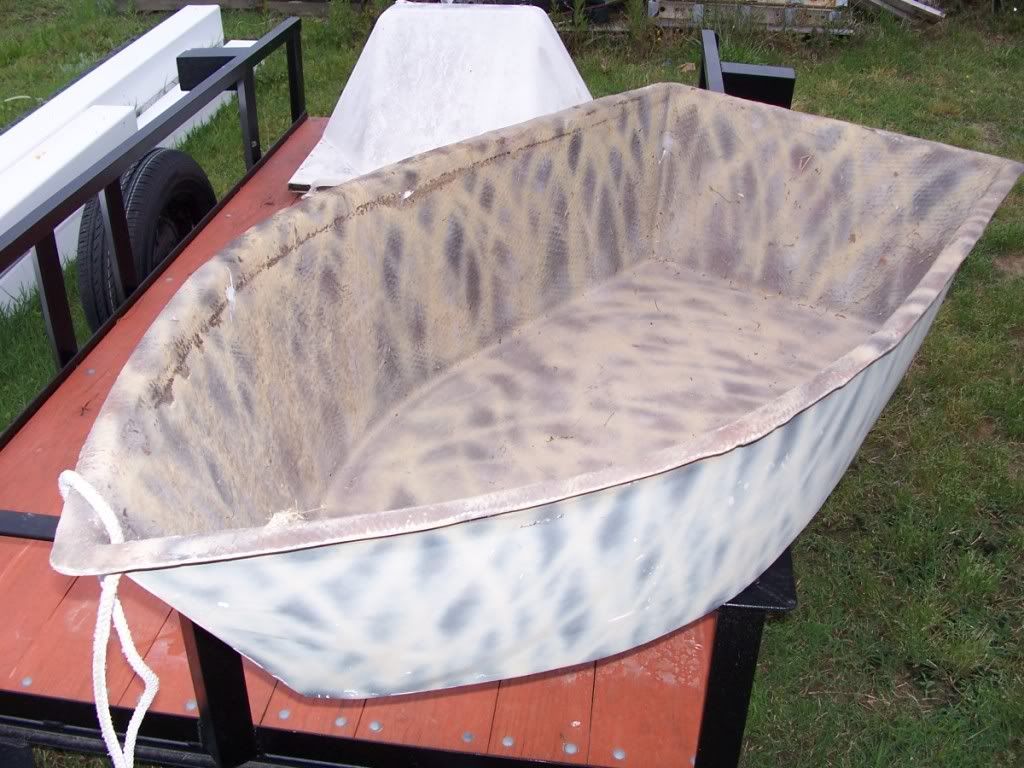
The illusive 4' Gigginhauler. One of my friends dad, RIP, decided he wanted something to haul his flounder gigging gear in and made the mold many years ago. It's gelcoated, but I camo'ed it for duck hunting. Not that exciting, but, I snickered everytime I posted, waiting for somebody to bite. All in the name of fun!
  Also, wanted to show off my new bling on the console. 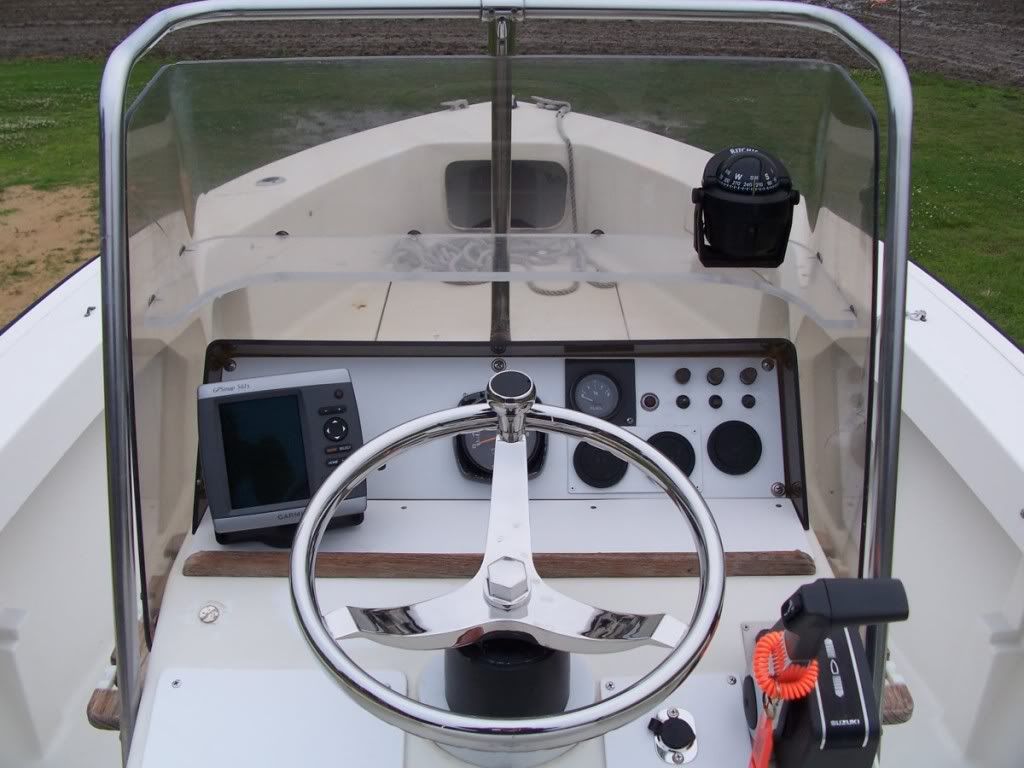 http://i833.photobucket.com/albums/z...s/100_2000.jpg
__________________
1975 SF18/ 2002 DF140 1972 15' MonArk/ 1972 Merc 50 http://i833.photobucket.com/albums/z...photos/SC3.jpg
|
|
#10
05-18-2010, 12:26 PM
|
|||
|
|||
|
Quote:
Quote:
|
 |
| Thread Tools | Search this Thread |
| Display Modes | |
|
|


 Hybrid Mode
