Classic SeaCraft Community  

Go Back   Classic SeaCraft Community > Recovered Threads

Notices

Reply
 
Thread Tools Search this Thread Display Modes
  #1  
Old 12-03-2013, 11:35 PM
strick strick is offline
Senior Member
 
Join Date: Aug 2003
Location: California
Posts: 2,738
Default

Thats an interesting looking seacraft. Did someone play with it before you got to it?

strick
__________________
"I always wanted to piss in the Rhine" (General George Patton upon entering Germany)
Reply With Quote
  #2  
Old 12-04-2013, 08:34 AM
flyingfrizzle flyingfrizzle is offline
Senior Member
 
Join Date: Sep 2012
Location: Eastern NC
Posts: 1,653
Default

Quote:
Originally Posted by strick View Post
Thats an interesting looking seacraft. Did someone play with it before you got to it?

strick
I had been redone a few times before from the way it looks. The rear seating was removed and gone. Look like there will be more room behind the leaning post with the plain basic transom lay out that was put back in. Some one recored the floor, well about 2/3 of it. They left the old balsa wood around the edges of the deck and only changed out the fuel cover and a foot down both sides of it with 4" ply wood squares. Later on the transom was looked to be done after wards and the last two foot of the deck at the rear was cored with a solid 1/2 ply at that time. Some one cut 4"x6" holes in the top of the stringers and refilled sections with foam. Not all of the foam but just enough for them to say they did it. There were several layers of white paint & gel coat on the deck where it had been refinish several times. Transom is raised to 25" height. Here are a few pics before I got the sawzaw out:

Name:  20130510_113305_zps15708316.jpg
Views: 369
Size:  94.7 KB

Name:  20130510_113313_zps96231f00.jpg
Views: 369
Size:  96.0 KB

Name:  photo-3_zps1d84adb1.jpg
Views: 366
Size:  92.0 KB

Name:  photo-4_zps2a2185f3.jpg
Views: 363
Size:  91.2 KB

Name:  photo-1_zps1c75d498.jpg
Views: 362
Size:  92.6 KB

Name:  photo-2_zpsd5036e59.jpg
Views: 362
Size:  94.8 KB

Name:  photo-5_zps90c0a426.jpg
Views: 358
Size:  91.3 KB

Name:  20130624_205821_zps92e2a5b2.jpg
Views: 356
Size:  57.4 KB

Name:  20130515_155624.jpg
Views: 356
Size:  92.5 KB
__________________
Current SeaCraft projects:
68 27' SeaCraft Race boat
71 20' SeaCraft CC sf
73 23' SeaCraft CC sf
74 20' SeaCraft Sceptre
74 20' SeaCraft CC sf
Reply With Quote
  #3  
Old 12-04-2013, 09:37 PM
Mikem8560 Mikem8560 is offline
Senior Member
 
Join Date: Apr 2011
Location: Charlotte Harbor Florida
Posts: 577
Default

Quote:
Originally Posted by flyingfrizzle View Post
They left the old balsa wood around the edges of the deck and only changed out the fuel cover and a foot down both sides of it with 4" ply wood squares.
my decks are ok now but if I had to repair later on is there a real advantage to the squares rather then a dull piece of plywood ?
__________________

82 seacraft 20SF

Bayview Canvas
Reply With Quote
  #4  
Old 12-05-2013, 02:29 PM
flyingfrizzle flyingfrizzle is offline
Senior Member
 
Join Date: Sep 2012
Location: Eastern NC
Posts: 1,653
Default

Quote:
Originally Posted by Mikem8560 View Post
my decks are ok now but if I had to repair later on is there a real advantage to the squares rather then a dull piece of plywood ?
From what I understand doing the small squares will help keep the deck from warping up and also it is a much stronger way to core the deck. You can curve or crown the deck to help the water to drain if you wanted and could do curves this way too. Also if you space the squares out a small bit once you bed them down and then pour thickened resin between them it creates a fiberglass grid that is supper strong. If you get a screw hole in one section it will only get water in that square compartment that the core is in. This contains it there, keeps it from spreading to other squares and stops it from rotting the whole deck. Plus most of the strength comes from the fiberglass layup and not the core itself and doing it this way the decking relies more on the lay up and the wood is just a filler to fill the void.

Here is a section of deck I did:

I waxed the surface them primed it with a high build primer then layed a layer of csm first then a layer of 1708 then another layer of csm again on top of a mold table....
The first layer of csm is going to be the top of the deck and the csm will prevent print threw of the 1708 from showing in the primer. The other layer of csm is to help bed the wood squares into.


I bedded the wood blocks down in thickened resin...


I added resin that was a little thick in between the squares...


I added several layer of csm over the coring...


Then added a layer of 1708 then on top of that one more csm layer to build thickness and to sand on so I dont sand into the 1708 fibers...


This created a 1" thick lambent that was smooth on the top side for patching a section of decking...
__________________
Current SeaCraft projects:
68 27' SeaCraft Race boat
71 20' SeaCraft CC sf
73 23' SeaCraft CC sf
74 20' SeaCraft Sceptre
74 20' SeaCraft CC sf
Reply With Quote
  #5  
Old 12-05-2013, 06:29 PM
flyingfrizzle flyingfrizzle is offline
Senior Member
 
Join Date: Sep 2012
Location: Eastern NC
Posts: 1,653
Default

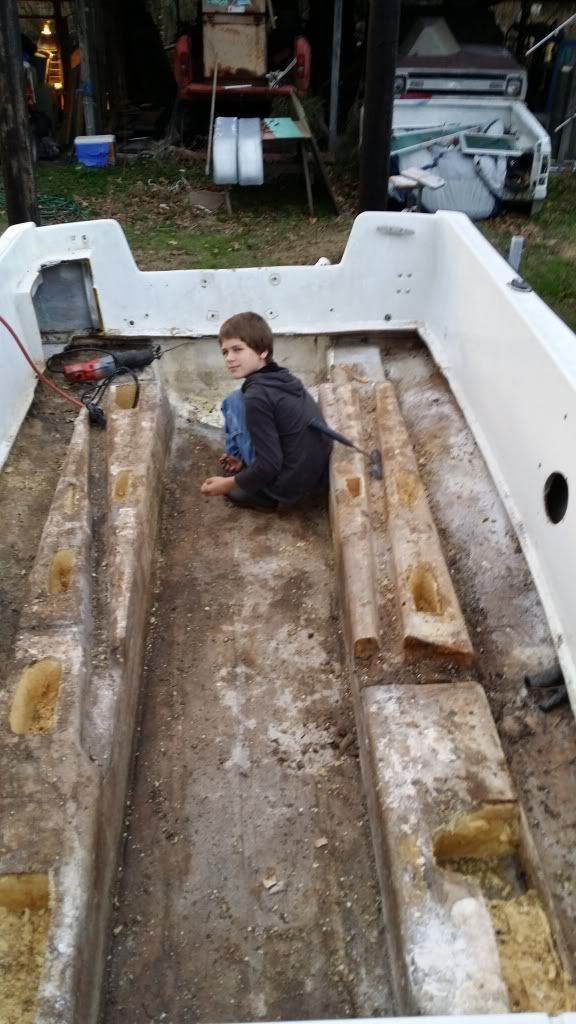
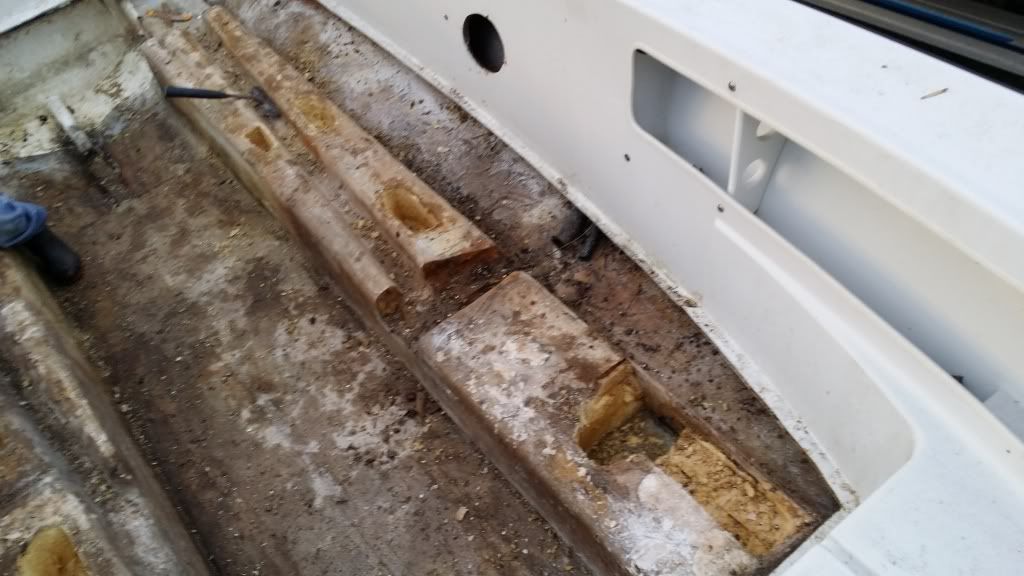
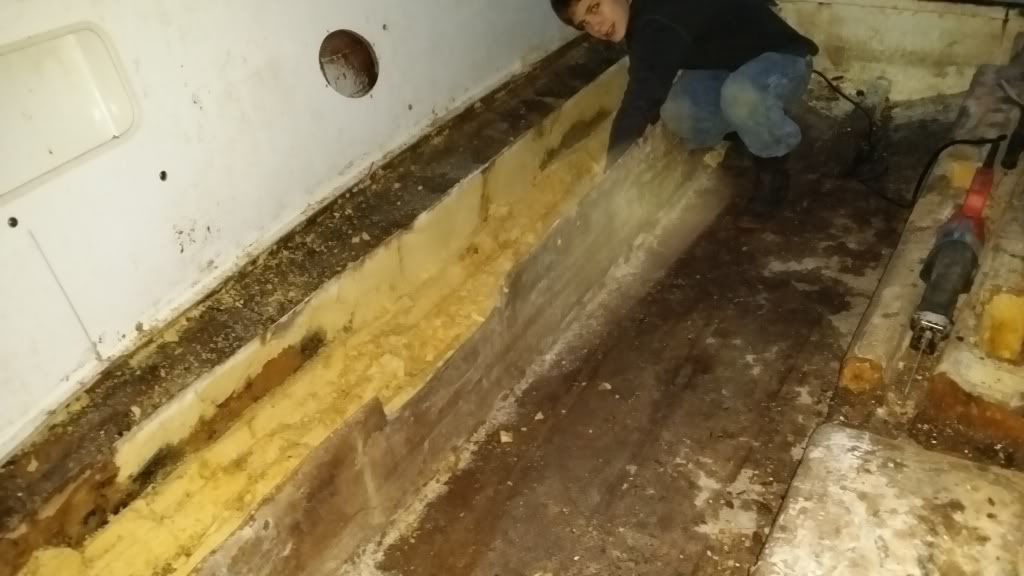
The foam in the top of the stringers was dry but the bottom had a 1" of water in them. Cut the tops off and started getting it out. There was several holes cut in the tops already where they were filled originally. They never sealed them off after pouring the foam and that's how most of the water got in.


__________________
Current SeaCraft projects:
68 27' SeaCraft Race boat
71 20' SeaCraft CC sf
73 23' SeaCraft CC sf
74 20' SeaCraft Sceptre
74 20' SeaCraft CC sf
Reply With Quote
  #6  
Old 02-22-2014, 11:39 PM
flyingfrizzle flyingfrizzle is offline
Senior Member
 
Join Date: Sep 2012
Location: Eastern NC
Posts: 1,653
Default

Back to it, finally got some good weather and time to get back on the cc. Cleaned out the stringer boxes and formed them up for foam. Will be raising the floor 2.5 inches and filling them higher for that purpose. Poured 2 part foam let it set then removed forms. Trimmed the top level and beveled the edges. Ready for glass.

Name:  20140222_171539.jpg
Views: 202
Size:  90.1 KB

Name:  20140222_181531.jpg
Views: 203
Size:  88.3 KB

Name:  20140222_220754.jpg
Views: 203
Size:  86.0 KB
__________________
Current SeaCraft projects:
68 27' SeaCraft Race boat
71 20' SeaCraft CC sf
73 23' SeaCraft CC sf
74 20' SeaCraft Sceptre
74 20' SeaCraft CC sf
Reply With Quote
  #7  
Old 02-23-2014, 11:45 PM
flyingfrizzle flyingfrizzle is offline
Senior Member
 
Join Date: Sep 2012
Location: Eastern NC
Posts: 1,653
Default

Shaped up the foam a bit with the sander and then added a layer of mat then a layer of mat/rover combo cloth over the foam. Then added some cloth in corners of the stringer to help stiffen the tank tray. It was starting to come loose from the side of the stringer so this will help make the tank platform more solid.


Attached Images
 
__________________
Current SeaCraft projects:
68 27' SeaCraft Race boat
71 20' SeaCraft CC sf
73 23' SeaCraft CC sf
74 20' SeaCraft Sceptre
74 20' SeaCraft CC sf
Reply With Quote
  #8  
Old 12-04-2013, 11:33 AM
flyingfrizzle flyingfrizzle is offline
Senior Member
 
Join Date: Sep 2012
Location: Eastern NC
Posts: 1,653
Default

Quote:
Originally Posted by Lordwrench View Post
A little history on this hull.
Thanks again for the incredible deal on the hull and meeting me so I could get it. She will get some needed attention and love. Hope you are enjoying the new "sf" you got...
__________________
Current SeaCraft projects:
68 27' SeaCraft Race boat
71 20' SeaCraft CC sf
73 23' SeaCraft CC sf
74 20' SeaCraft Sceptre
74 20' SeaCraft CC sf
Reply With Quote
Reply

Thread Tools Search this Thread
Search this Thread:

Advanced Search
Display Modes

Posting Rules
You may not post new threads
You may not post replies
You may not post attachments
You may not edit your posts

BB code is On
Smilies are On
[IMG] code is On
HTML code is Off

Forum Jump


All times are GMT -4. The time now is 03:17 PM.


Powered by vBulletin® Version 3.8.7
Copyright ©2000 - 2025, vBulletin Solutions, Inc.
All original content © 2003-2013 ClassicSeacraft