
|
|
|
|
#1
 07-26-2005, 09:19 AM
|
|||
|
|||
|
Here's how I pulled the reinforcing up to the transom.
Beware, keep the transom flat! http://i15.photobucket.com/albums/a3...repair5_15.jpg
__________________
73 23 SF 2004 200 HP Yami OX66 Best boat I owned! 2002 29 Seavee twin 200 yami's 
|
|
#2
07-26-2005, 11:46 AM
|
|||
|
|||
|
might as well run thru a string of photo's -
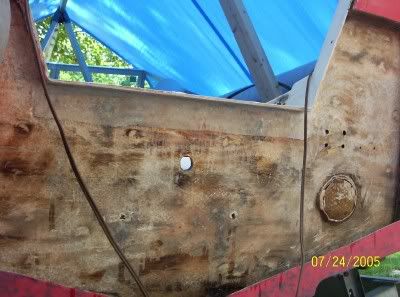
boat as seen / purchased - very oxidized hull 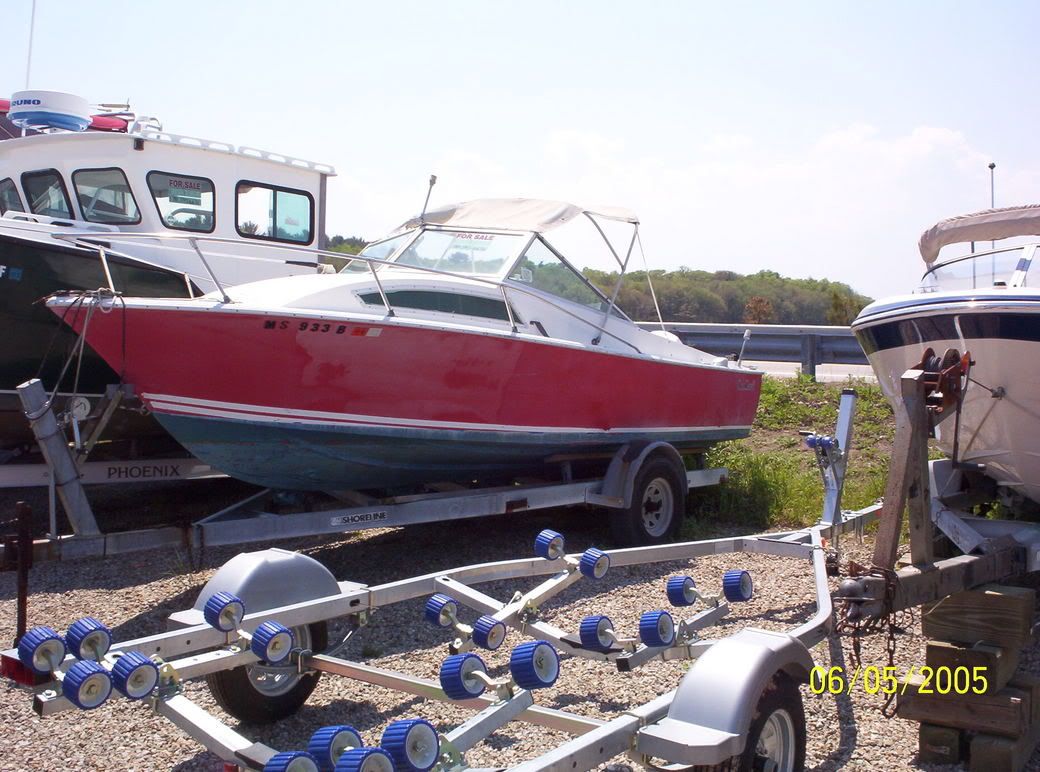 after getting it home, I spent a weekend wet sanding with 600 grit, then again with 1500 grit, then compounding and buffing, then waxing and buffing - cleaned up pretty well 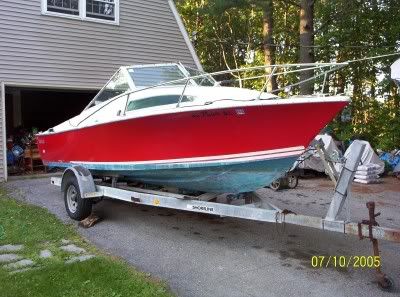 however, the two hour tow home took it's toll on the transom - what appeared in the yard to be sound, with a minor crack inside the splash well, was significantly worse by the time I got home, cracked inside and out - and reading thru CSC back threads made me decide to pull the motor and start looking closer - so - a serious crack in the left lower corner of the outboard notch, and a really wet transom, time to go to work  decided to go in from the back / outside the cracks and soft core induced deformation left me with an inside skin which was not flat, so went to work on that first  (now, I don't know how many pix I can stuff in one entry - so we'll stop here for the moment - Bill
|
|
#3
07-26-2005, 12:09 PM
|
|||
|
|||
|
moving right along - used the last seen clamps and block, wrapped in wax paper, to hold several layers of cloth/resin in place inside the transom upper lip, flattening and reinforcing that area, while at the same time putting a plywood reinforcement plate on the inside surface of the inner transom, in the area of the lower motor mount bolts, also pulling that area flat, results as seen
 this effort successfully pulled the inner transom wall flat, so that I could beginning shaping plywood plates for the transom replacement. In the original transom, between the outer skin and the face of the plywood, was a very heavy, and highly troweled / grooved layer of putty - the outer skin was not uniformly bonded to the core, and this also made for an offbeat thickness, so my transom layup looks to be 3/4" / 1/2" / 1/2" - I have the first two plates in now - last night, after a good 24 hours cure, I pulled the bracing off, and checked thru the bolt holes, and a couple of taped off interior inspection holes, and I have a good solid mate and bond all the way across the transom. and right now, I'm bushed - gonna take a break for a few days. Added to the punch list: the gas tank appears to have slid backwards during the tow home, stopping against the bolt / bracket in the keel for a thru hull transducer - that needs help. the gas fill line looks ancient (well, 32 years old !) so some plumbing is in order. I'm going to add a knee brace from the keel up to the transom. I like the accessability I created with the hole in the splash well, so I want to dress that up for keeps. Yes, I still think I'll get this in the water this season, yet.... I hope !!! Bill
|
|
#4
08-03-2005, 11:53 AM
|
|||
|
|||
|
Ha Worthog
Thanks for asking that question I thought the same thing but did not have the chance to post your question. Ha Old Blues Player I have to admit that I totally agree with your comments regarding the west system epoxy. I could never have done my boat all alone with out any help by using polyester resen. When I did my boat the first project I did was to laminate a layer of glass on the gas tank plywood deck in the shade here in South Florida after that should have been easy project I knew I needed more time that polyester would give me. If I can remember correctly I used 12 gallons of epoxy to do everything needed and dont regret that decision as all. FellowShip [img]/images/graemlins/grin.gif[/img]
|
|
#5
08-03-2005, 02:44 PM
|
|||
|
|||
|
Scott - my brother has a place in Oak Bluffs, back up by the water tower, Bad Boy is kept on a trailer at his friends, who is the owner of the Admiral BenBow Inn, down by OB harbor... by derby I assume you mean the striper/bluefish derby in sept ? We were there last year, expect to be there weekends again this year.
Fellowship - used to do the surfboard thing outside - shaping the foam is wicked dusty, and counted on a hard 10 minute clock on the polyester resin, from first hardener to useless - beginning to gel, in the summer in New England. Sure can't be any easier in Florida ! Warthog - You got the real question, which really bugged me as I started into this. I've been an engineer too long, so I analyzed the heck out of this, and every example I could find in the back pages and photo albums... accumulated thoughts finished strength will be a combination of bonded surface area and mechanical capture, both of transom and bracing structure - the inner well is a significant strengthening member, some of the inner well cuts I've seen worry me about weaking of the supporting structure IMHO - look at TimD's pictures of a 20 rebuild - I would worry having taken the cutout that close to the edge of the transom, would really have to wrap the rebuild around the corner - tricky job, it appears that his CC had a double motor wide cutout, less side wing surface bond area, really needed to go full width, and evidently his wood was all shot alot of the examples are on 23's, with a double wide motor cutaway, again, less surface area to bond to closest to mine appeared to be Hammer's 20, same size boat, same transom shape with single motor cutaway - he appears to have done about the same shape cut out, plus, as I intend, he did a glass wrap from the inner transom / splash well, over the transom edge, and on to the outer face of the transom - excellant mechanical capture, plus it seals the one probably worst seam on the boat, preventing a reoccurance of water getting in to the new transom, and strongly reinforces the structure, between the primary structure, the transom, and the secondary supporting structure, the inner cap/splash well assembly - IMHO that inner cap/splashwell piece significantly supports the transom. most everybodies pix showed a live well port on the port side of the motorwell, mine had a buried hole thru the core, on the starboard side, glassed over on the inside, glassed over on the outside skin, but a 4" hole thru the plywood core - This feature alone completely fooled me - as it was directly below the Teleflex mounting holes, leading me to believe the core was disintegrated rotten. I set the circular saw to 1/4" depth, and cut off the skin in the shape as seen, and aside from being wet in the motorwell/ motor mount hole areas, my plywood was intact. If I thought plywood could adequately dry out, I might well have left it in place, but I know it can't adequately, in reasonable time, dry across the ply boundaries. Wet, up here in New Hampshire, even salt water will freeze in the winter, and the wet wood would eventually turn to mush from freezing and thawing. I was initially prepared to have to cut more off, go all the way out to the edge, leaving a 3" rim, if need be, but I had good wood where I stopped. Wow - this is Way Too Long - give you an idea about how much I researched and thought about this. - I've got all good wood now - I reinforced the inner transom - I kept my supporting structure intact - I'm going to tie the transom to the existing supporting structure, the splashell assembly, with a transom wrap - I'm going to add a knee brace, supporting the transom to the hull floor/ keel stringer - I'm being as careful as I can with all the surface prep work and I'm gonna hope this works - and believe from all your previous efforts, that one can successfully cut holes in boats, and rebuild them satisfactorily !!!! Bill
|
|
#6
08-03-2005, 03:21 PM
|
|||
|
|||
|
Bill,
Yup, the striped bass/bluefish derby. We stay at a house up behind the Oceanview Restaurant on Laurel Ave. I'll be down there Sept 10-18 so maybe we can hook up some time?
|
|
#7
08-03-2005, 03:59 PM
|
|||
|
|||
|
cool - I'll probably be down there several weekends in Sept - we launch the Bad Boy on the town ramp over in the lagoon by Vineyardhaven - definitely have to hook up -
right now I'm estimating one more weekend, good weather permitting, to finish my boat up, then give it a trial splash in a local lake, then a more serious shakedown up in Winnpesaukee, so's I can chase some salmon while I'm at it... and swim to shore if it falls apart... -  and then hopefully get out to the coast for some blues - and if everything looks good, tow it to Falmouth and bop over to the Vineyard sometime during the derby. and then hopefully get out to the coast for some blues - and if everything looks good, tow it to Falmouth and bop over to the Vineyard sometime during the derby.Bill
|
|
#8
08-03-2005, 04:20 PM
|
|||
|
|||
|
looking further, I think I know where you are coming from, that most of the motor force forward thrust load is carried by the transom at the edges, into the hull - kind of similar, in reverse, to the transom test people talk about, standing on the tilted motor to see if the transom flexes under the weight -
both views are expecting that the transom is an unsupported, or marginally supported, span, attached primarily at the ends, kind of like a simple bridge, except that the transom is also attached to the hull bottom, so it is more of an oil can flex - imagine cutting half of the top out of a 55 gal oil drum, then grip the edge, in the center - it would move up and down - any unsupported edge would do that - It seems that cracks primarilary start to appear at the lower corners of the transom motor well cutout - leading me to suspect that most transoms are not adequately reinforced by inherent design, so that as soon as the core wood gets wet and begins to lose it's stiffness, the load is shifted into the glass, which if not overbuilt, soon begins to fail under the increased load - thus the cracks forming. Imagine a straight line, width of the transom, fastened only at the ends. From underneath the line, you have a force, up against the line - now add - above the line, imagine a structure in the letter "W" sitting on the line, above it, in the center - the two bottom points of the W are on the transom line, the two upper points of the W are fastened to the boat hull - either directly or indirectly thru the cap - the more strength in that center support, the better off the whole transom structure will be. just my humble 2 cents worth. Bill
|
|
#9
08-04-2005, 04:24 AM
|
|||
|
|||
|
Bill you are putting me to sleep with all that darn engineer talk [img]/images/graemlins/grin.gif[/img] Just put it back together and I'm sure it will be fine....A buddy of mine is a structural engineer and a while back I asked him how I should go about testing an engine bracket that I built. His reply was bolt it to a wall and then put double the weight you anticipate it to bear and then jump up and down on it for a while and if it does not crack then you will be ok. This guy was on the discovery channel for some engineer competition thing and his team won [img]/images/graemlins/shocked.gif[/img] I like your boat and hope to find one like it some day over here on the left coast. Good luck.
strick
__________________
"I always wanted to piss in the Rhine" (General George Patton upon entering Germany)
|
|
#10
08-04-2005, 04:16 PM
|
|||
|
|||
|
HeHe I have a friend Robert Sebring that own's Dawson Boat's here in Pensacola. http://www.rlsebring.com/
He had made some test panel's and sent them to Pensacola Testing lab. The panel's were cored with 3/4in Nidacore. They came back and said XYZ strength, bla,bla,bla. Robert said wait a min. Give it to me in layman's term's. Can 30 people stand on top of this hardtop? They said 300 people can stand on it. [img]/images/graemlins/shocked.gif[/img] [img]/images/graemlins/crazy.gif[/img] [img]/images/graemlins/grin.gif[/img] This was not on a center console [img]/images/graemlins/crazy.gif[/img]
|
 |
| Thread Tools | Search this Thread |
| Display Modes | |
|
|


 Hybrid Mode
