
|
|
|
|
#1
 06-05-2007, 11:53 AM
|
|||
|
|||
|
The outrigger kit I got came with the gunnel / skiff style mounts - I remember Nestor talking about the functionality issue before- but the more I think about it, the more I'm going for the side mount, and Nestor's #2 solution, putting a shim pad under the upper mount to position the holder correctly - Nestor - did you install any backing / reinforcement to the inside of the sidewall area where you mounted yours - I'm thinking it would be a good idea.
thanks !! Bill 
|
|
#2
06-05-2007, 04:49 PM
|
|||
|
|||
|
Yes I did, the cockpit sides are too thin and flexible to take the load. I made an aluminum backplate twice as big as the mounts to help disperse the torsional forces. If I were to do it again and had better access, I would have first fiberglassed in a 1 foot square piece of 1/4" or 1/2" marine plywood on the backside of the side panel and then installed the aluminum plate behind that so the nuts and washer won't dig into the fiberglass/wood; with the aluminum plate alone I still had quite a bit of flexing, especially when trolling large mullet or ballyhoo. Anything to stiffen the area and disperse the torsional forces will help. The problem is that there's very little space to work in between the two fiberglass vertical surfaces. Here's a rough sketch of what I would do:
 Hope this helps!
__________________
Boatless again!
|
|
#3
06-05-2007, 04:58 PM
|
|||
|
|||
|
By the way, here were my plans for the "ultimate" Seafari 20:
 I estimated about 50k including the engine and I/O combo but who has that kind of moolah?? Now, on a Seafari 25 this would be a sweet setup except with twin 190's or a single 350-400 diesel with duoprop outdrive. ")
__________________
Boatless again!
|
|
#4
06-06-2007, 12:53 PM
|
|||
|
|||
|
Nestor - your thoughts match mine on the "ultimate" Seafari.
I put 3/8" ply reinforcement under the new rod holders, as the gunnels are not cored, and was expecting to do the same for the outrigger side mounts. Spent another 2 hours sanding old bottom paint off last night, it's finally getting there - dam, is that a messy, painful job. And, now that I've got it almost done, I'm thinking of just doing the bottom red, whereas I was planning on doing the same white, from the chines down, that Carla did on the 65 bowrider project. Hopefully get a fully sanded pic, and other progress, up this weekend. Bill
|
|
#5
06-06-2007, 03:33 PM
|
|||
|
|||
|
Shes gonna look sweet with the new bimini&curtains!!

__________________
no falls, no balls
|
|
#6
06-11-2007, 02:34 AM
|
|||
|
|||
|
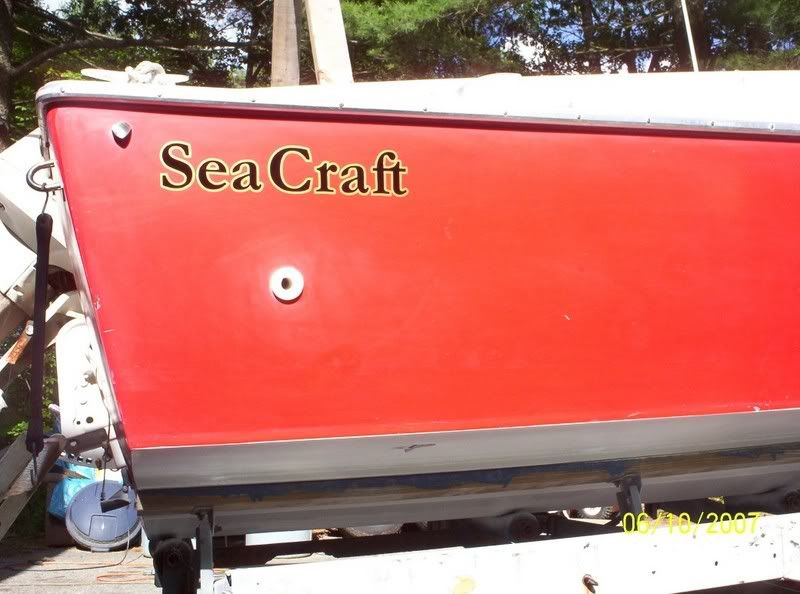
More progress this weekend - finished the bottom cleaning, sanding, painting, and added the replacement decals -
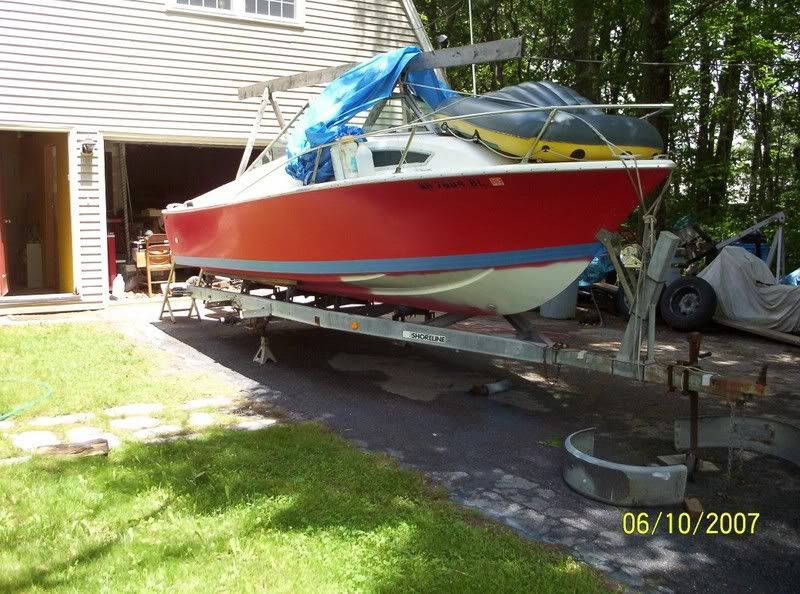 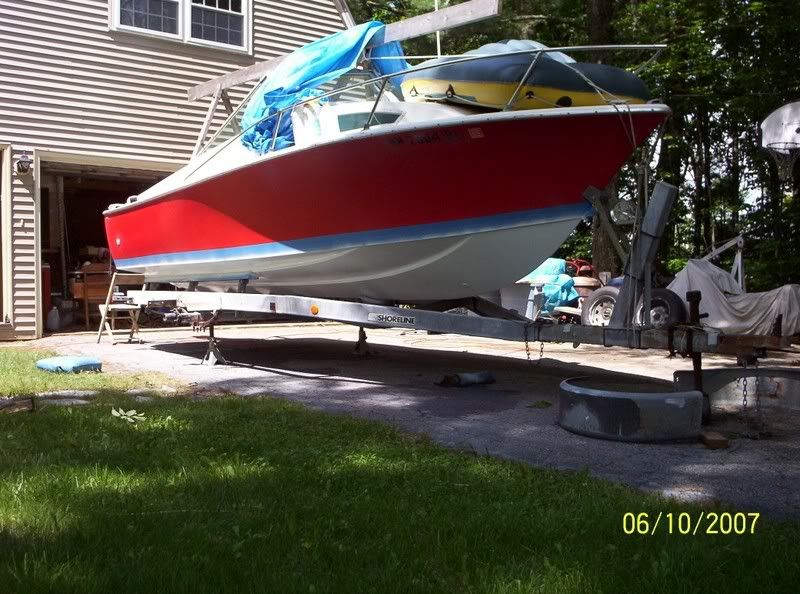 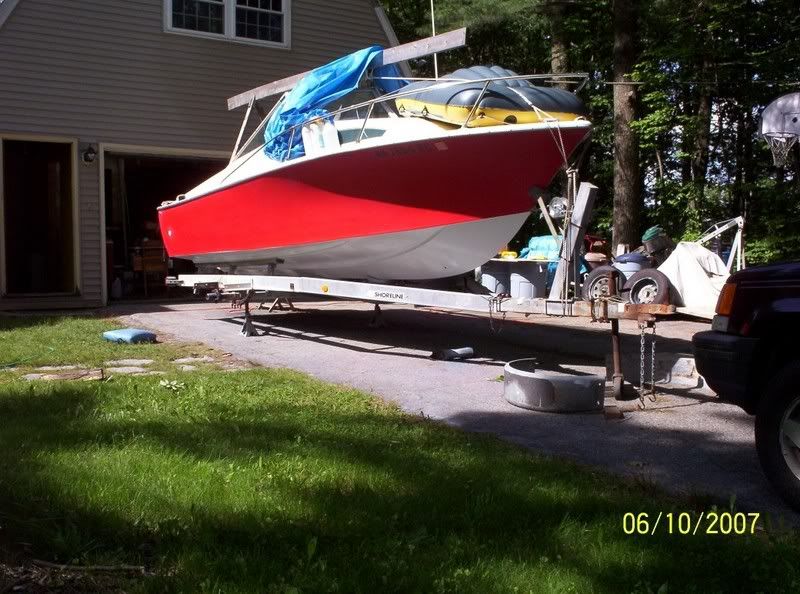  I'm seeing reports that the tuna are in on Stellwagen Bank already - now I gotta start pushin !!! Bill
|
|
#8
06-11-2007, 10:35 AM
|
|||
|
|||
|
Interlux, with their reducer, thru a spray gun. I'll be keeping it on a trailer, so I'm hoping that will hold up well - did a trial shot, let it dry overnight, tried power sanding it, it seemed to have real good adhesion, so that's what I went with.
Bill
|
 |
|
|


 Hybrid Mode
