
|
|
|
|
#1
 12-07-2009, 10:02 PM
|
|||
|
|||
|
Hey Ken....did you ever put humpty dumpty back together again?
__________________
__________________________________________________ ________________ 1974 23SF 
|
|
#2
04-16-2009, 08:12 PM
|
|||
|
|||
|
good luck on your project
__________________
Kevin
|
|
#4
11-06-2021, 04:07 PM
|
|||
|
|||
|
The bracket drawing came from some internet-wierdo called bigshrimpin. He also sent me a link to 1708 tape, a vinylester source, and a PDF on how to measure/attach the bracket. I ended up using 8 x 5 1/2" bolts. Good dude to know.
|
|
#6
11-08-2021, 10:49 AM
|
|||
|
|||
|
The Diagram you posted I sent to Big after I pulled it out of my files Last year. I talked with several members in the upper tiers of CSC including Tim as I wanted to get "permission" to post the full diagram for those interested in building their own bracket. At one point the brackets were patented and the name "seamark" may have been under copy right/trademark protection hence the need for approval from the uppers. If I can get the OK then we can make it a "sticky" in this sub forum.
strick
__________________
"I always wanted to piss in the Rhine" (General George Patton upon entering Germany)
|
|
#8
11-21-2021, 02:06 PM
|
|||
|
|||
|
One of the topics I have seen discussed on csc dot com, and thought a lot about, is "what is the car version of the seacraft?" Seems to have settled on corvette, maybe Camero or disgustang. I would like to suggest that it might be the Morris Mini because of 'Project Binky':
https://www.youtube.com/watch?v=txtM..._ae83e313-GLTO - seacraft innovations such as variable deadrise are about as important front wheel drive. Every modern car and SUV owes its front wheel drive layout to the success of the mini, perhaps to the degree that seacrafts have influenced modern center consoles. Maybe only Boston Whaler's use of poly/fiberglass is more important (thus making the boston whaler 13 akin to the VW bug). - the original seacrafts were pretty effective raceboats, Minis (Mini Coopers) were so good at rally racing that they were effectively banned. - Probably more than any other hull, seacrafts get rebuilt with obnoxious levels of attention and care, largely powered by Japanese 4 stroke engines. These guys repowered a mini with a Toyota Celica 4wd drive train... the inline4 2L they installed is not too far removed from a yamaha outboard (Yamaha used to be the tuning division of toyota). - Some folks could get a little grumpy about the small stature of the mini, but compared to all the 27-30' regulators, Contenders, See-Vees etc. 23/27' seacrafts seem like hulls that out perform their length. Anyway, when I would get a little stuck or depressed about my seacraft project, I'd fire up the next episode of the binky build. There's even a side quest where they rebuild an old hauler... not too far off redoing an old boat trailer. Their paint episodes convinced me to try out awlgrip. I am not too pleased with my final paint job but very happy with awlgrip, as a product.
|
|
#9
11-21-2021, 02:40 PM
|
|||
|
|||
|
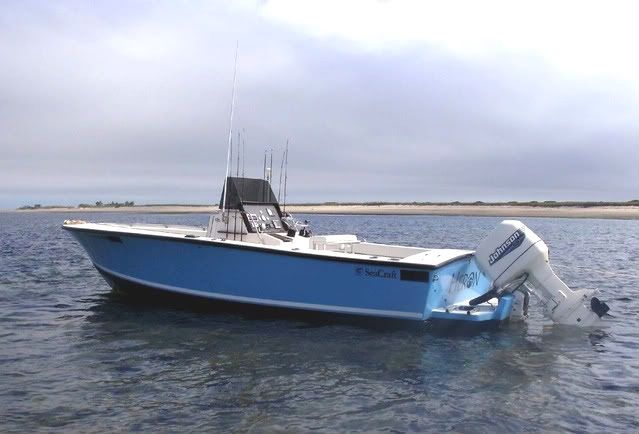
I made my first cuts into the original transom on March 9, 2009. The plan was to close the transom and add a bracket. In late 2020, I considered a cutout without a bracket, but adding back the splashwell was going to be as much work as a bracket. But I did think about it.
Transom is 2 sheets of 3/4 ply, inside face got 10oz cloth. Stringers (dry) were extended back to the transom. I added a small limber hole, so the water that collects outside of the stringers can drain. Hopefully I won't regret that. I used 3 layers of 1708 and mat to fill the cut out. I should have gone with 4 or 5 layers, or just cut up one of the unused deck hatch panels. I put the drains about 8 inches in board, so they drain right on to the tabs. I spent a lot of time trying to figure out how to get the hydraulic steering cables and transducer cables through the bulk head, without spending $500 on cables. At one point I was about to order $1500 worth of thruhull transducers because I didn't want to put a 1"hole in the new transom...I ended up buying the uflex hytech kit because its beefy enough for the merc 150 efi (e.g. rated to 175 hp, unlike baystar), and modifying a Scanstrut Multi Deck Seal to get the 1" simrad tranducer through.
|
|
#10
11-21-2021, 02:57 PM
|
|||
|
|||
|
I recored the topcap with 1/2 ply, mat, and vinylester. I made the transom cap from 3 layers of leftover 1708 from the bracket. I stuck some extra 1/2 ply where I might put rod holders.
It turns out that the there is a slight crown at the bow. I thought I got this by not supporting that section when I vinylestered in the ply, but I should have measured the width at the anchor locker. Getting the topcap on was a bit of a clown show. It wasn't heavy, just awkward. In order to get things to fit, I had to jack up the bow a little, but was still about 1/4 off. Good thing 5200 is strong, and rubrail covers the gap. At the transom, I forgot to consider that the new transom extends back a little (e.g. 12° lean back), so I had to cut the top cap lip and epoxy in some leftover strips of fiberglass. I think in cars they call this 'dzusing in a panel', anyway it worked.
|
 |
|
|


 Hybrid Mode
