
|
|
#12
 05-12-2008, 12:19 AM
|
|||
|
|||
|
Ledfoot - Just noticed something in that one photo showing all the cables going thru side of splashwell. The aluminum trim around motor cutout looks to be rotted away and the gap between the inner liner/cap and transom does not look to be very well sealed. THIS IS A POTENTIAL TRANSOM SOAKER! This gap was originally sealed with a polyester paste which is very brittle, gets cracks in it and falls out. Brown & Hauptner Marine, which was a SeaCraft dealer back in the 60's & 70's, used to remove the trim on NEW boats, remove the polyester and caulk the gap with a flexible sealant like Life Caulk. I bought my used boat from them and did the same thing. I believe it's one reason my transom was still dry 31 years later when I had Don Herman fill it in to install the bracket. Unfortunately you'll have to pull the motor off to fix it, but it could save your transom or at least extend it's life a few years!
If you could run all those cables thru a 2-3" diameter rigging tube like they use on brackets and transoms, it would be a lot easier to seal that splashwell. Could cover the existing hole with a piece of teak, starboard or PVC foam board and then mount rigging tube to it, as high up as possible, preferably above level of motor cutout. Might need a separate "cable clam" fitting for the steering hoses.
__________________
'72 SeaFari/150E-Tec/Hermco Bracket, owned since 1975. http://i188.photobucket.com/albums/z...Part2019-1.jpg 
|
|
#13
05-14-2008, 05:04 PM
|
|||
|
|||
|
bushwacker: thanks for the heads up, I think it does indeed need a new transom. I think that will happen in July, so I won't worry too much right now. Where can I purchase a rigging tube and how much $$ is it?
Thanks Jeff
|
|
#14
05-14-2008, 05:16 PM
|
|||
|
|||
|
OK, more progress this week.
When I installed my bilge pump and got the batteries hooked up and tested it, some water was leaking back down the hose. I had to remove everything anyway, so I decided to replace the thru-hull with a new stainless one:  and a new fitting inboard:  Got all the wiring sorted and tied down, as well as the batteries:  more to come...
|
|
#15
05-14-2008, 07:20 PM
|
|||
|
|||
|
Some other projects:
Got the new antenna & base installed just how the other one was:  A quick spray bomb of this horrendous engine cover until I have time to strip and paint the whole motor:  Installed the new LED lights on the sides of the console. I am a little disappointed, I should have ordered the ones that deflect the light downwards. These send a circular glow onto the inner hullsides, looks strange. I think I will use these elsewhere, like under the console.  My aft cleats were very loose, so I cut an inspection hole in the vent area and whern I loosened the bolts, some rotten plywood fell out. It was not coated in anything...just slapped up there as a backing for the cleat:  
|
|
#16
05-20-2008, 01:41 PM
|
|||
|
|||
|
Some more progress. Hope you guys aren't getting bored because this isn't a full-blown resto!
 Anyway, here are the updates: First off, I had an experienced fiberglass guy come to the house and patch the hull and some holes in the deck & transom. He has worked at Donzi, Wellcraft, and Jupiter here locally. Sorry I don't have any progress shots, but it was hot and we were very busy that day. The hull:  The old marinium cleats were loose so we filled the holes and shot some "primer" gelcoat on the aft corners of the deck: before: after:  Also filled some holes in the transom: removed all hardware from the bow deck, drilled and filled the nonexistant core with resin and fiberglassed a resin-coated piece of marine plywood underneath for some structure:  This gelcoat is just a primer, we will roll on the color-matched nonskid next weekend. Looks SO much better without the rail, but my wife wants it on for the kids    Also tried buffing the hull, came up ok for now. Just need to look ok for this year, then I'll paint the hull & bottom this winter.  Thanks for looking...
|
|
#17
11-03-2009, 10:27 PM
|
|||
|
|||
|
A quick update:
My 19 year old Yamaha 150 is still running perfectly and we had another great summer with the kids. We used the boat almost every weekend, and it has never failed us. The only issue in the last 6 months was a failed trim pump, fixed that & moved on. I wanted you guys to see the incredible handiwork of a guy called Scott Cambia, he runs Vector Imaging and produces custom-designed dash panels. He can design the layout if you want, in my case I sent him an Illustrator file with the design I wanted and he created 2 panels for me. I couldn't be happier with the results, check them out: Before: 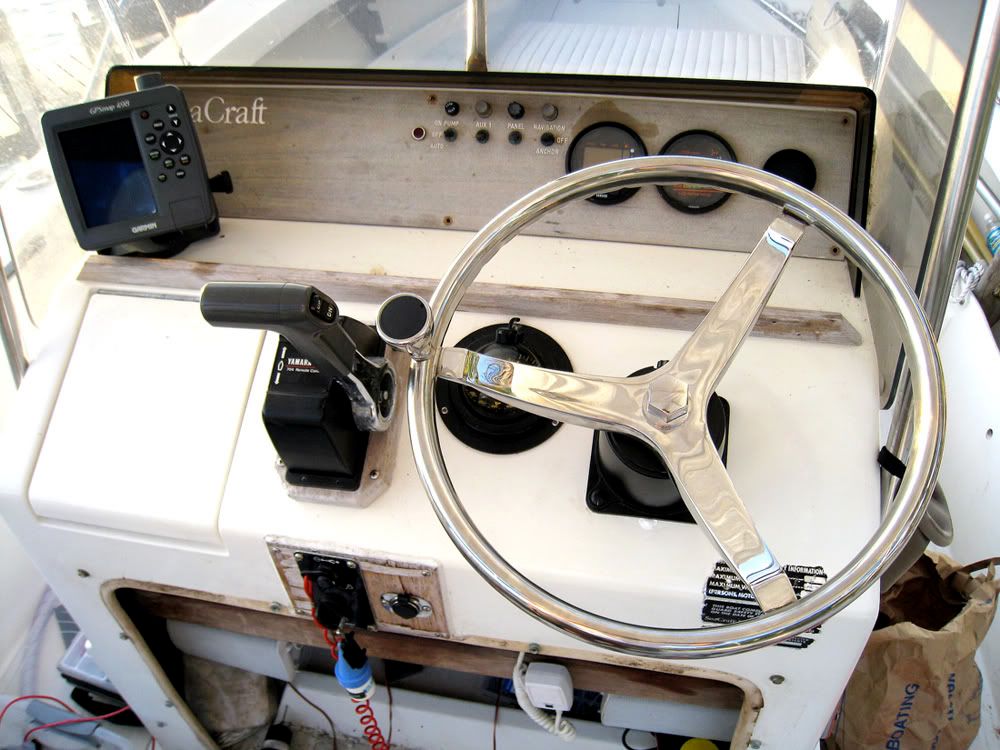 After: 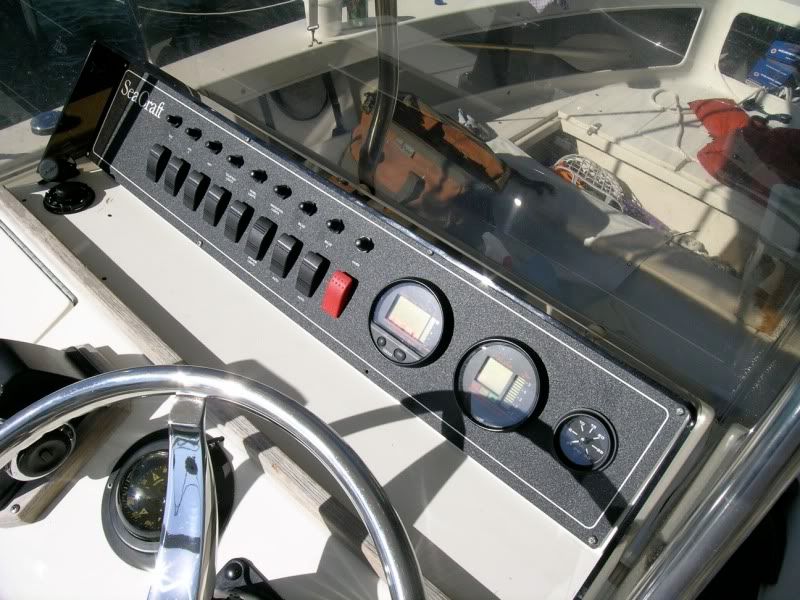 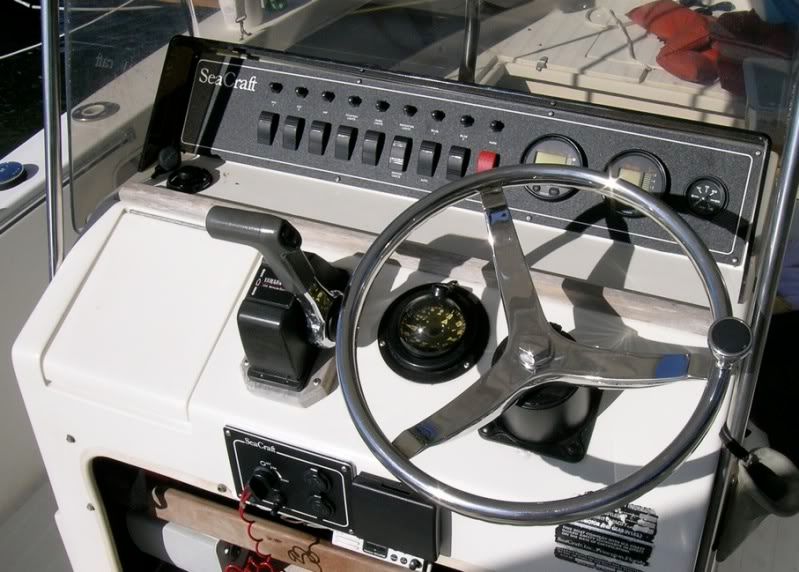 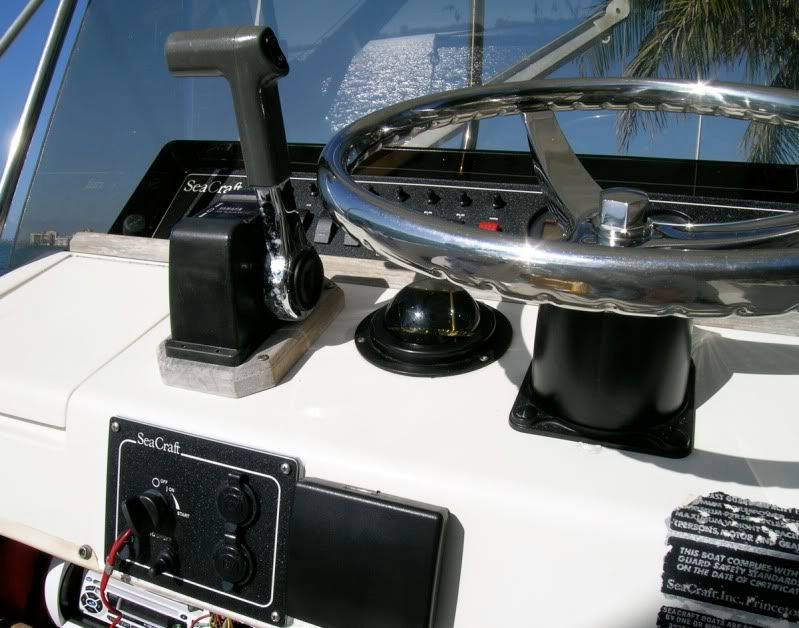
|
|
#18
11-03-2009, 11:35 PM
|
|||
|
|||
|
Great looking dash panel! How do you like that left handed engine controler??? I would have a hard time w/ that, I'm a right handed throttle guy.
__________________
1977 SeaCraft 23' Sceptre W/ Alum Tower & Yamaha 225 www.LouveredProductsUnlimited.com
|
 |
|
|


 Linear Mode

