
|
|
|
|
#1
 10-18-2011, 12:12 PM
|
|||
|
|||
|
You get to the bow by walking around the cabin rather than through the front window. To make this easier, there are grab rails on the top, the cabin sides are canted inward slightly, and all deck hardware is flush mounted so there's nothing to stumble upon. All of this will be apparent in future photos.
I replaced the headliner myself. Go to www.sailrite.com and search for "headliner". I followed (mostly) their video installation instructions posted on YouTube: http://www.youtube.com/watch?v=bHLq6FxQiI0 I would suggest using new scissors - not ones ruined by cutting fiberglass - and having lots of fresh box cutter blades. The tip of the blade dulls quickly trimming against fiberglass and then the headliner pulls and tears instead of cutting cleanly. The scissors are better if you have access and clearance. I had better luck placing the headliner, marking the edges to be cut with a marker, pulling it away while the adhesive was still wet, and then trimming away the marked line with the scissors. (You may have to spray a coat of adhesive on the headliner backside if it doesn't want to stay in place after trimming.) The carpet type headliner material is actually pretty easy to work with and stretches a lot to compensate for mistakes and/or deal with irregularities. Start on vertical surfaces, or smaller areas, before you tackle a big piece like the overhead, to refine your technique and become familiar with the process. Seams are hard to perfect, so try to place them in areas where they are less visible. It took me a couple of hours to do the forward cabin in the Tsunami, and half that was spent tryng to figure things out, and because I foolishly started out with the overhead. It was like working under a tent and very awkward, but one continuous piece did the entire overhead. The interior cabin enclosure was finished with rolled gel coat and has a lightly textured surface, which looks clean and nicely finished. You can see the texture in the following image (as well as the small gap that is being caulked and covered with 1/2" teak quarter round molding). 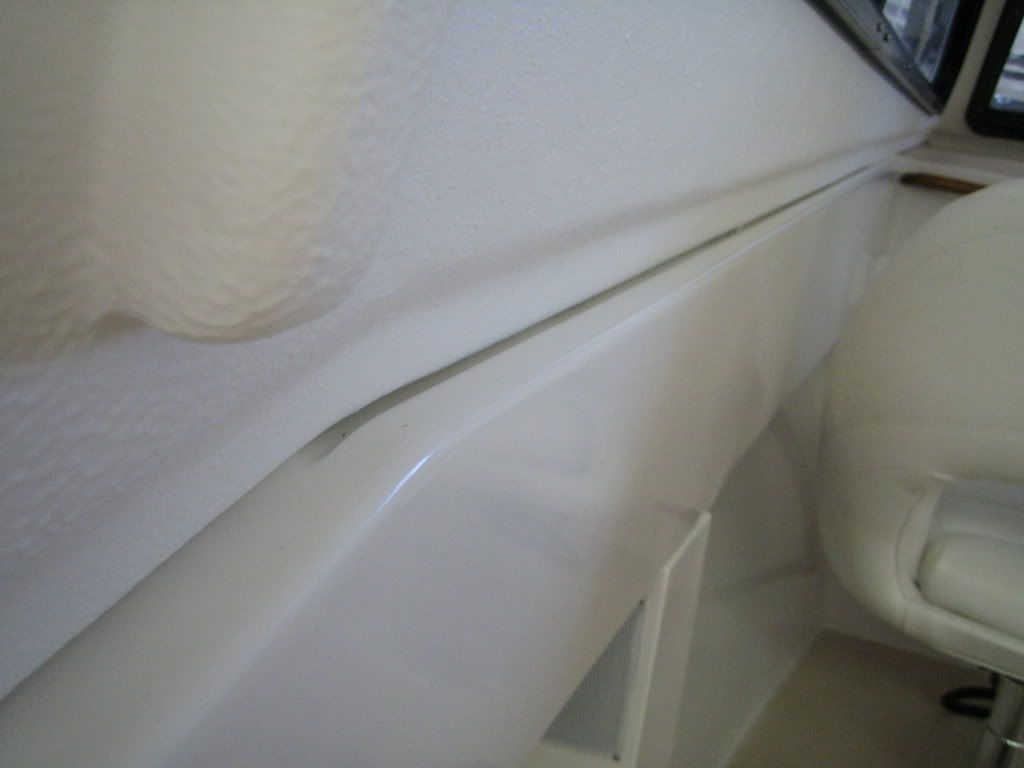

|
|
#2
10-25-2011, 09:31 AM
|
|||
|
|||
|
Oops. Trim tab issues. Lenco edge mount 12X12 tabs won't work without cutting holes in the bracket (though Capt Chuck did this on his 23' with good results). A 9" wide tab would allow the cylinder to fit outside of the bracket, but it still is quite high.
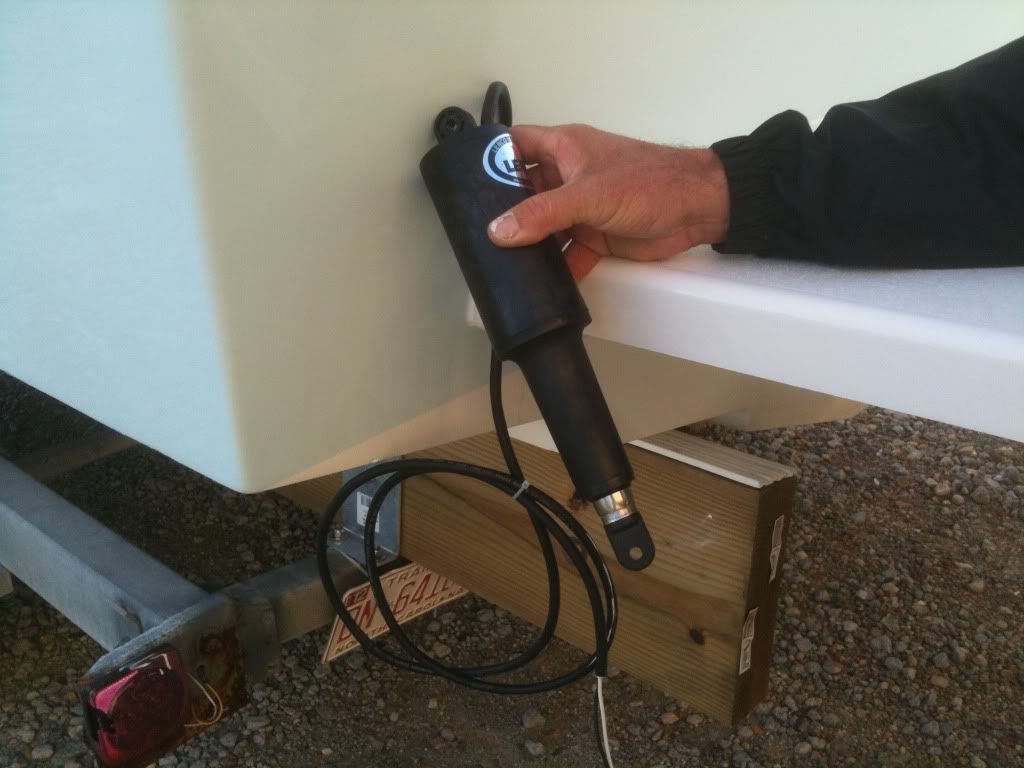 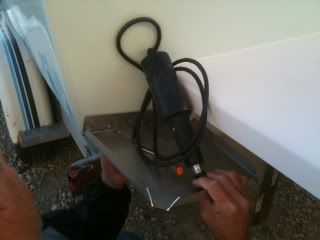 Solution: QL tabs. I'd never heard of these. Volvo Penta has a history of pushing the design envelope and these certainly are different. They basically have a blade that drops straight down and creates a hydraulic wedge. Installation is a challenge as they must mount to a perfectly flat surface so the housing isn't distorted, which jams the blade. (Yes, been there, done that.) One nice thing, the thin profile makes them impossible to smash at the dock. They are a perfect fit and work really well. 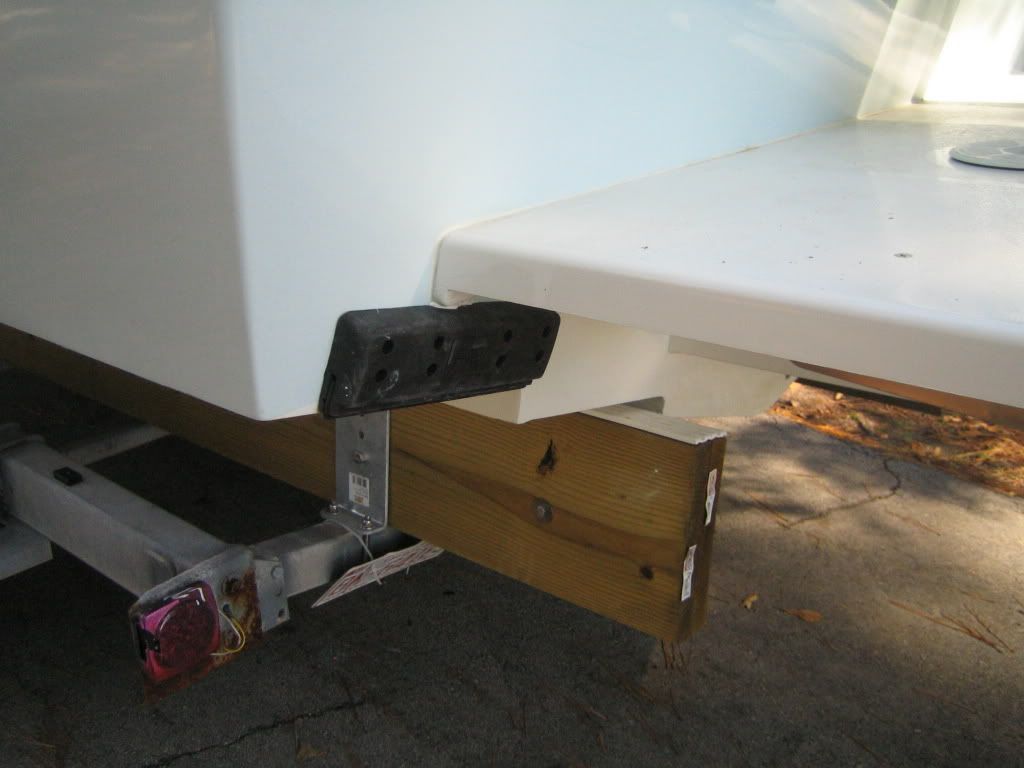
|
|
#3
10-31-2011, 04:09 PM
|
|||
|
|||
|
The boat was launched 10 days ago. A close friend was along to keep me from doing anything particularly stupid on the inaugural launch. All went well and, thankfully, concerns about the cabin weight in the front were not justified. It sits in the water nicely. The cockpit does drain aft. I briefly opened up the new motor and saw 48 mph. Cruise numbers are approximately 30 mph at 3000 rpm and 3 mpg. (Amazingly, my old 21' Parker with a 175 Johnson 2 stroke at the same speed/rpm got half that mpg!) More detailed performance numbers will follow, but that 250 Etec is pretty sweet thus far.
My schedule and the weather have not cooperated for getting good photos to post, so I've been working on the aft cabin bulkhead/doors, using 1/2" starboard with acrylic windows to keep the weight down. (Don't want to push my luck on the forward weight issue.) We had our first cold snap this past weekend, so that enclosed cabin with a little duck blind heater is going to be really nice for winter boating. 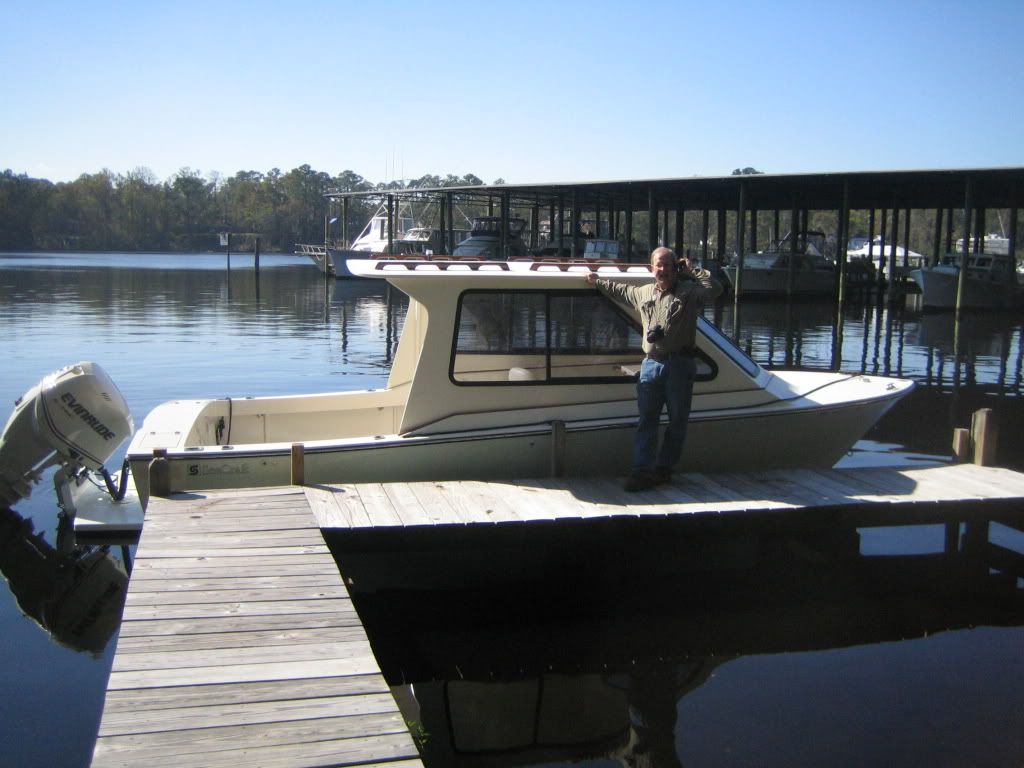 
|
|
#6
10-31-2011, 11:31 PM
|
|||
|
|||
|
sweet! love it
__________________
http://i224.photobucket.com/albums/d...t/0a21e0b9.jpg
|
|
#8
11-01-2011, 09:46 AM
|
|||
|
|||
|
Awesome!!
If I ever do a cabin Seacraft I will have to follow your foot steps.
|
|
#9
11-07-2011, 02:17 PM
|
|||
|
|||
|
The boat is slightly bow heavy due to the top/cabin and glass windows, but not objectionably so. Adding accessories or equipment (Bait well, water tank, extra battery, etc - or a monster 4 stroke) in the stern would help the balance, but increase overall weight. Acrylic windows would have been lighter, but get hazy over time.
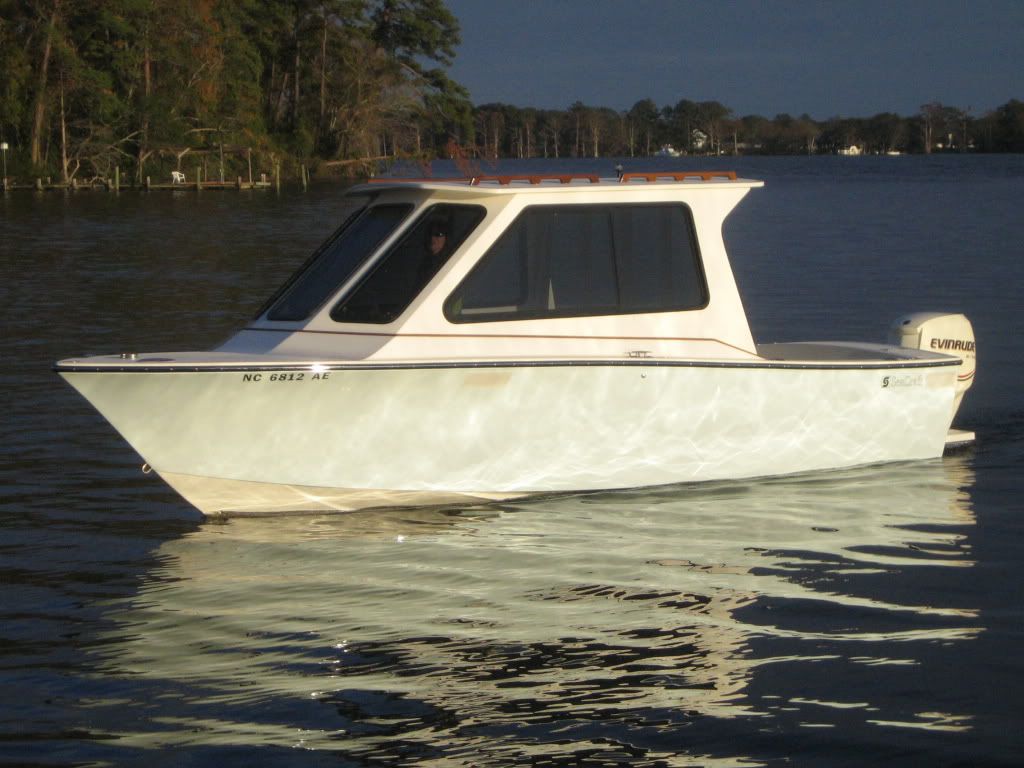 There was a post questioning the view from the inside. 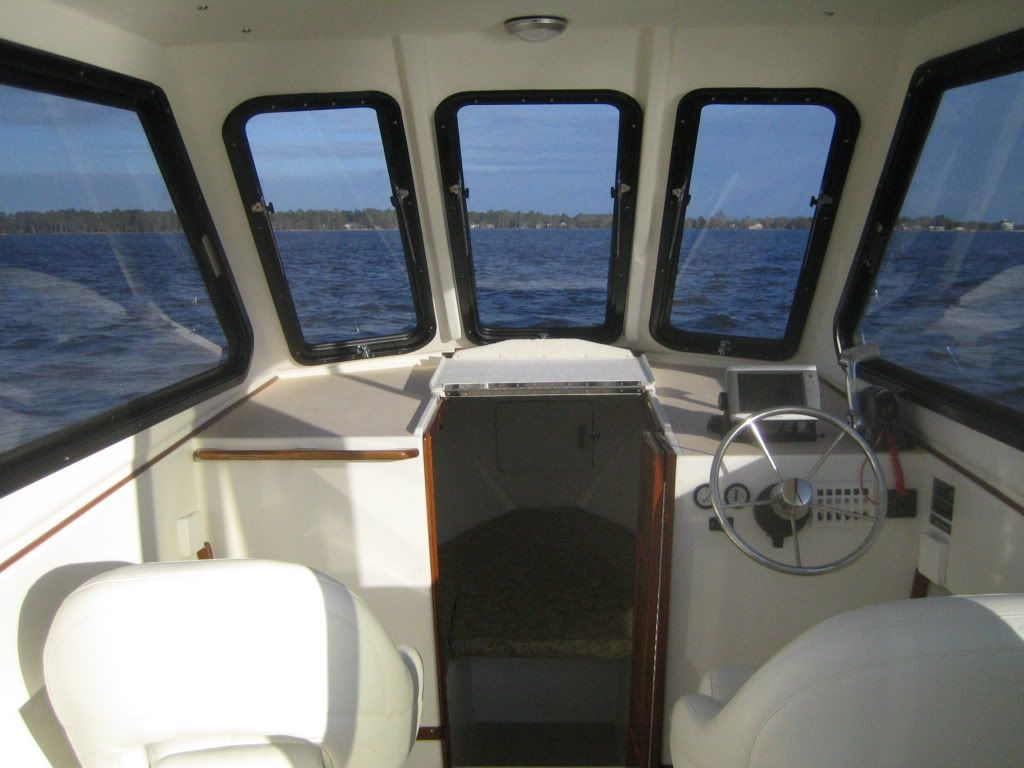 The main purpose behind the top/cabin was protection from the elements during cold weather boating. An aft bulkhead with doors was the final step, and installed last weekend. The 1/2" King XL Starboard and 1/8" lexan are pretty light, but the Starboard is too flexible and will need stiffening on the door edges - another minor project to ponder. 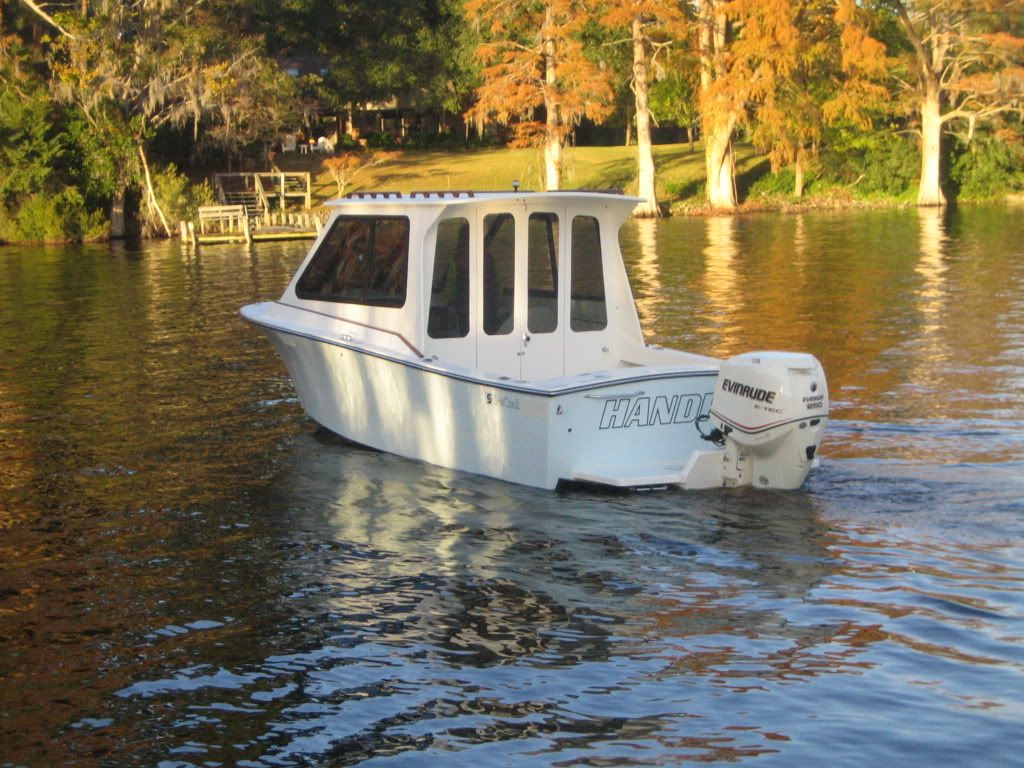 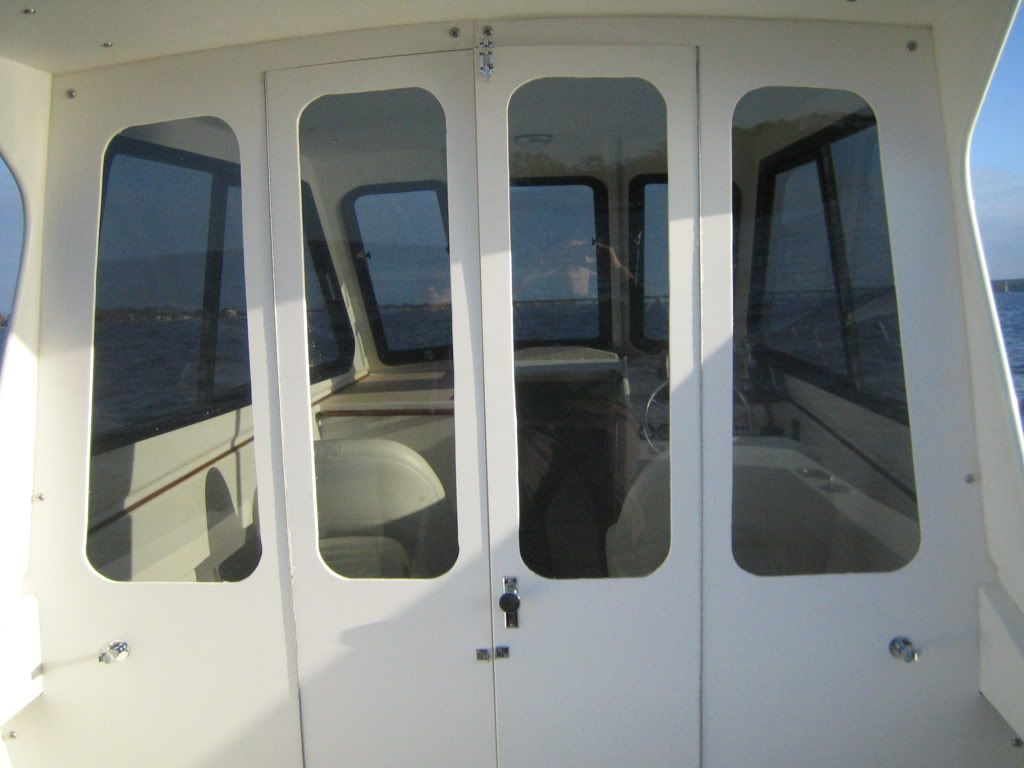 Double doors allow a large opening, and the ability to remove the hatch over the fuel tank. 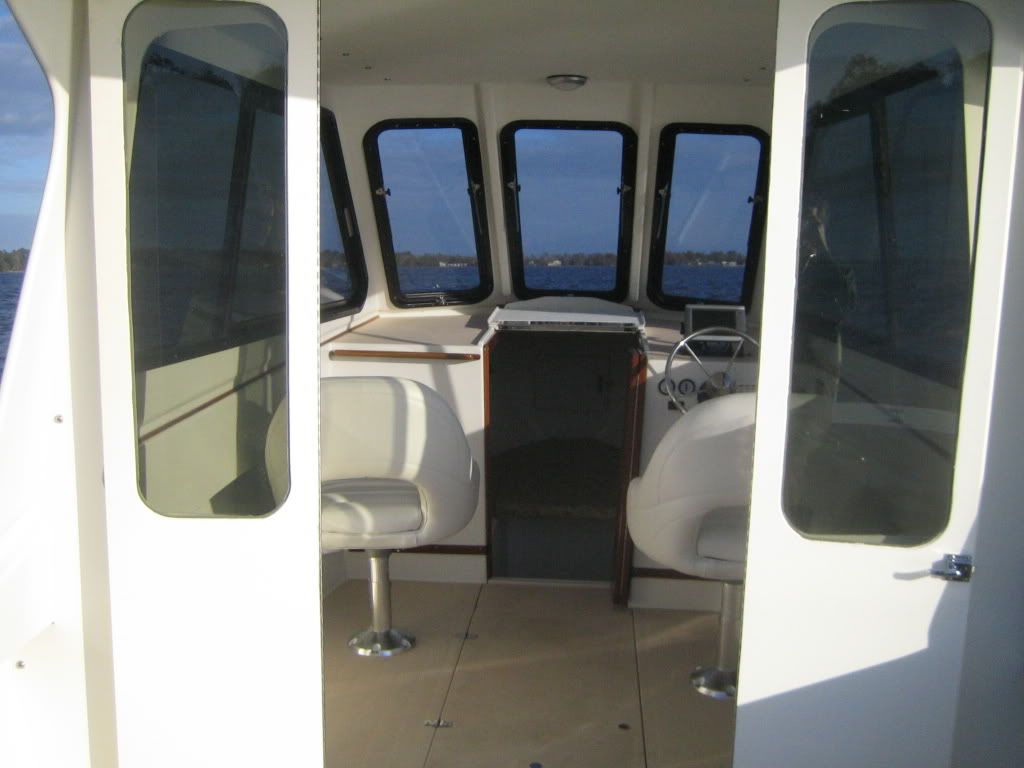 That's home base in the background.  I found some 15' flexible LED strips for sale on Amazon, but they weren't waterproof, so I inserted them into cheap clear plastic tubing and sealed the ends with silicone. They run the full length of the gunnel and are on a dimmer. A leftover piece lights the wiring behind the helm station. You can see the "Mr. Buddy" propane heater in the forward cabin, which will provide way more heat than needed. 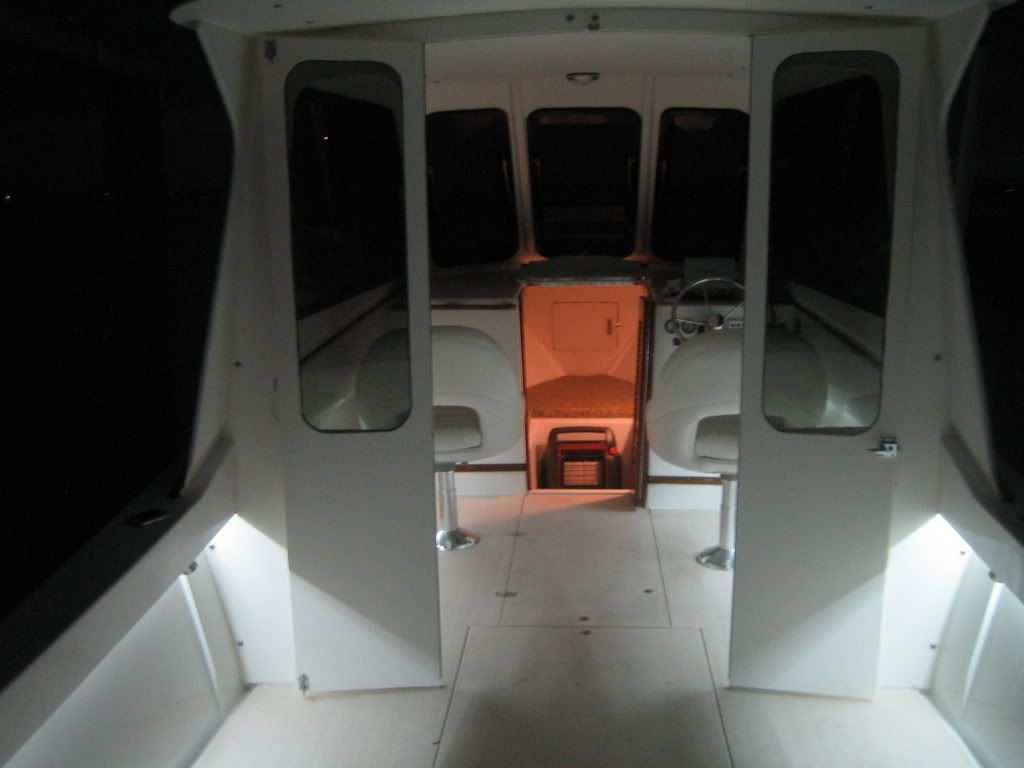 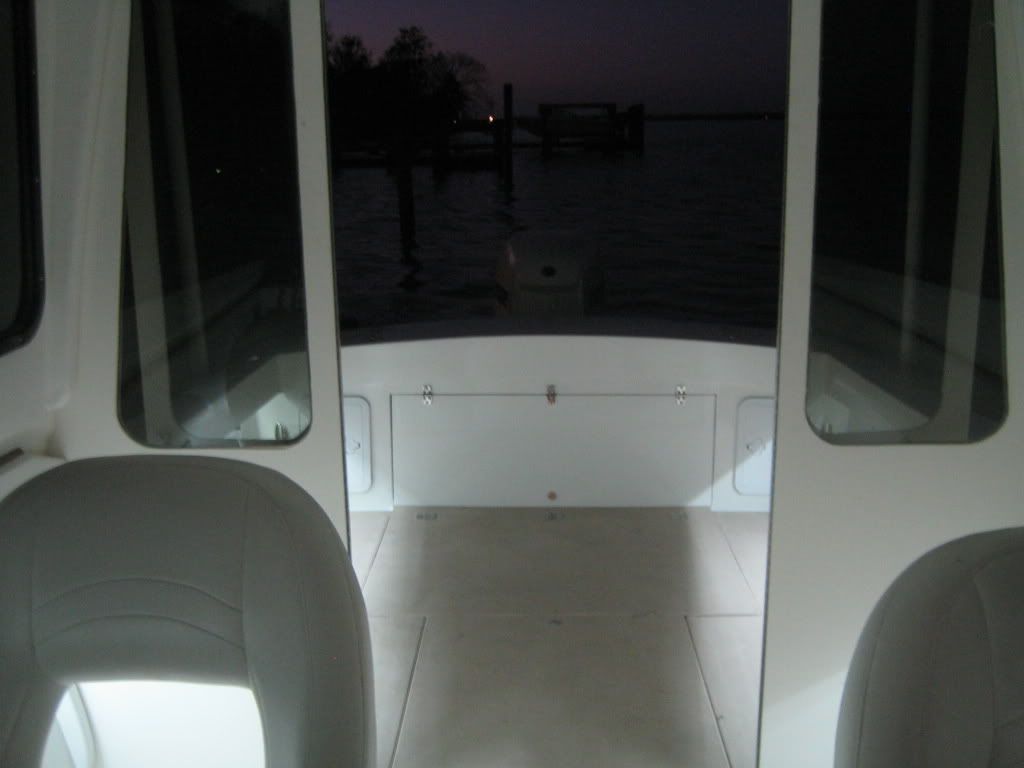 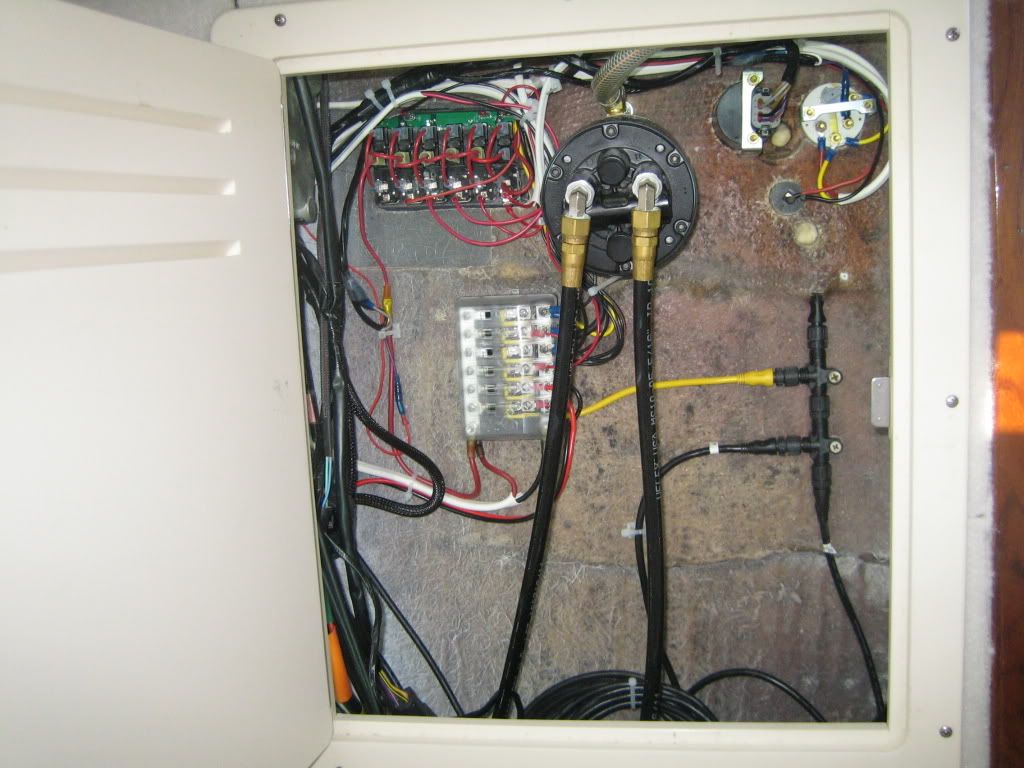 Ample storage and easy access was one of my fantasies, so the conversion from I/O to outboard bracket provided some readily accessible bonus space. The I/O engine compartment floor is easily removed. (I didn't have the skill to do water channels in the hatch - a future project.) 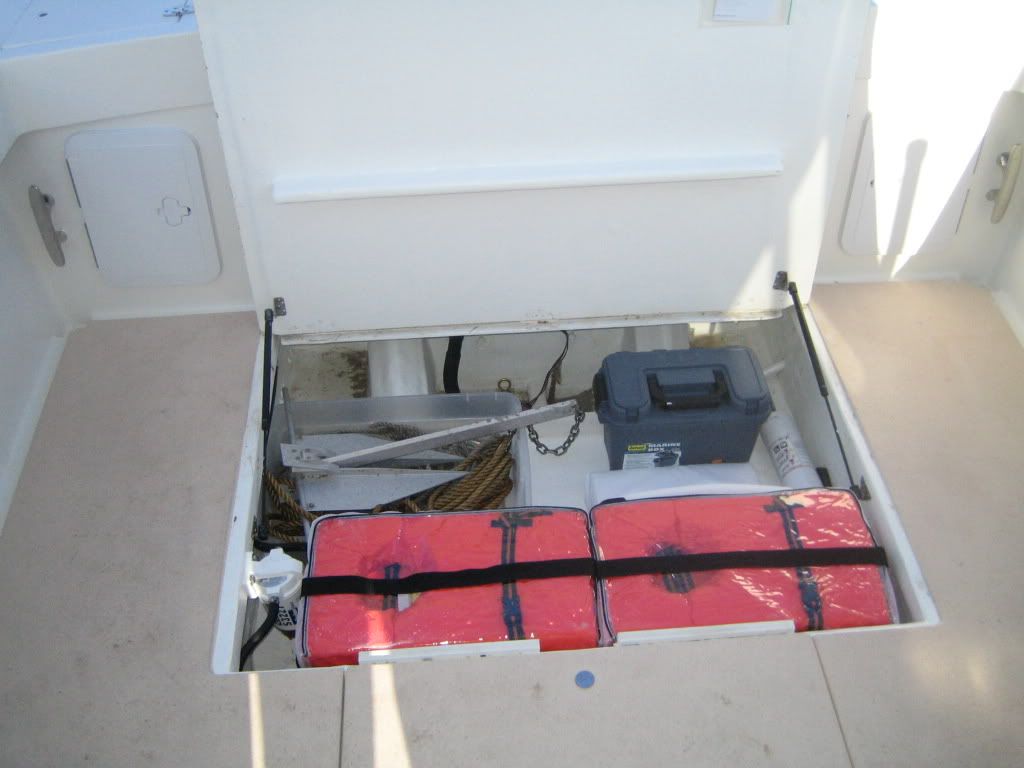 There is a removable 3-section PVC shelf that runs across the transom for the oil tank, battery, etc. The door is held up/closed with neodymium magnets, which are scary strong. 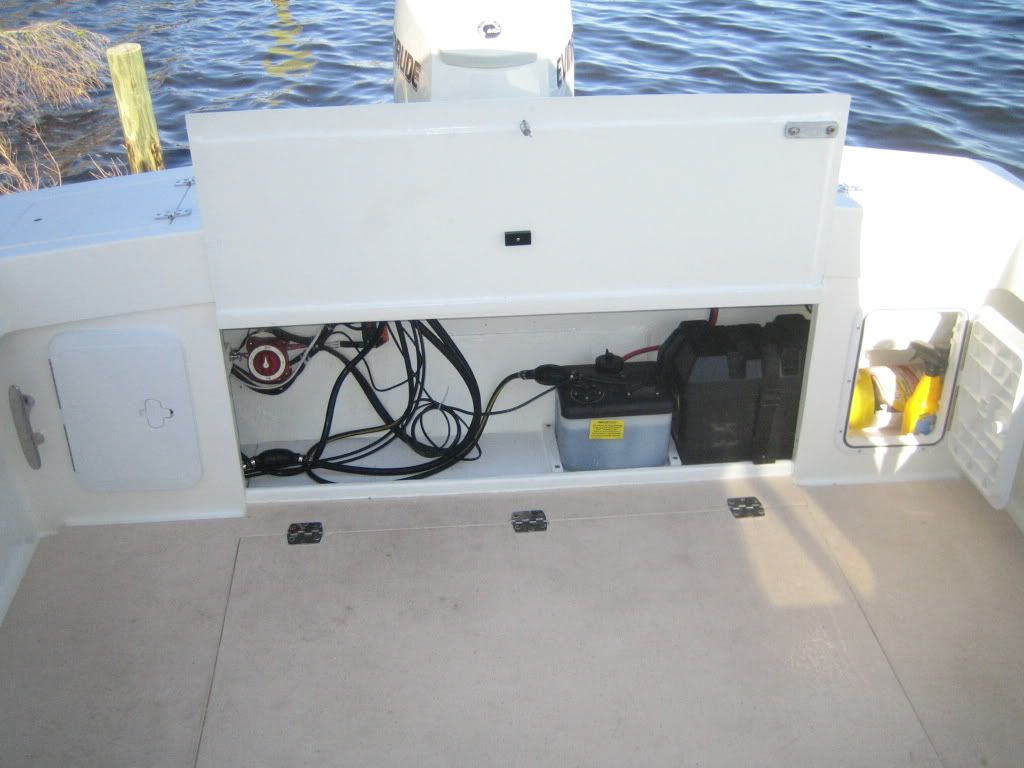 On the reported performance, I mistakenly stated 30 mph at 3,000 rpm and 3 mpg. That should have been 4,000 rpm. This was a huge project for me and I am thrilled with the results. Thanks everybody for all the positive comments, and for the contributions of some very talented and dedicated people to the forum. I couldn't have done it without you!!!
|
 |
|
|


 Hybrid Mode
