
|
|
#11
 11-17-2006, 12:29 PM
|
|||
|
|||
|
The NEMA box is a Radio Shack "Project Box". It's plastic and has a screw on cover.
There is a piece of Starboard mounted in it and the terminal board screw's to that. It get's it out of the bottom of the box to work on easier. Terminal strip was from Radio Shack too. There are hole's drilled in the box to match the grommet size needed for the particular wire size. Small tye wrap's on each side of the grommet's to act as a strain relief. 
|
|
#12
11-17-2006, 12:42 PM
|
|||
|
|||
|
Quote:
The "power pak"s are for the fly by wire control's. Those are the servo's. Wiring is connected to those and it convert's it to mechanical action the move the shift/throttle cables. That the only place the cables hook up. It 'ain't cheap! Those box's are stainless and weigh 10lbs ea. These are the conversion kit's to change a factory control to a fly by wire setup. http://www.techmarine.com/ 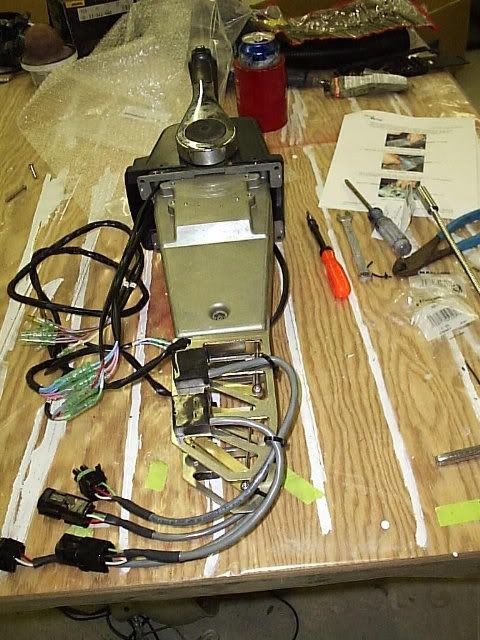 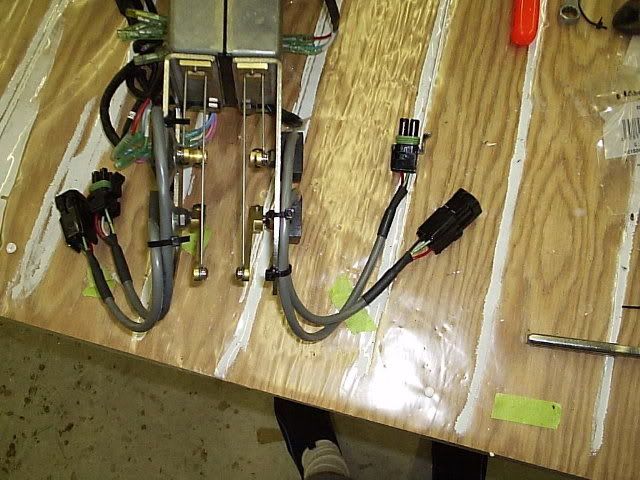 The only pix I have of the switch's right now is not quite complete in the pix.  A 8 gang Blue Sea's switch panel goes in that hole above the helm.
|
|
#13
11-17-2006, 12:46 PM
|
|||
|
|||
|
I'm trying to figure out the attachments on that PowerPak...
the rods and levers...looks like offsets to mount something over it too. It is an AWESOME job...
|
|
#14
11-17-2006, 04:10 PM
|
|||
|
|||
|
Very nice indeed!!! Trick controls too!! I'm also looking into the Blue Seas switch panels. It looks like with their switches you have to have seperate anchor/nav. switches as opposed to the old pull/3-ways.
|
|
#15
11-17-2006, 04:18 PM
|
|||
|
|||
|
Reelescape- you do have to seperate the anchor and nav lights. what sux is when you have a masthead and a seperate sternlight where you really need that 3 way switch to make the aft side of the masthead go out when you want running lights alone. I think I have it figured out though. (gotta put a jumper wire from running light switch to one/fwd masthead wire on the anchor switch)
__________________
"Lifes too short to own an ugly boat"
|
|
#17
11-17-2006, 06:41 PM
|
|||
|
|||
|
Quote:
|
|
#18
11-17-2006, 06:49 PM
|
|||
|
|||
|
As to the 2 switch methiod. You don't need it.
But you do need to order switch 8220 Double Pole- Double Throw. ON/OFF/ON. http://www.bluesea.com/product.asp?P...=7459&l2=7489#
|
|
#19
11-18-2006, 11:27 AM
|
|||
|
|||
|
Rookie question, but why use so many terminal posts and bus bars? Is it to save wire? They seem like open accidents and trouble spots just waiting to happen, plus they have to add to maintenance.
|
|
#20
11-19-2006, 02:33 AM
|
|||
|
|||
|
I'm sure your referring to the one in the back. It is coated with fluid film to protect it. That is the connection point for all the pump's and float switch's.
Ok, now think about this. Most boat's have the wiring all crimped and sealed for these and that's fine untill you have a problem and need to do some testing. Then you take a test light and stab the insulation to test for power. You have just screwed up the watertite integrity of the wiring.  So enter the terminal board into the system. Now I can prop the terminal's for power. I can also do a quicker componet swap too. Here's the drawing. 
|
 |
|
|


 Linear Mode

