
|
|
#31
 06-20-2009, 12:09 AM
|
|||
|
|||
|
grgrmouse,
the layup was three consecutive layers of a 15 oz biax. After knocking off the sheen with 40 grit, I followed it by tieing in the stringers with an 8.0 lb structural foam and using the same biax with alternating layers of woven roven to glass them in. I did install 1/2" drain tubes through the stringers but didn't post any close up pics. My supply man has been short on the woven roven material but I intend to beef up the transom corners of the existing substrate with roven, 1708 and finish with a final layer of biax when my material finally arrives.
__________________
Will 
|
|
#32
06-20-2009, 12:20 AM
|
|||
|
|||
|
Big Lew,
I'm heading your way for the Independence Day weekend. Got to get out of this heat and looking forward to the NE this time of year. Your advice on the anti sieze is well taken and something I've given consideration to. One of the wise owls on this site has pointed me to a synthetic material that I think I can laminate into my deck that should give me the strength I'm looking for. When I get to that point I'll post the procedure in advance so I can get called out on any potential problems. Thanks for the laugh with your descriptive terms, good to know someone else has twisted humour.
__________________
Will
|
|
#33
06-21-2009, 06:05 PM
|
|||
|
|||
|
Quote:
__________________
20' Mako 175 'rude Sacto, CA looking for a landlocked 23'-25' Seacraft  http://classicmako.com/forum/topic.asp?TOPIC_ID=13979
|
|
#35
06-23-2009, 09:58 PM
|
|||
|
|||
|
Some progress over the weekend:
After the "dry" fit I took a 1/2" drill and made some shallow holes between the two pieces that were epoxied together and in the bottom of the piece that would attach to the stringer to give the thickened epoxy some "tooth". 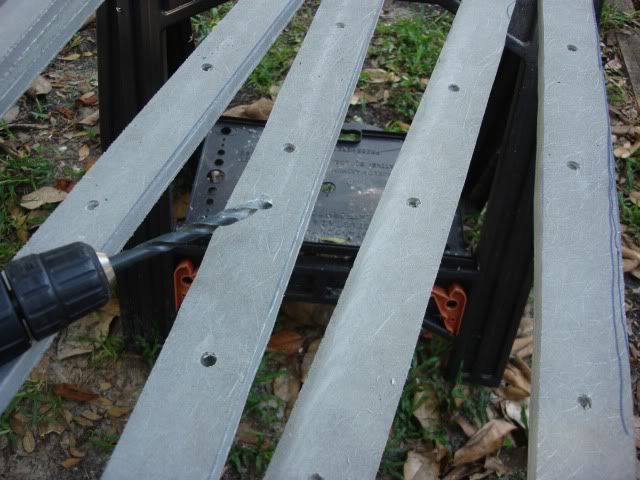 After setting the pieces in place and a letting the epoxy set up, I glassed in the new smaller center drain tube. 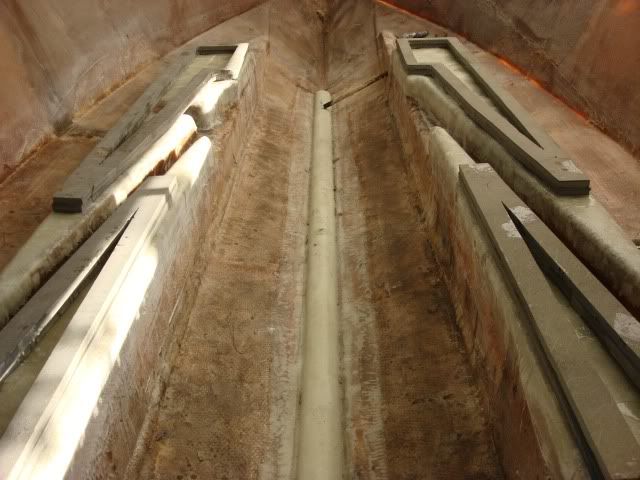 Today after work, I wasn't ready to start anything inside the hull (still planning my next move) so I decided to see what I could do with the center console. I priced some new ones a while back but thought modifying the original would be more prudent than dropping a grand on a new one. The area to be removed had been marked with a sharpie a while back so all I had to do was to do was start cutting. 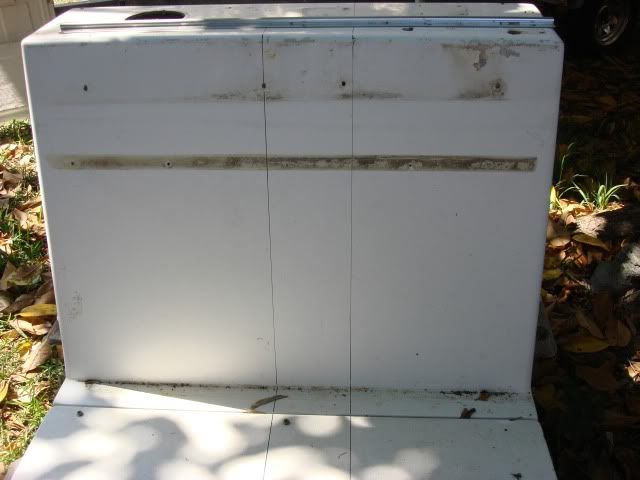 I removed 6" from the original which took the outside dimensions at the top from 37" to 31". I like the forward compartment for storage and have thought about putting the batteries in there or turning it into a cooler. I cut the original lid as well that is resting in the foreground. 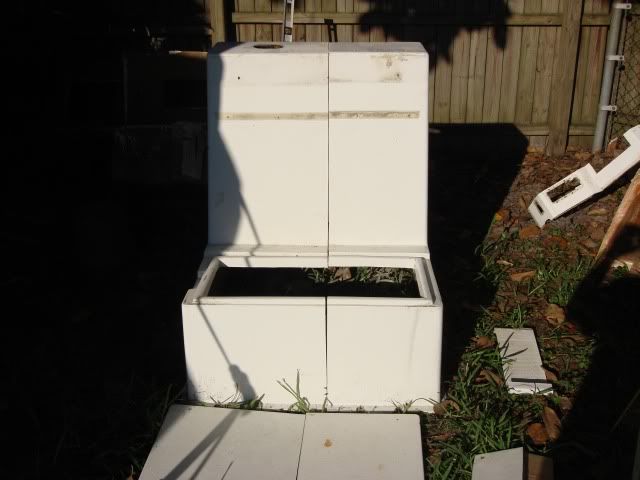
__________________
Will
|
|
#37
06-26-2009, 11:09 PM
|
|||
|
|||
|
kinda late chimming in here, but for the bolts, I wouldn't use "never sieze", it has copper in it, between the aluminum, stainless steel and copper it would just all sieze up together, use a product called "tef gel" you won't be dissapointed, your project looks great, good choice of materials.
|
|
#38
06-27-2009, 11:58 AM
|
|||
|
|||
|
Tuf Gel. Works great!
GFS Cayman are you doin a crossing this month? 
|
|
#39
06-28-2009, 10:09 PM
|
|||
|
|||
|
Nathan, the reason I went with the 15 oz biax was that I understood it could be used in a variety of applications and I was also able get a roll of it for a good price. It will require more layers to reach the same thickness as using a heavier cloth but has worked well for me so far.
__________________
Will
|
|
#40
06-28-2009, 10:16 PM
|
|||
|
|||
|
Thanks for the compliment Caymanboy, I'm leaning towards using a material called Garolite for the backing of my console, leaning post, etc. Reading the specs on it, the material is similar to what is used in electrical circuit boards and is very dense, waterproof and composed of epoxy and woven fibers.
__________________
Will
|
 |
|
|


 Linear Mode

