
|
|
|
|
#1
 06-07-2010, 07:51 PM
|
|||
|
|||
|
When I cut out the front of my tank coffin to install a 60 gallon tank, the only place I saw the putty was on the stringers and where the drain is.
__________________
" I'm the one thats got to die when its time for me to die; so let me live my life, the way I want to". J. M. Hendrix 
|
|
#2
06-08-2010, 03:09 AM
|
|||
|
|||
|
Quote:
__________________
1975 Seacraft 18SF w/2004 150hp Johnson 2-stroke on a 26" bracket
|
|
#3
06-08-2010, 06:53 PM
|
|||
|
|||
|
Hope it goes well. Please take lots of pics when you pull it. Maybe I can get you to email them to me if you don't post them all. I would appreciate it.
__________________
1975 SF18/ 2002 DF140 1972 15' MonArk/ 1972 Merc 50 http://i833.photobucket.com/albums/z...photos/SC3.jpg
|
|
#4
06-09-2010, 11:23 PM
|
|||
|
|||
|
Well tonight we got the pilot holes drilled in the bracket and thru the transom for the bracket bolts. We wanted to go ahead and drill thru the transom so we can fiberglass some 1/4" solid fiberglass panel on the inside of the transom where the bolts will be. I am hoping this will help spread the compression out from the head of the bolts when we mount it permanently. It will act like a backer plate. It probably doesnt need it but I want to make sure the transom is plenty strong where the bolts go thru. I was a little worried that there wouldnt be enough clearance between the bottom of the bracket and the bottom of the boat for the trim tabs to mount. After we marked where the bracket would be I held the tabs up to the boat and they fit just fine. That was a big relief. I will post more as we make progress. Thanks, Adam
__________________
1975 Seacraft 18SF w/2004 150hp Johnson 2-stroke on a 26" bracket
|
|
#5
06-11-2010, 11:13 PM
|
|||
|
|||
|
I pressure tested the gas tank last night. Everything was good it still had the 4lbs of air in it this morning. We put a layer of glass on the gas tank to help give it some protection from rubbing and from moisture if any was to get around it in the foam. Thats all for now. When we get the gas tank and water tank mounted I will post some more pics.
__________________
1975 Seacraft 18SF w/2004 150hp Johnson 2-stroke on a 26" bracket
|
|
#6
06-13-2010, 01:59 PM
|
|||
|
|||
|
I am going to use awlgrip paint on the outside of the hull, bracket, console, and top deck. I was wondering.....would I be better to use awlgrip paint and nonskid on the floor or should I use gelcoat on the floor. I dont know what would hold up better for walking on. I know the finish will look different. I think I like how the awlgrip looks better but I would rather have the tougher finish so it will last.....I guess. I just am not sure. Also I am thinking of going with Aqua Mist color. I was wondering if anyone has used this color and if they have any pics of it on a boat. Thanks, Adam
__________________
1975 Seacraft 18SF w/2004 150hp Johnson 2-stroke on a 26" bracket
|
|
#7
06-15-2010, 11:40 PM
|
|||
|
|||
|
Well tonight we popped the remaining liner loose from the hull. We put a floor jack under the front bulkhead and took out all the screws in the gunwale. It popped loose much easier than I had expected. I am not sure I could have taken the liner and cap out unless the floor was out already. The plan is as of right now is to screw the liner back where is was. Then build the box across the transom and put the gunwale inserts back on and tab them in place. Then we are going to pull the whole liner out in one piece, minus the floor. If I do it like this, the floor can be put in all the way to the hull on the sides and the transom. I think this will make it much stronger. We are going to try and work on the rear box saturday and I will try to post some pics of the progress.
__________________
1975 Seacraft 18SF w/2004 150hp Johnson 2-stroke on a 26" bracket
|
|
#8
06-20-2010, 02:21 AM
|
|||
|
|||
|
I had to work today and didnt think anything was going to get done to my boat but my brother-in-law took it upon his self to start on the box in the stern. He screwed the old boxes I had cut out back in the boat and attached it to the liner with pieces of wood to hold it. Then put a 2x4 across the front so it would hold them the same distance apart like they were before I cut the floor out. Here are some pictures of what he did.
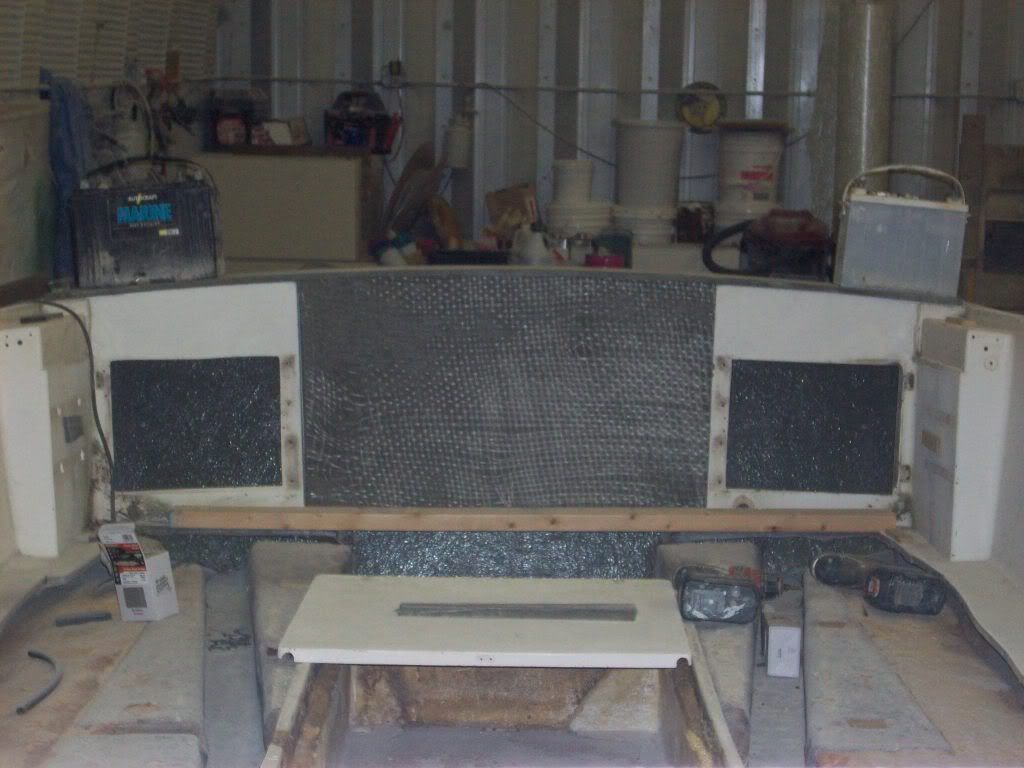 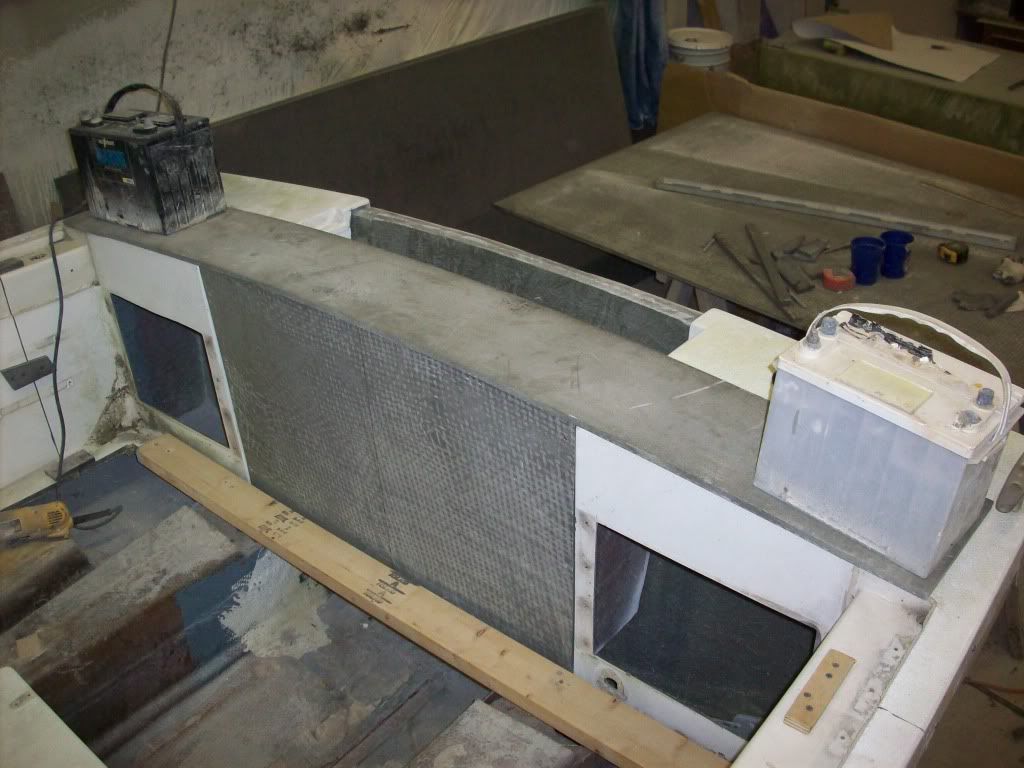 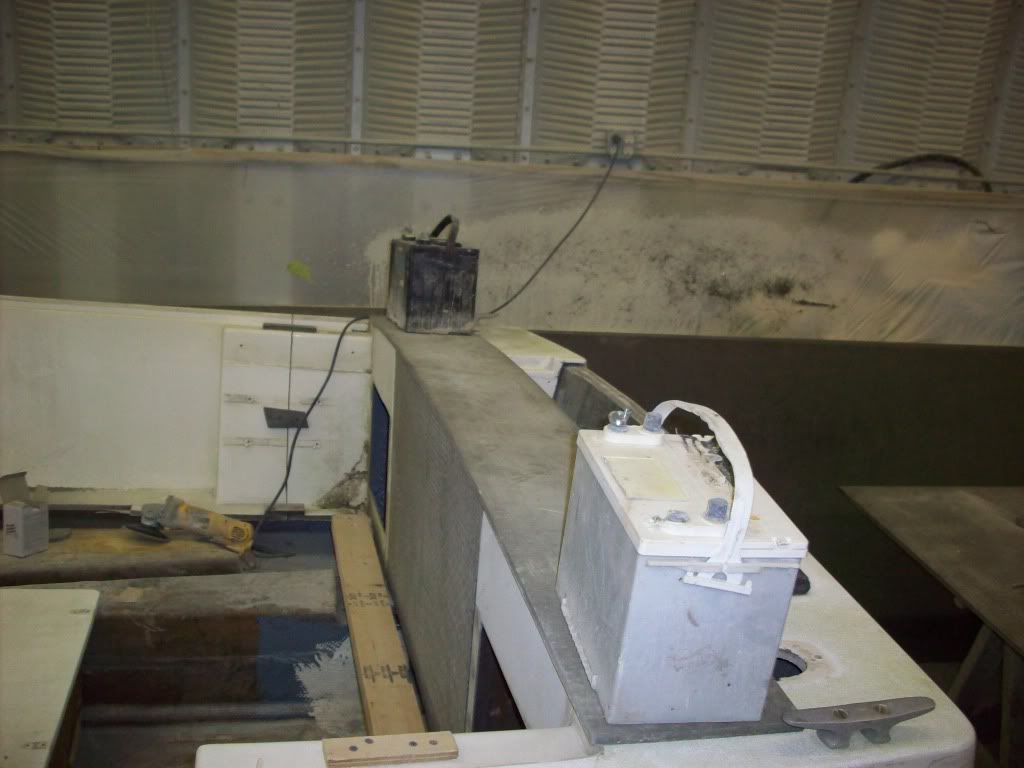 He layed a piece of penski board across the top and put batteries on either side to continue the crown of the stern across the void where the motor cutout was. Then cut a piece of penski to fit for the front of the transom box. After we get the rest of the box completed and all glassed together I am hoping the liner with a few braces, will be sturdy enough to remove the whole liner in one piece. I guess we will see. I am hoping to make some more progress next week. If anyone has any ideas on how to configure the hatches/storage in the rear box let me hear it. I am not sure what to do about that. Anyone with a full transom and wants to post some pics of yours maybe that will give me some ideas. Thanks, Adam
__________________
1975 Seacraft 18SF w/2004 150hp Johnson 2-stroke on a 26" bracket
|
 |
|
|


 Hybrid Mode
