
 |
|
#1
|
|||
|
|||
|
Aloha!
So I'm helping my friend get his boat back on water. He calls it ours (he's the money, I'm the muscle). It's a 72 seafari 25. Originally twin I/o's converted to an outboard. I've been inspired by Strick and Blue_Heron on here. don't expect to be in the same league budget or craftsmanship. But with the boards knowledge. I'm gonna do some stuff to it. Saltwater fishing/cruiser boat. In it's current config. It's made the trip from big island to Maui which is really saying something as the channel means "strong blowing winds". Needs: Trailer Transom Outboard bracket Helm Painting Hardtop Electrical Fuel Fiberglassing Interior It's been sitting 3 years. Got the motor started. Now onto body work. 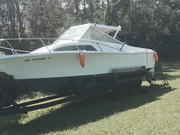
|
|
#2
|
|||
|
|||
|
Nice project. 25 seafari in Hawaii . . . did you get this from bigfluke?
|
|
#3
|
|||
|
|||
|
Don't think so. We are on Big Island, Hilo area. Big Fluke in Hawaii too?
----------- So let's start at the beginning. My buddy (hereafter we) purchased this boat. We went out to tow it home. Yes, that is a steel boxed rail frame trailer used exclusively in saltwater here. It has seen better days. The PO had to weld a gusset b/c it had so many holes it didn't throw a shadow. The grease caps are missing and it took a whole tube of grease to repackage the zinc fittings for the short but off road and down a mountain journey to our boatyard (my backyard). The surge brakes are bone dry and ft he cap was immovable. The hitch is so rusty that we weren't even sure it locked in place but we successfully made the trip. We are trying to get a local brothah to weld us an aluminum one. In meanwhile, new actuator, winch, strap, and brakes are on way.      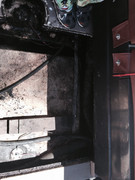 After taking a look at the boat. That is a truck bed tool box on right that has a foam seat on top. And a DIY wood box on left with a foam seat on top. Both had their own ecosystems going from the foam used. Ingenious but time for some upgrades. 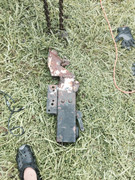  We decided to prioritize engine repair, fuel system, and electrical system. Engine Wouldn't start and no spark. 3 year old gas. Stink of the fuel tanks was enough to make me puke...literally. This is the hose drain plug Suzuki installed. This is a picture of dried salt that has been sitting in here for years. Took a while but it is cleaned out now. Still need to clean injectors, replace all rubber hoses and on and on the story goes. But hey, she's running! Motor dried salt   You might call this a redneck repair. We call this island Effeciency. Or you know you puna when... Motor and bracket   It actually worked quite well according to PO. My friend and I decided we weren't gonna try it out. We are replacing with a Hermco style double with swim from a local builder. During the course of investigation, we found rotten transom and partially rotten rib (battery boxes are) due to swamp pictured below. I have been inspired by Blue_Heron and I will grind down fiberglass install foam and glass it in to try to funnel this out.... Transom first, rib second... More updates to come. We built a gantry crane and an engine stand. The engine has been removed. The outboard bracket has been removed. The DIY rigging sleeve has been removed. On to cutting back the deck and transom removal. Trying not to remove the cap if I can help it. Wish me luck... |
|
#4
|
|||
|
|||
|
Too bad you're not close by, there's a "metal scavenger" guy who comes through the neighborhood about every week or so. He will actually cut the trailer up and haul it away to sell as scrap, which would be nice and convenient for you and your trailer

|
|
#5
|
|||
|
|||
|
BIG project, my sympathy, but the first time you take it out in rough water, you will know for sure it was worth it.
There is so much room under the deck, you will be able to do most anything you need to do without pulling the cap ( skinny and flexible helps). Pull the fuel tanks, cut an access hole between the bunks and you should be golden. Be sure to reinforce the forward section of the hull, Potter made a mistake when he omitted the water ballast tank and did not add some reinforcement to take care of the reinforcing that was omitted. Welcome to CSC and good luck with a great project |
|
#6
|
|||
|
|||
|
Ty cd. I'm not sure we'd attempt this stuff without this board. Great info and people here.
--------- So we built a gantry crane and engine stand. The crane will serve multiple purposes: Engine removal Trailer removal Boat safety during sanding And many other vehicle repairs. 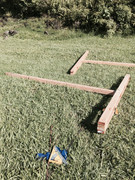 The engine stand works great. Decided to bolt it back down. Was just a little too wobbly otherwise. But it's holding up the 340lb beast great. If you want the plans just pm me. 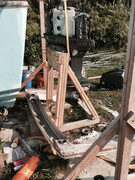 The swim deck and bracket are removed. Now have 24 holes to patch. Removed the tub section to access transom. Wish I would have just cut the cap now.... Transom has some weird bolts in back of it in top edge (may not be pictures. Below is the rot and precious repairs) but they don't go through the fiberglass maybe lag bolts. Will check this out later. Any ideas appreciated. You can see previous repairs are areas of leakage and time to just git'r done. 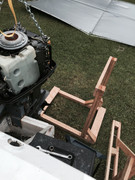 Unwrapped this rigging tape. I'm not familiar with it but looks like saltwater has really done a number on some cables here. They'll be replaced. We have a new rigging sleeve on order. Gonna look around CSC for good ways to route this under deck in tub so it's not visible and more protected. If anybody has ideas, please share. Been siphoning gas for a while. Planning to get the tanks out for a cleaning. check under deck and bulkheads for reinforcement and this drainage idea of using foam and fiberglass to eliminate the swamp. Gonna be relocating the batteries forward to counter balance the outboard... Eventually will get around to removing this hardtop but I'm focusing on getting this transom done and unrigging everything. Lots and lots of labeling/deconstruction. All in all a really good day. |
|
#7
|
|||
|
|||
|
Help needed please....
Anyone know what the stringers are made of on a 72? Wood, foam, hollow? I've found termites in the transom, so I'm doing major investigation, now. |
|
#8
|
|||
|
|||
|
Should be foam filled hollow glass
|
|
#9
|
|||
|
|||
|
Sorry for the delay, lots going on in life and research. Gas tanks are removed they were wrapped in fiberglass. I'll have to pressure test and see why that was done.
 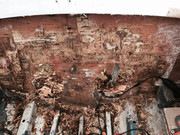 We found the transom was rotten in our deconstruction. Massive water damage and inadequate glass work. The keyholes were glasses with a coating of 1708 and then had multiple holes drilled in them. In addition, we found termites in the upper portion of the transom (picture below): It's taken hours and hours to remove this thing. 1. Remove fiberglass covering plywood in roughly 2' squares for ease of removal. (In retrospect I wish I had put a circular saw set to depth of 1 7/8 on a 2 1/4 deep wood piece) to make this so much easier on #1 &3) 2. Rotten wood was very easy to remove. 3. Began cutting around edges and making cuts for wood to break on. Burned through lots of oscillating blades here. 4. Various chisels, pry bars, sanding to get out the various plys. 5. I finally got enough leverage to take out some serious chunks after finding the staples and removing. 6. Pic below is roughly 1/4" wood. Below that is a ply skin soaked with the resin and below that is the CSM fibers. I have located some meranti marine grade plywood. Only 1 provider on my side of island. Now have 3-3/4" 4x8 sheets just waiting to go in. To do finish removal. Grind down delaminating (or disbonded) fiberglass at bottom of transom. Hull Repair work: 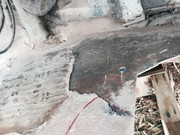  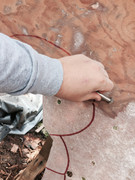 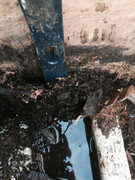 Patch inboard holes properly 1. will layup 2 layers of 1.5 oz CSM and a layer of 18oz roving inside of tub (may do this 2x for strength? Or any suggestions on a unidirectional cloth? 2. Grind down exterior around 3" out and layup 1708 from outside in overlapping from big to small 6 or more plys.... 3. Pva, cure, fair and sand. 4. Make cardboard template for plywood 5. Start prepping plywood (glue and glass) 6. Glass it in. 7. Move on to other things (electrical, fuel, hardtop, painting, helm controls, cabin, for starters...) Ps have I told you how much I love this boat? Suggestions on cutting back stringers? Filling them with float foam? Will end up with several coats of fiberglass (3 fill internal hull) (3on transom) (3 backside of transom) If I'm messing up please give me a suggestion. Thanks! |
|
#10
|
|||
|
|||
|
lots has gone on in the last year or so.... I didn't post as regularly as I should...
I had kidney stones take my life apart last year. In January, I had a kidney stone attack. I had to have 6 surgeries last year to remove them. Sadly, I've had them before and they can't tell me how to avoid them. here's some updates and some things I'm not sure I did right, but that's how you learn. Control cables and such gone 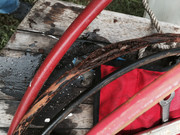 fuel tanks removed and demo nearly done 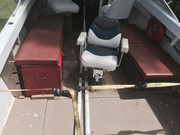 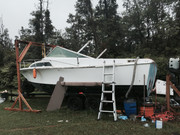 if you see this, you have issues: 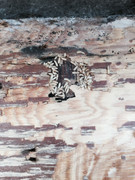 tap test  grinding area after locating good glass and chamfer in for new glass 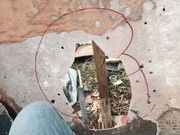 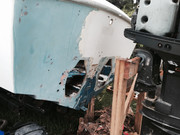     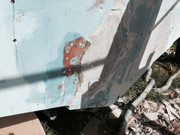 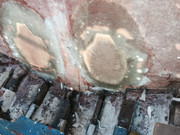 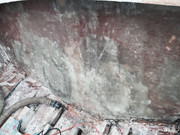 well that gets you caught up on the transom tear down and glass in keyholes drama |
 |
|
|