Classic SeaCraft Community  

Go Back   Classic SeaCraft Community > General Discussion > Repairs/Mods.
FAQ Community Calendar Today's Posts Search

Notices

Reply
 
Thread Tools Search this Thread Display Modes
  #1  
Old 05-19-2014, 11:07 PM
billythekid billythekid is offline
Senior Member
 
Join Date: Feb 2007
Location: NJ shore
Posts: 485
Default

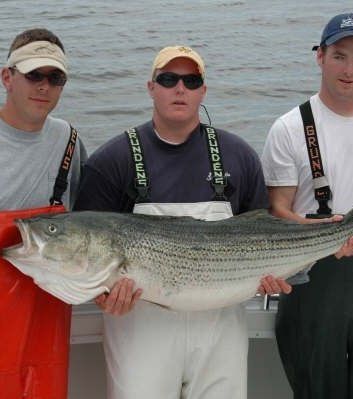
Strick its all the nuclear waste that make them big! fishing has been good and getting better.


I had a few hours and an extra set of hands this afternoon to help me get the deck out of the boat.

I have some work to do under the decks before the they go in permanently.

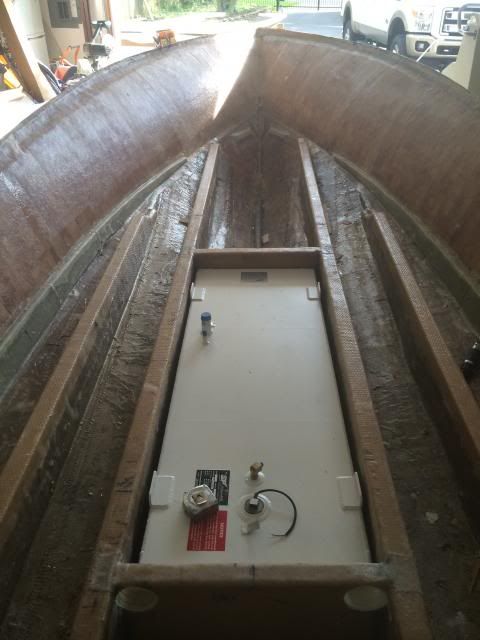
I installed the neoprene strips on the the beds for the tank, and started installing some sleeves for rigging. I cut the holes 1/4" bigger and fill around them with dynaglass thru a caulk tube. I cut the pvc a little bigger and then grind them flush with the hole.
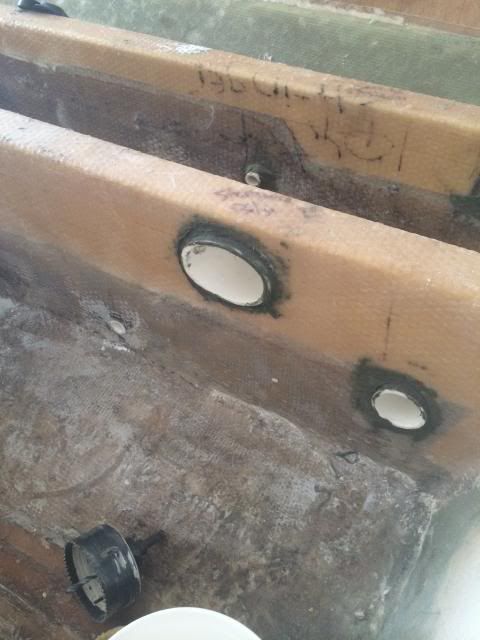


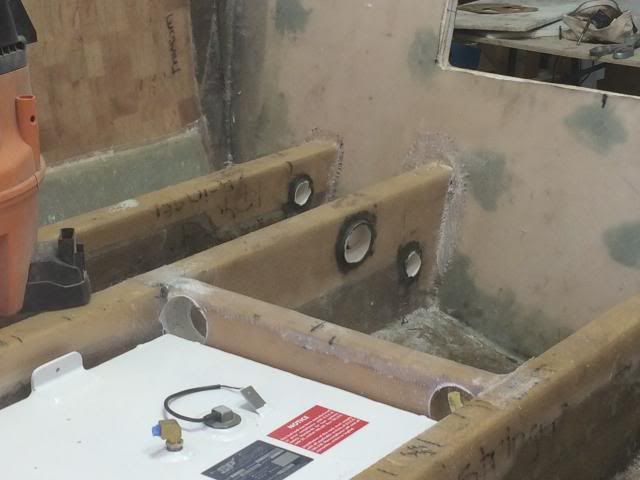
the gas tank grew by a half inch somewhere along the way and it is infront of the rigging tubes by a 1/2" its alright I am just gonna cut pvc to fit through the bulkhead and then deal with rigging


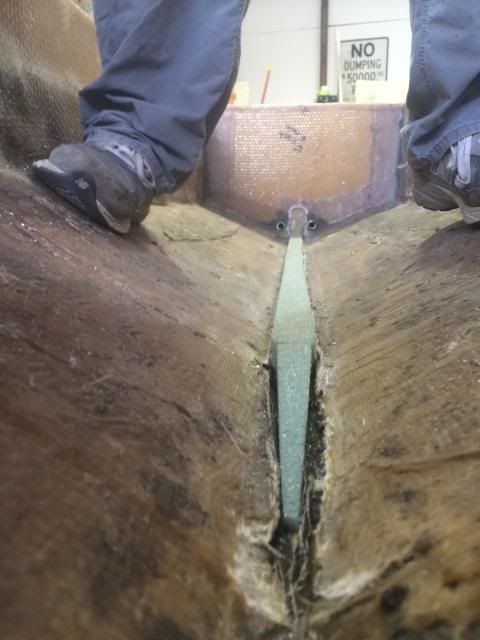
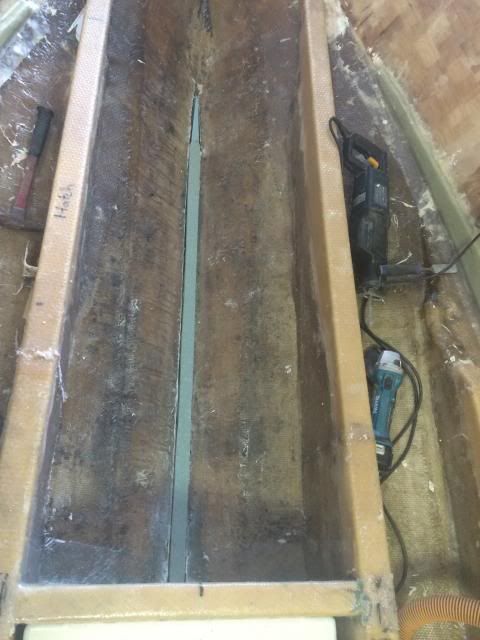
I couldn't deal with the stupid 2x4 going down through the center of the floor box so out it came, I cut a piece of 1" foam that I bonded in there and I am going layup a couple layers of mat and roving to smooth it out for gelcoat. the foam is 1.5" w and 2" tall to create a hard right angle for strength. the front floor box and the bilge will be white gelcoat.


and strick this one is for you. 51 pounds
__________________
36' Yellowfin
1972 20' seacraft 140 suzuki

http://www.classicseacraft.com/commu...ad.php?t=18607
Reply With Quote
  #2  
Old 05-24-2014, 09:53 PM
billythekid billythekid is offline
Senior Member
 
Join Date: Feb 2007
Location: NJ shore
Posts: 485
Default

alrighty finally ready to set the deck down inside and prep for bonding. I got the bilge all faired out and somewhat smooth, I installed a backing plate/ pad for the livewell pick up. I had to add another hole for the hoses to go places. I got the front fish box all glassed down and sanded with 60 grit.


After everything was sanded down and vacuumed the wiped with acetone, It got a coat of no wax gelcoat. I let it dry overnight then we layed down a coat of gelcoat with with wax. I did this with the little rollers with a velvet roller.


next order of business was securing the gas tank forever! I redrilled the holes because I had some choice 1/2"x 6" bolts. So I cut some backing plates out of some 1/4" scrap fiberglass. I coated the bolts in some tuff gell with the touched the tank and bolted everything into place.


I only have 1/4" clearance front and back which I think is a little on the tight side but it will be fine. plus the tank is 1/4" thick!


I used the expensive hose clamps for the fill and vent. in apposing directions


I know I know the grounding wire isn't heat shrinked... I just saw that myself
__________________
36' Yellowfin
1972 20' seacraft 140 suzuki

http://www.classicseacraft.com/commu...ad.php?t=18607
Reply With Quote
  #3  
Old 05-24-2014, 10:06 PM
billythekid billythekid is offline
Senior Member
 
Join Date: Feb 2007
Location: NJ shore
Posts: 485
Default

I finally got all the hardware to assemble the bilge. you don't realize how much hardware it takes to install all this crap!

I got some of the stuff roughed in before I gelcoated so if I made a mistake it wouldn't be hard to fix. The first thing I do is install pumps, fuel filter, thru hulls. then its time to run the wires and hoses. you can see the thru hull transducer( compliments of trayder) also I used the Yamaha stainless fuel filter housing to keep it from getting crappy.


then came in some more hoses for the livewell and wash down its start to get busy


I also installed a brass sleeve back through the bilge drain. I set it in 5200 and sealed it up on the outside. so with it glassed and sealed with 5200 it should last a long time. plus it gives it a clean look.


gonna get the deck set back in this week
__________________
36' Yellowfin
1972 20' seacraft 140 suzuki

http://www.classicseacraft.com/commu...ad.php?t=18607
Reply With Quote
  #4  
Old 05-27-2014, 10:00 PM
billythekid billythekid is offline
Senior Member
 
Join Date: Feb 2007
Location: NJ shore
Posts: 485
Default

I like to keep my workers moving till the end of the day, so I had to put the deck back in to make some measurement of rigging holes. I had them help me put the top cap back on so I could get a feel of what it was like. and I like it. the flush deck is the cats meow.


here is the shot from inside the floor box, the deck is sitting solid on the stringers.


shot of the bilge


I told her she had to help me sand the boat.

__________________
36' Yellowfin
1972 20' seacraft 140 suzuki

http://www.classicseacraft.com/commu...ad.php?t=18607
Reply With Quote
Reply


Posting Rules
You may not post new threads
You may not post replies
You may not post attachments
You may not edit your posts

BB code is On
Smilies are On
[IMG] code is On
HTML code is Off

Forum Jump


All times are GMT -4. The time now is 02:13 AM.


Powered by vBulletin® Version 3.8.7
Copyright ©2000 - 2025, vBulletin Solutions, Inc.
All original content © 2003-2013 ClassicSeacraft