Classic SeaCraft Community  

Go Back   Classic SeaCraft Community > Recovered Threads
FAQ Community Calendar Today's Posts Search

Notices

Reply
 
Thread Tools Search this Thread Display Modes
  #1  
Old 01-21-2015, 09:43 PM
bibijawa bibijawa is offline
Recovered
 
Join Date: Jun 2014
Posts: 80
Default Attaching the new transom core

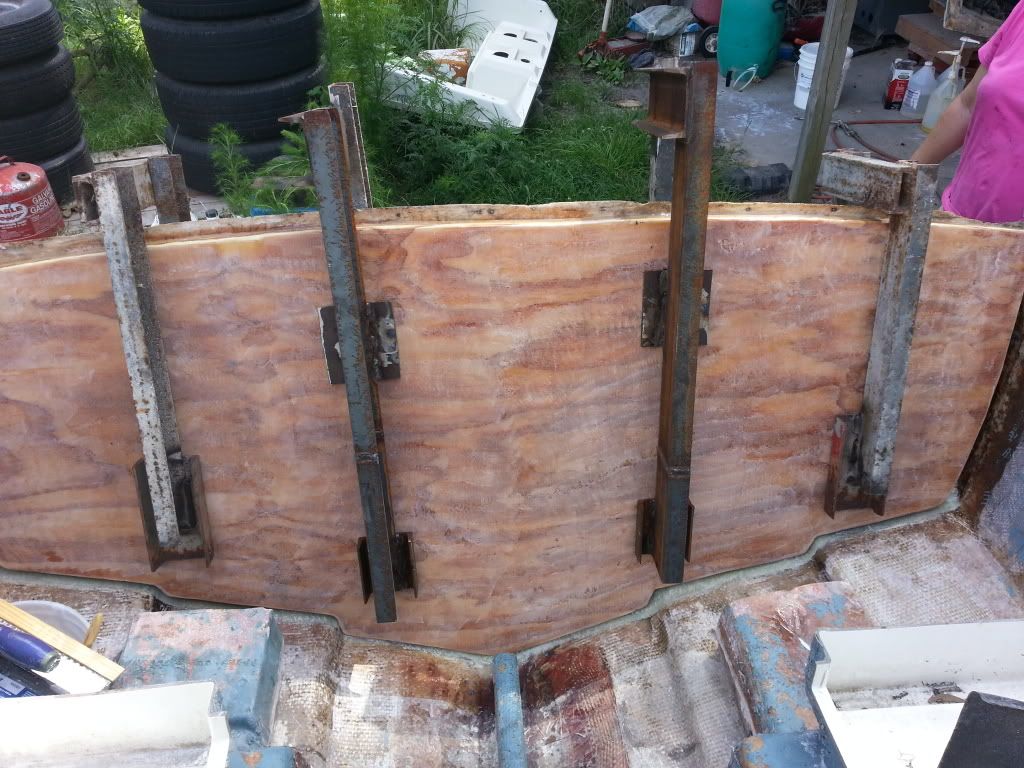
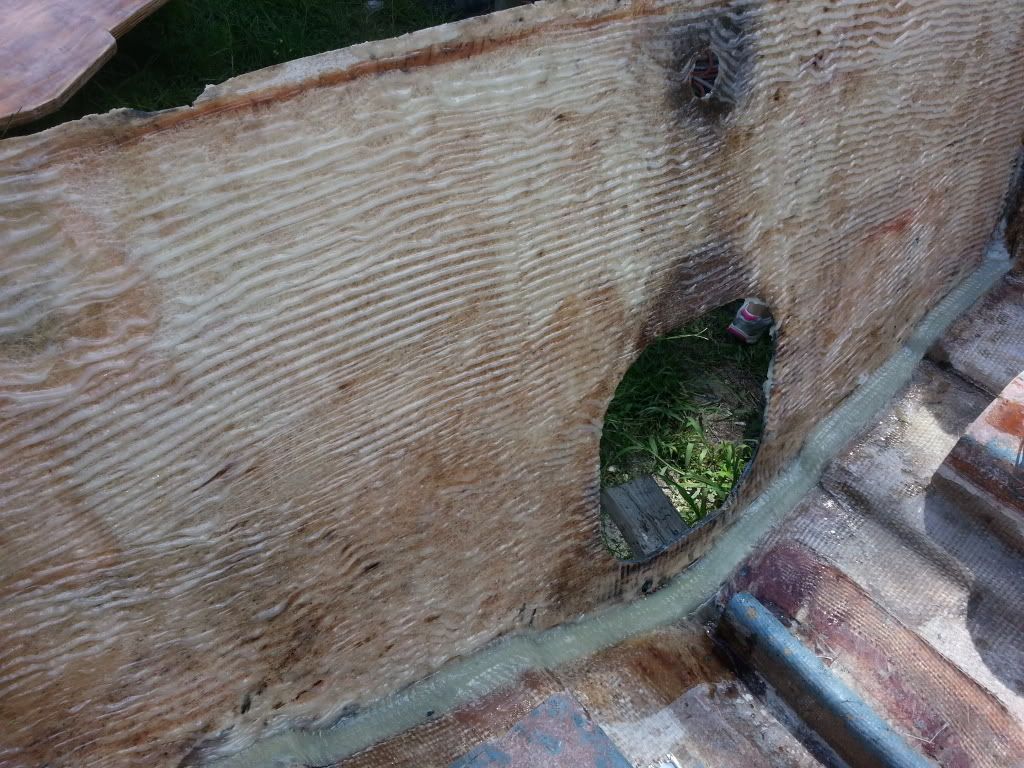
I've cut out the new 1 1/2" coosa transom core. I keep grinding here and there to get it to lay as close to the outside skin as possible but when I look down the top I can still see from 1/8" to 1/4" gaps in some places and I can't get it any closer. Is this normal or is it supposed to lay completely flat. I'm thinking when I apply a thick layer of thickened epoxy and clamp it all down all voids will be filled. Any suggestions or opinions on how to continue? I'm sorry I haven't posted any pictures but I just can't figure out how.
Reply With Quote
  #2  
Old 01-21-2015, 10:37 PM
Bushwacker Bushwacker is offline
Senior Member
 
Join Date: Feb 2007
Location: N. Palm Beach, Fl.
Posts: 2,456
Default

Drill some holes in coosa to allow cabosil to ooze out; use bolts/screws through existing transom skin to pull coosa up against inside skin. I'd install a layer or two of 1708 against inside skin, wrapped around 6-12" into hull sides and bottom and then try to install the cabosil/coosa while the 1708 is still tacky to get a good chemical bond. Get a couple guys to help with mixing resin and laying glass; refrigerate resin to maximize working time. And I'd use epoxy resin or at least vinyl ester resin for maximum bond strength.
__________________
'72 SeaFari/150E-Tec/Hermco Bracket, owned since 1975.
http://i188.photobucket.com/albums/z...Part2019-1.jpg
Reply With Quote
  #3  
Old 01-21-2015, 10:37 PM
billythekid billythekid is offline
Senior Member
 
Join Date: Feb 2007
Location: NJ shore
Posts: 485
Default

that is close enough you will need thickened epoxy or other type of bonding such as 2 layers of matt wetted out. make up either clamps or 2x4s inside and out bolted through to squeeze everything together
__________________
36' Yellowfin
1972 20' seacraft 140 suzuki

http://www.classicseacraft.com/commu...ad.php?t=18607
Reply With Quote
  #4  
Old 01-21-2015, 10:51 PM
bibijawa bibijawa is offline
Recovered
 
Join Date: Jun 2014
Posts: 80
Default

I'm using the U.S. composites 3:1 epoxy. So I should stick a layer of 1708 on the inside of the transom skin then when tacky spread the cabosil thickened epoxy on it and clamp the core with pre drilled holes in it so the epoxy can ooze out?
Reply With Quote
  #5  
Old 01-21-2015, 11:22 PM
Bushwacker Bushwacker is offline
Senior Member
 
Join Date: Feb 2007
Location: N. Palm Beach, Fl.
Posts: 2,456
Default

This is a perfect application for vacuum bagging, but yes, use a notched spreader on the cabosil and apply it to still-wet layer of 1708; mat may add some extra bulk too, although not much strength. When we installed the transom in SkipnCarla's 21, we were advised by a professional glass guy to drill some holes in the coosa to allow it to squeeze out and show that we weren't getting air pockets between the coosa and inner skin. Bolted 2x4's or clamps are definitely a good idea.
__________________
'72 SeaFari/150E-Tec/Hermco Bracket, owned since 1975.
http://i188.photobucket.com/albums/z...Part2019-1.jpg
Reply With Quote
  #6  
Old 01-22-2015, 08:34 AM
flyingfrizzle flyingfrizzle is offline
Senior Member
 
Join Date: Sep 2012
Location: Eastern NC
Posts: 1,653
Default

Quote:
Originally Posted by bibijawa View Post
I've cut out the new 1 1/2" coosa transom core. I keep grinding here and there to get it to lay as close to the outside skin as possible but when I look down the top I can still see from 1/8" to 1/4" gaps in some places and I can't get it any closer. Is this normal or is it supposed to lay completely flat. I'm thinking when I apply a thick layer of thickened epoxy and clamp it all down all voids will be filled. Any suggestions or opinions on how to continue? I'm sorry I haven't posted any pictures but I just can't figure out how.
One thing that I learned the hard way years ago doing a little skiff is make sure you get the back of the boat straight with an straight edge when bonding it all in. Take a two by four turned up on the short edge or something similar and clamp it across the back of the transom. This will help get any curve or bow out of it. With a transom mounted outboard it is not as big of a deal but if you do a bracket or wide swim platform you will go to mount it and have 1/2 gaps on the outside edges and realize there is a outwards bow in it. You cant see the curve until you lay something straight up against it. When the skin is left with the core out it will not stay truly straight so make sure you pull it back true and straight. If you get a straight edge on it and pull it flat you should not have any gaps when you lay the core in it for fit, the gaps you have now may be from this. Also drilling holes will help get the air out but no always necessary if you put the core in place you will have to place the bottom in first and slowly roll it toward the transom skin from the bottom up pushing all the air out the top as you roll it to the skin. If you use epoxy the extra layers of glass is not necessary and will help trap air unless wetted out first. When you thicken it to trowel resin on it will be so thick it will not absorb in to 1708 well. If using ve or poly at a thinner viscosity you may need to add csm matt between it to hold the resin in place while you set the core. If you skin is thin you may need the 1708 to build up bulk and thickness but I would lay it in first wet it out with thinner resin, roll the air out of it then spread the thicker resin on top of it then lay the core in that way you know the cloth gets fully wetted out and all the air is out of it.


__________________
Current SeaCraft projects:
68 27' SeaCraft Race boat
71 20' SeaCraft CC sf
73 23' SeaCraft CC sf
74 20' SeaCraft Sceptre
74 20' SeaCraft CC sf
Reply With Quote
  #7  
Old 01-22-2015, 09:48 AM
bigeasy1 bigeasy1 is offline
Senior Member
 
Join Date: Jul 2006
Location: western massachusetts
Posts: 1,048
Default

Quote:
Originally Posted by Bushwacker View Post
Drill some holes in coosa to allow cabosil to ooze out; use bolts/screws through existing transom skin to pull coosa up against inside skin. I'd install a layer or two of 1708 against inside skin, wrapped around 6-12" into hull sides and bottom and then try to install the cabosil/coosa while the 1708 is still tacky to get a good chemical bond. Get a couple guys to help with mixing resin and laying glass; refrigerate resin to maximize working time. And I'd use epoxy resin or at least vinyl ester resin for maximum bond strength.
That's how I did the transom on my Tsunami,although I used marine plywood.We laid up two layers of 1708 on the inside face of the outer transom skin with vinylester(no wax),and then troweled on a layer of thickened resin to a putty (thickened with milled fiber & cabosil) on to both the transom face,and plywood.
We pulled it all together with bolts,and clamps.

I did this in late Feburary cold winter day,but it turned out to be a benefit,as the cold prevented the resin and putty from kickin too fast,giving us ample time to get it all in place..
I then turned up the heat,and got it warm for several hours.I tried to use bolts in areas wher I was going to cut out the plywood like the hole for the outdrive,and the holes wher the lifting transom eyes were,so that Id have less holes to fill later on.
After the transom was in, I applied more layers of 1708 on the face of it overlapping it several inches in to the hull.

I only used Epoxy to glue the two layers of 3/4" plywood together.Everything else was done with vinylester and polyester resins.

I think I put a bit too much putty on it,but its been six years now,and (knock on wood)its still solid as a rock.

Good luck with your project


__________________
All this,just for a boat ride
Reply With Quote
  #8  
Old 01-22-2015, 11:15 AM
bibijawa bibijawa is offline
Recovered
 
Join Date: Jun 2014
Posts: 80
Default

Looks like I'm going to attach the transom and fillet it this friday and then remove the clamps and glass it in on sunday.
Reply With Quote
  #9  
Old 01-22-2015, 09:38 PM
Jeff79Sceptre Jeff79Sceptre is offline
Senior Member
 
Join Date: Jun 2013
Posts: 203
Default

I'm doing the same thing. Do I need cloth first or can I just use thickened epoxy to glue the new core in? I can add 2 layers of 1708 wetted out then thickened epoxy then the core but this seems redundant. I plan on covering the coosa when done with 1708 and 1208. My original skin is 3/8 of an inch thick. Is there a proper layup or is there more than one way to skin a cat?
Reply With Quote
  #10  
Old 01-23-2015, 04:11 PM
bigeasy1 bigeasy1 is offline
Senior Member
 
Join Date: Jul 2006
Location: western massachusetts
Posts: 1,048
Default

Quote:
Originally Posted by Jeff79Sceptre View Post
I'm doing the same thing. Do I need cloth first or can I just use thickened epoxy to glue the new core in? I can add 2 layers of 1708 wetted out then thickened epoxy then the core but this seems redundant. I plan on covering the coosa when done with 1708 and 1208. My original skin is 3/8 of an inch thick. Is there a proper layup or is there more than one way to skin a cat?
Wow, my original skin wasn't even close to 3/8" thick(more like 1/8")I think you'd be ok with just using the thickened epoxy. The only reason I used a couple layers of 1708 was because the outer skin seemed to be quite thin,so I wanted to beef it up a bit.
If its an out drive powered boat,the transom can only be a max of (i think) 2-1/8" thick.After I finished mine with the two layers of 3/4 plywood,- the putty,-and the new glass skins- on the inner and outer transom skins,I was at 2-1/16" thick
I went too heavy on the putty as you can see on the picture of the core

Its the first wide grayish band that you can see on the picture of the large core sample. on the right side.
It didn't hurt anything structurally,although it added extra weight.

__________________
All this,just for a boat ride
Reply With Quote
Reply


Posting Rules
You may not post new threads
You may not post replies
You may not post attachments
You may not edit your posts

BB code is On
Smilies are On
[IMG] code is On
HTML code is Off

Forum Jump


All times are GMT -4. The time now is 08:46 AM.


Powered by vBulletin® Version 3.8.7
Copyright ©2000 - 2025, vBulletin Solutions, Inc.
All original content © 2003-2013 ClassicSeacraft