
|
|
#21
 09-13-2012, 10:54 AM
|
|||
|
|||
|
page 4 of my 23' rebuild thread show in detail how to do this (coal tar)...
http://www.classicseacraft.com/commu...t=shine&page=4  then later page 6 in the thread I show etching, priming an aluminum bracket. Below is copied from my webiste.... Starting to prep the bracket for paint. I will make a separate post on the details of priming aluminum, but there are the basics so far. Acid wash, treat with alodine, prime with epoxy chromate primer, prime with epoxy high build, fair with epoxy fairing, primer some more, then paint with sterling top coat. Its a lot more work than just a powder coat job, but its should last a lot longer too - plus I wanted to paint it with the same paint/color as the boat. This was sort of fun, I have not used the chromate primer before. Pretty straight forward, but the etching,treating,chromate has to be done in one session. After the acid wash, while still wet, the treatment goes on, then the aluminum it dried and immediately primed to seal it up. I was able to get three thin coats on each side of the bracket in one afternoon - the chromate primer dries fast! The Sterling application guide covers this in detail. This is the same procedure for paint aircraft. 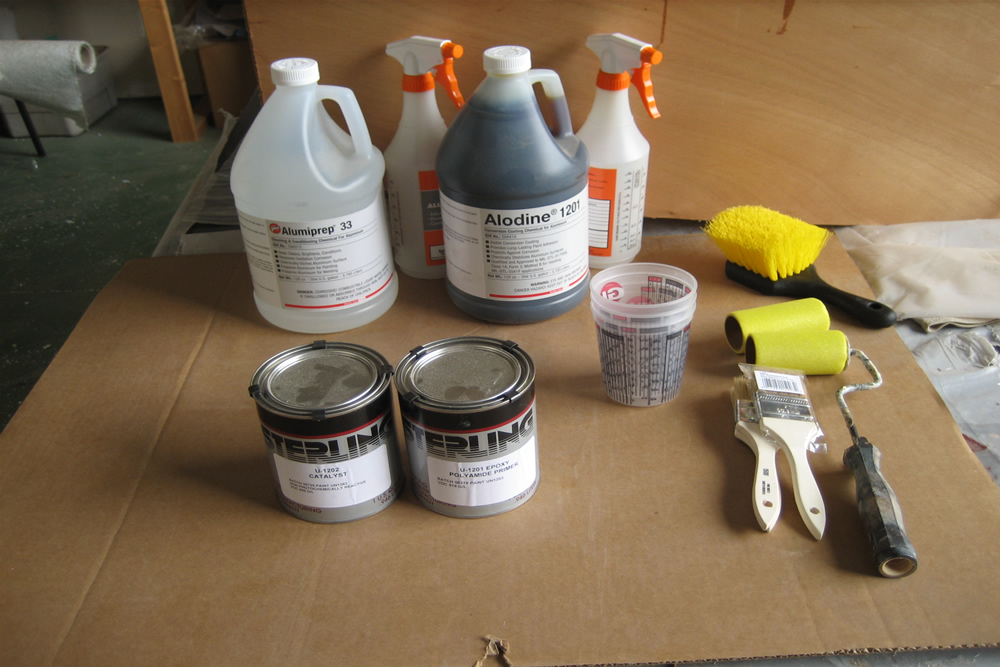 acid wash   alodine treatment being sprayed on, then we brushed it around  epoxy chromate primer. Immediately put a coat on both sides of bracket to seal off the air, then over the next 5 hours put 2 more coats on the top and bottom  bracket is faired and ready for final primer. After the chromate epoxy primer, Sterling recommends building up a good thickness of epoxy high build primer before any sanding/fairing, this makes sure the barrier coat of chromate stays in tact. So, I followed the instructions and rolled a few coats of Sterling highbuild primer on the whole bracket. After curing and a light sanding, I applied some Quick Fair to the welds and other places that were rough. After sanding QF, I put on another couple coats of sterling high build epoxy primer. The bracket is now ready for a final sand before paint. please excuse the image quality on this batch of pictures, i made a one digit error when resizing them  ops: ops:    After fairing, and more primer, then comes topcoat..... 
__________________
http://www.boatbuildercentral.com/ my rebuild thread: http://www.classicseacraft.com/commu...ad.php?t=22090 Last edited by shine; 09-13-2012 at 10:57 AM. Reason: forgot again 
|
 |
|
|


 Linear Mode

